Yes – we put our hidden subframe into the #43 coupe – because it makes the car stronger, SAFER, and it’s COMPLETELY HIDDEN!
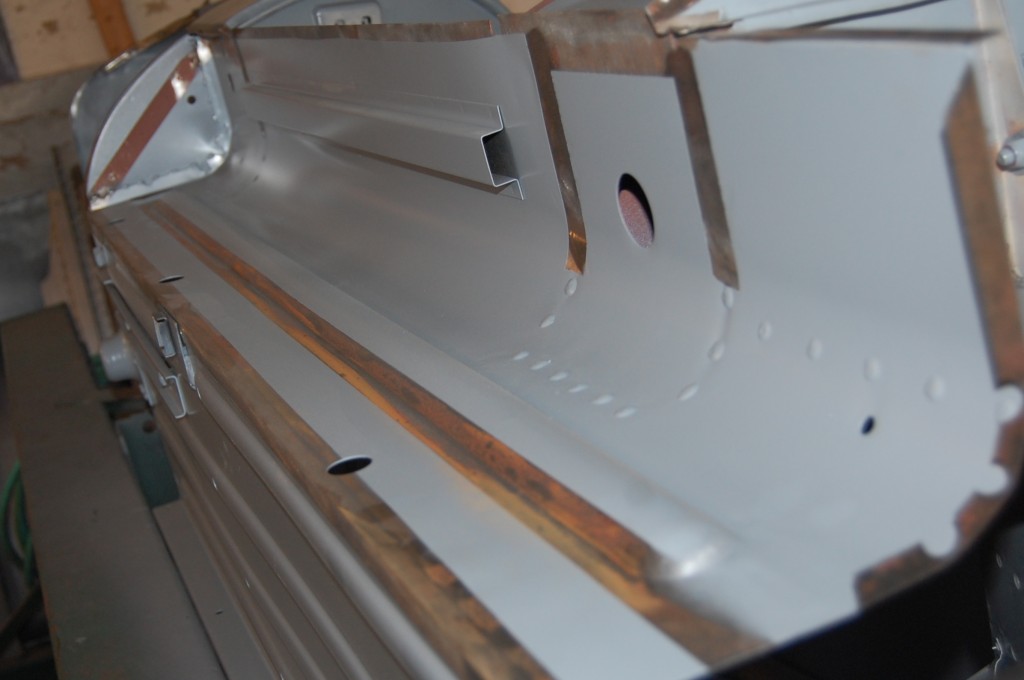
- This is what the shell looked like after our initial priming in 2-part PPG epoxy. It’s expensive, and it’s a PITA to mix up and spray, but let me tell you, once it’s on there, rust is OVER! What I want you to see in this particular phot is rust on the new steel where it was taped off fur the next phase of welding. This is due DIRECTLY to the type of tape used! Usually, we use the blue low-stick tape with the GREEN lettering. On this car, we ran out of tape, and finished off with some ultra-low-stick tape that was blue with ORANGE writing – and wherever we used it, the metal had light surface rust about 3 days later. Apparently, that different adhesive had something in it that acted as a catalyst to start this rust – in the dead of Winter no less. SO – ONLY use the blue tape with the GREEN lettering! We scuffed this all back off before moving on, of course…
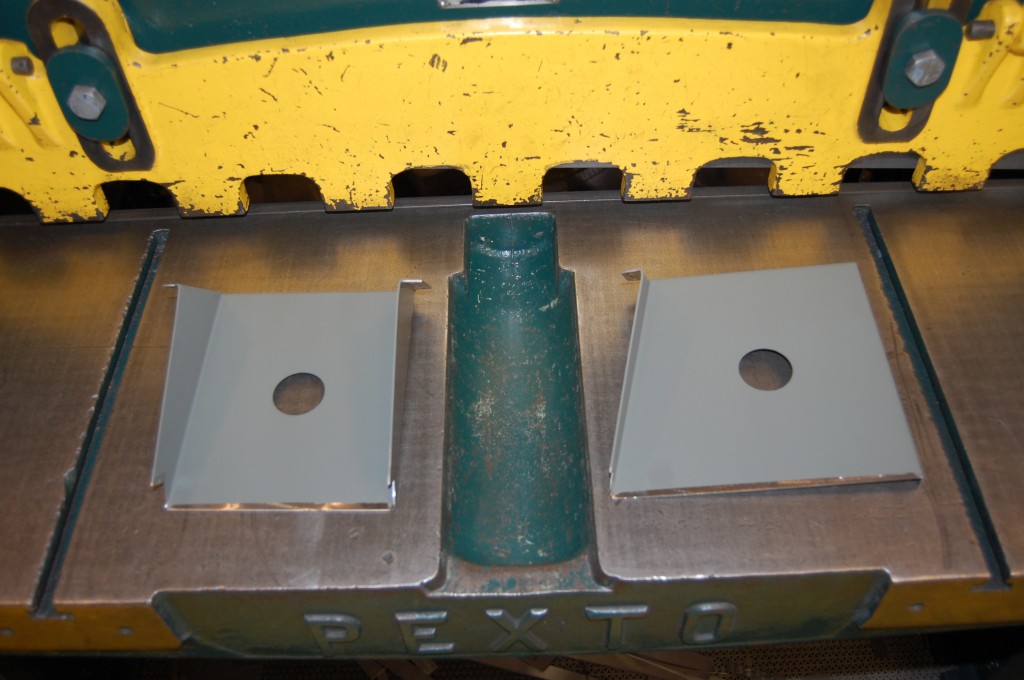
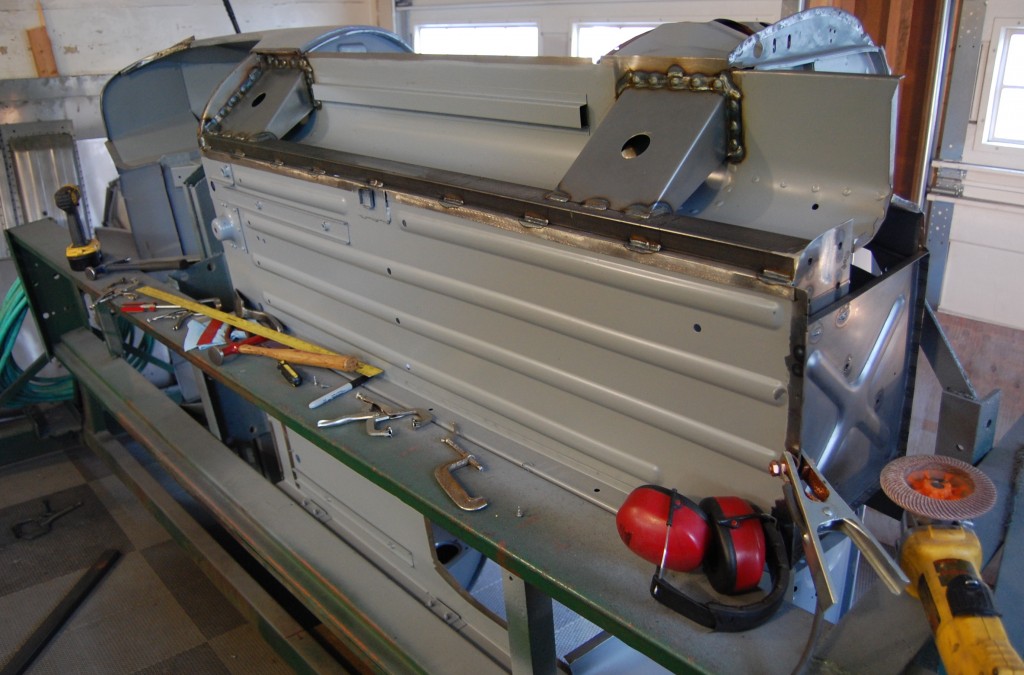
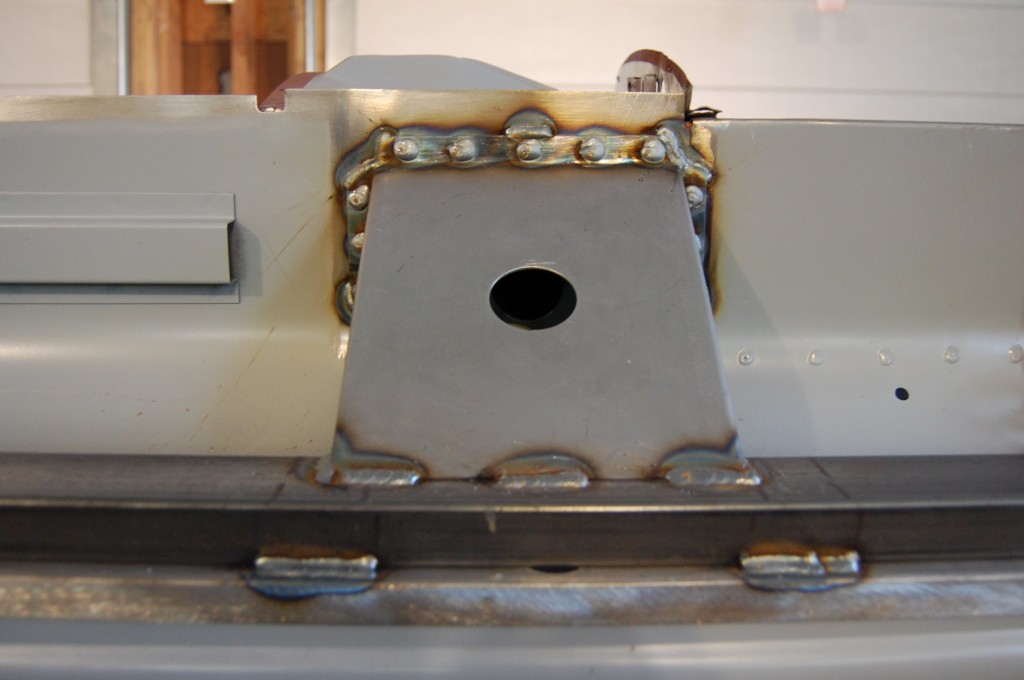
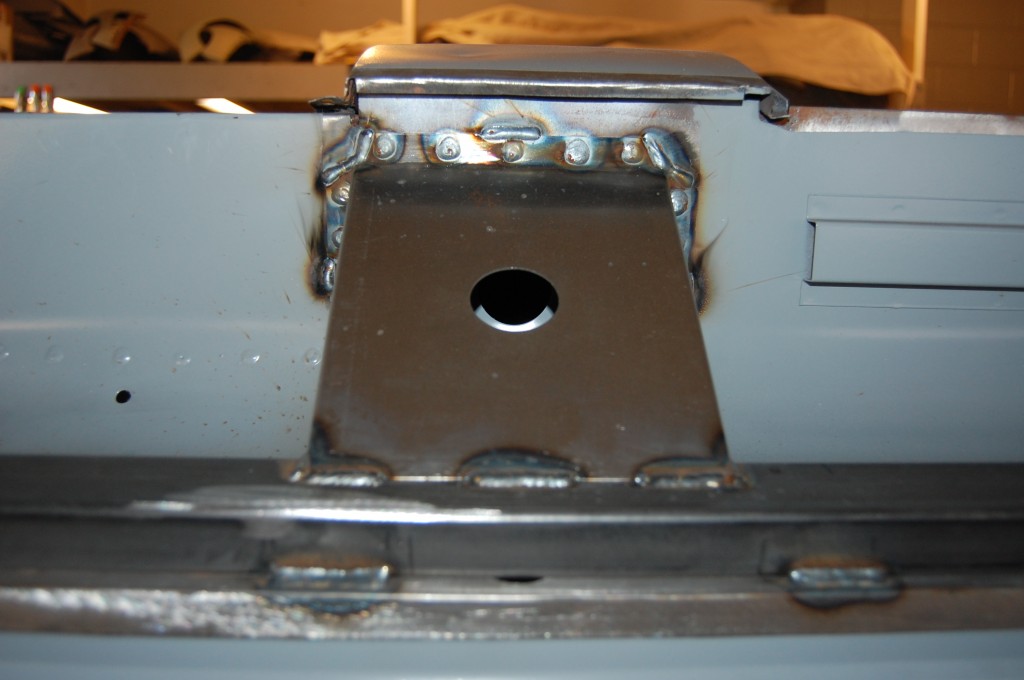
- These are the heavy 16-gauge sill gussets used with the subframe kit. You should make sure they are coated with a good primer before welding them in. If you think of it, you can hit them with epoxy while you have it out. If not, just hit them with a heavy coat of a good etch primer from a spray can as you go along…
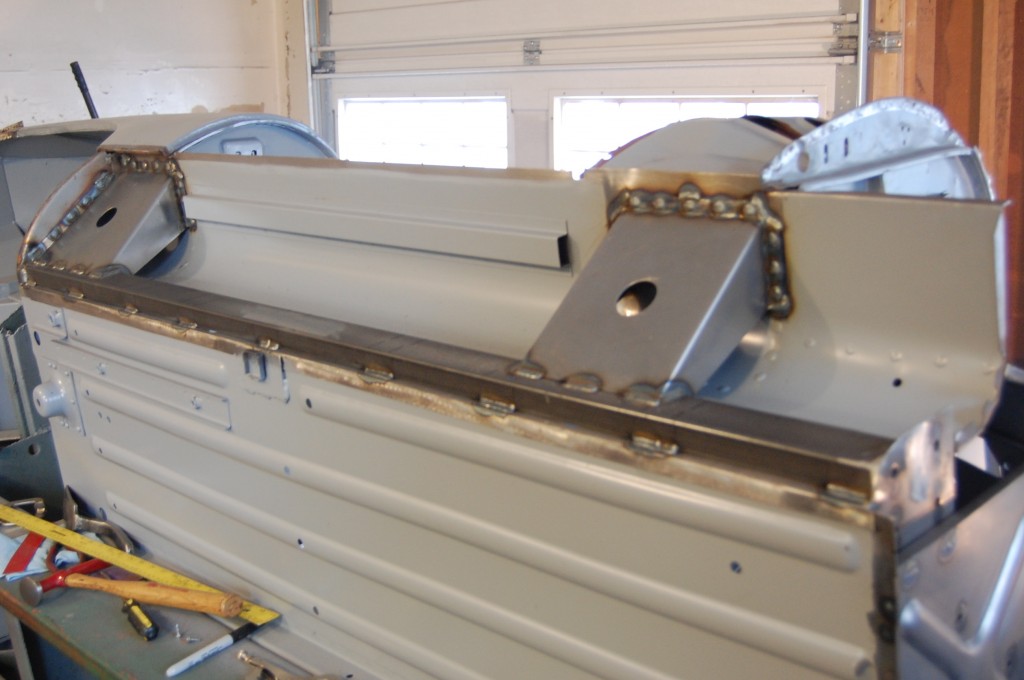
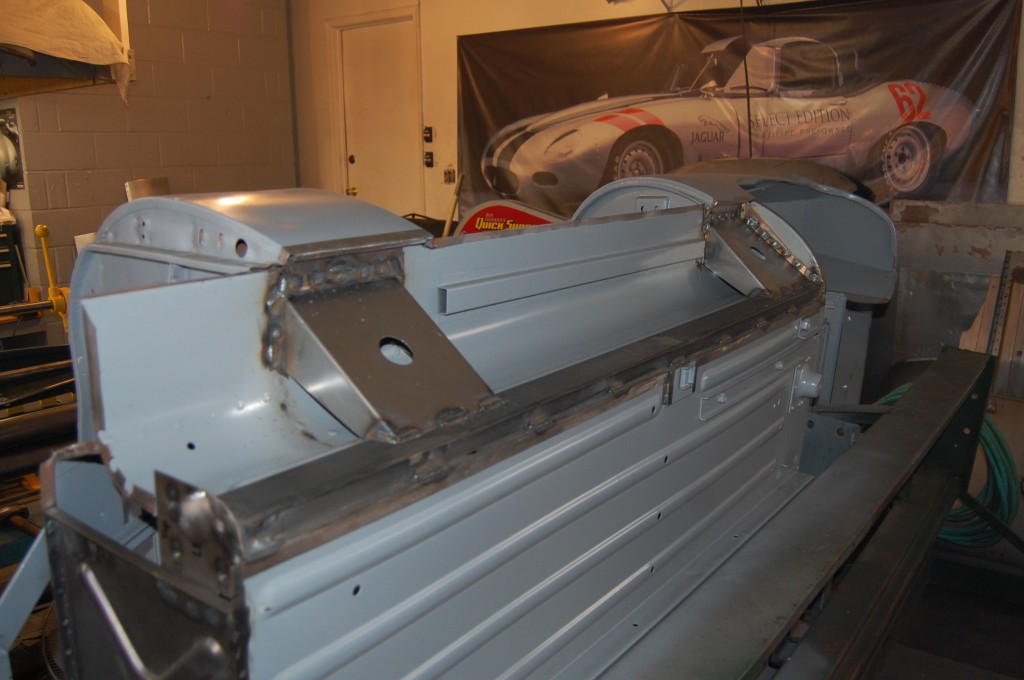
- In this shot, the RH sill tube is welded in, as are the heavy-duty 16-gauge gussets.
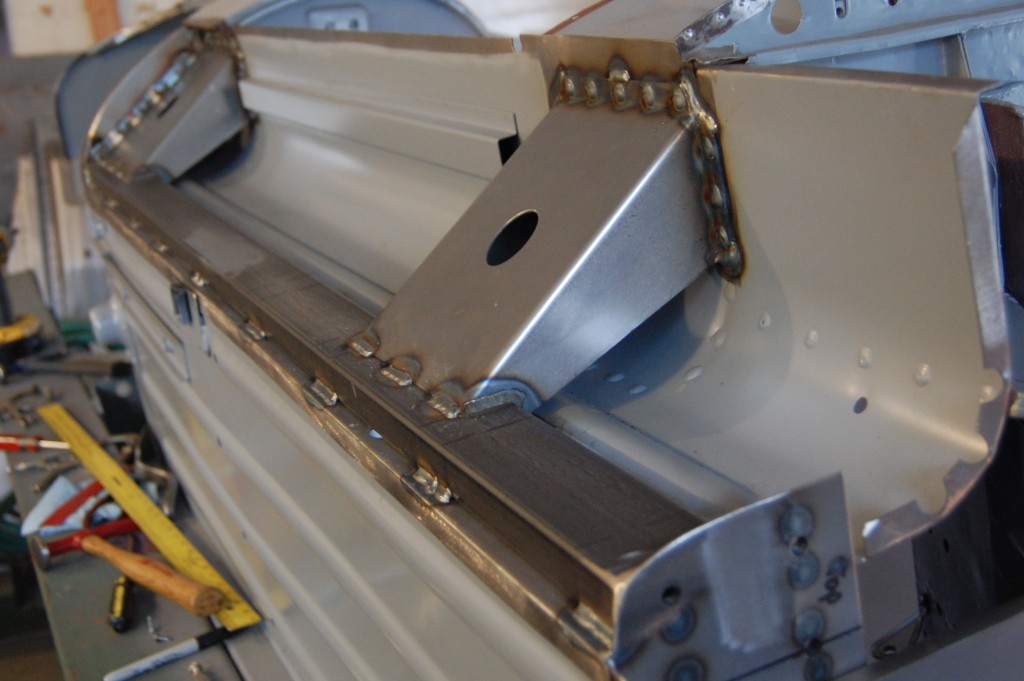
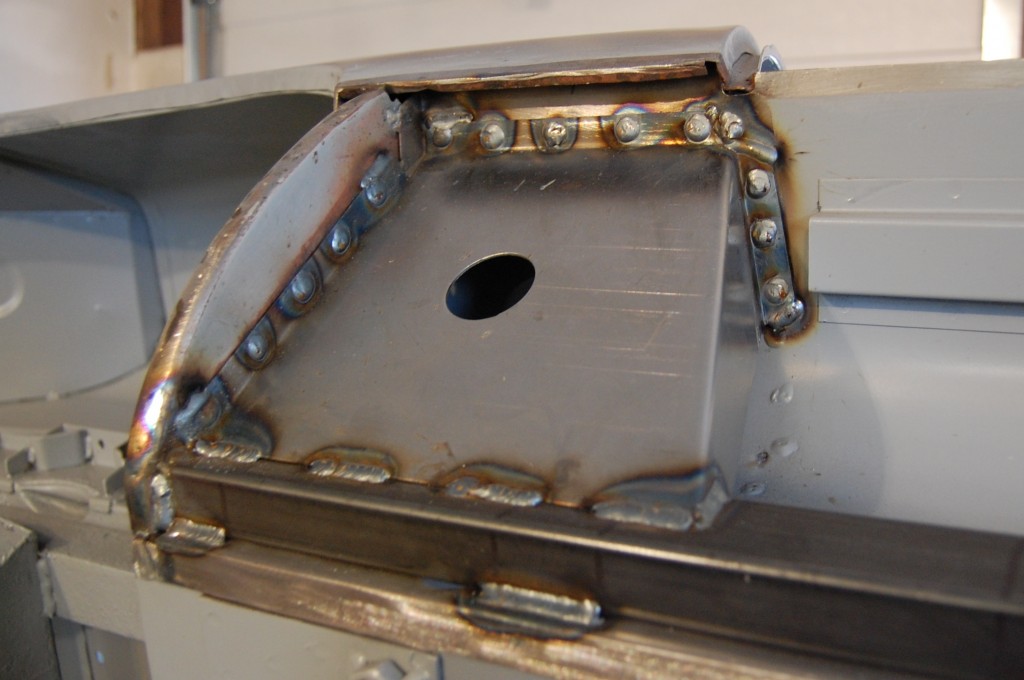
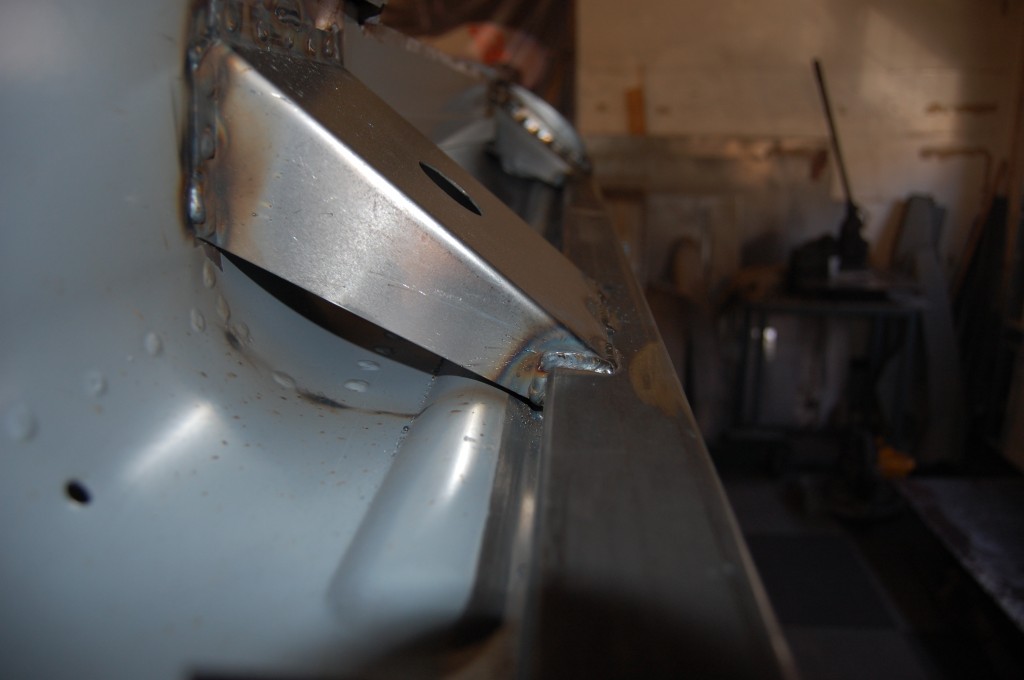
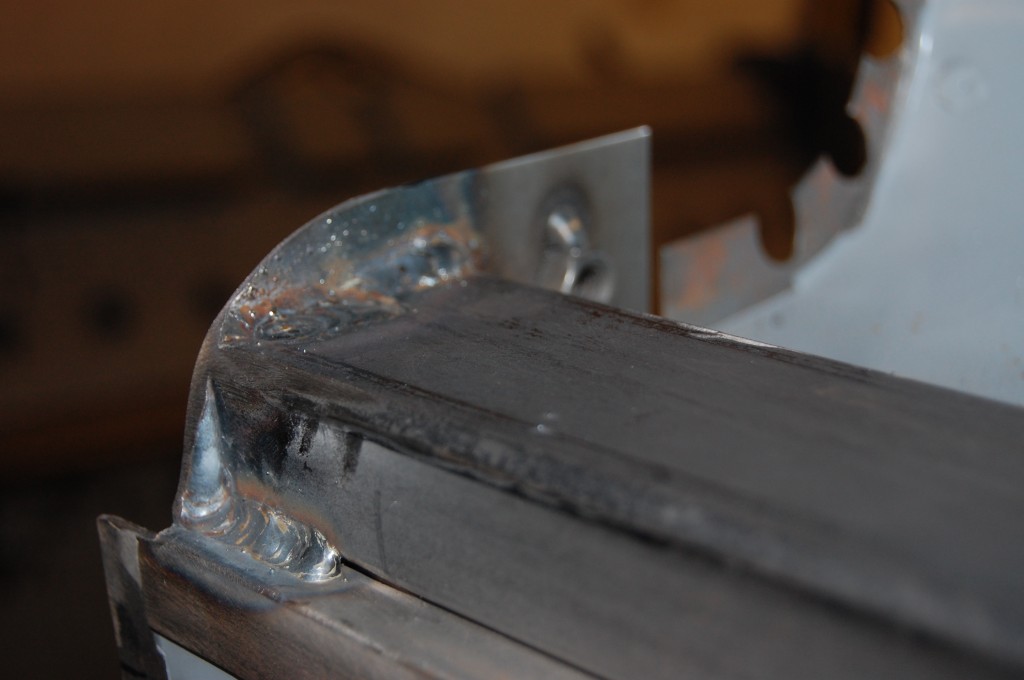
- This shot shows how the gussets are notched and fitted tightly into the tubing. The tubing is set up from the bottom of the sill approx. 5/16-3/8″ – don’t forget that, or you won’t be able to fit the outer sill on! Also note how the forward engine frame mounting plate has been rounded down on the lower corner – also to clear the sill.
- Our rotisserie often doubles as a bench – this actually works out really well!
- The gussets are 16-gauge, and the tubing is 10-gauge. All welding is done with a standard MIG – and it is CRANKED UP! Note the alignment of this gusset with the front face of the bulkhead – don’t just center it in this section, that is incorrect. Placing it here puts it directly under the bulkhead on the front and back edges.
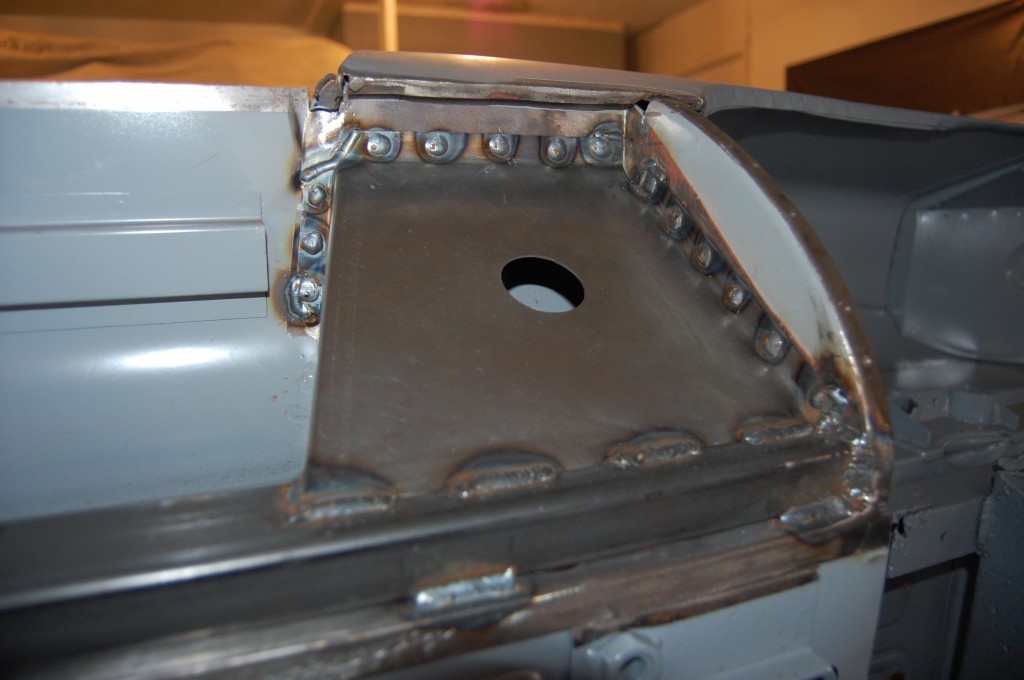
- The rear gusset is simply positioned right up against the rear closing panel. On this car, we were able to save this panel, which is VERY rare. Usuallu, you will be replacing this as well, and in that case, make sure it is fitted WITH the outer sill BEFORE this step!
- Over to the LH side, everything is the same, but mirrored…
- The forward gusset…
- …from the side. Note that the “notch” is fully welded to the tube – that is important for strength.
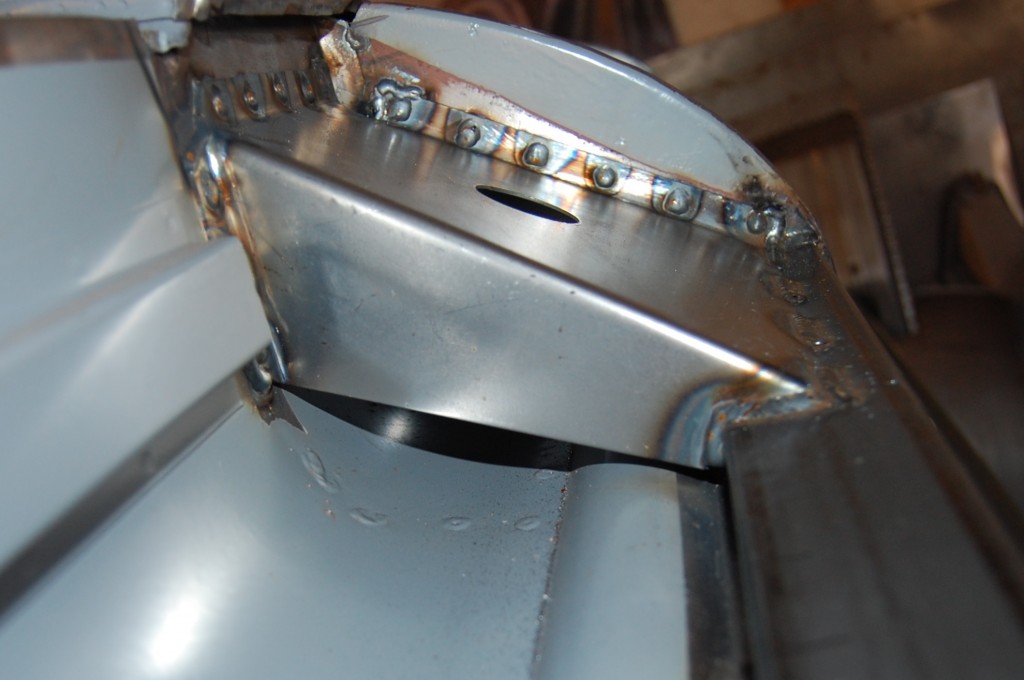
- The rear gusset…
- …also from the side. For some reason, these gussets are so clean and smooth that they kind of LOOK weak in these photos. Let me tell you, they’re not! You can pretzel the stock gussets with your bare hands – these are THICK – and don’t flex AT ALL!
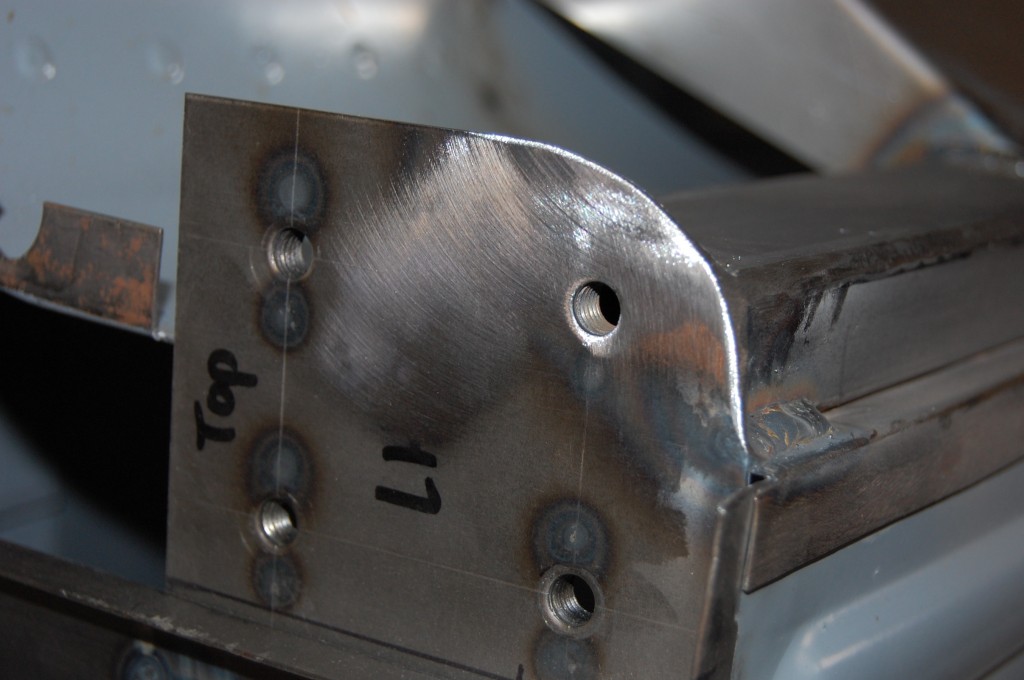
- This is the LH engine frame mounting plate. As you can see, it is solidly welded directly to the tubing. And don’t get bashful with the shaping of that lower corner – grind that baby right down to the corner of the tubing itself.
- Another shot of that plate from the front.
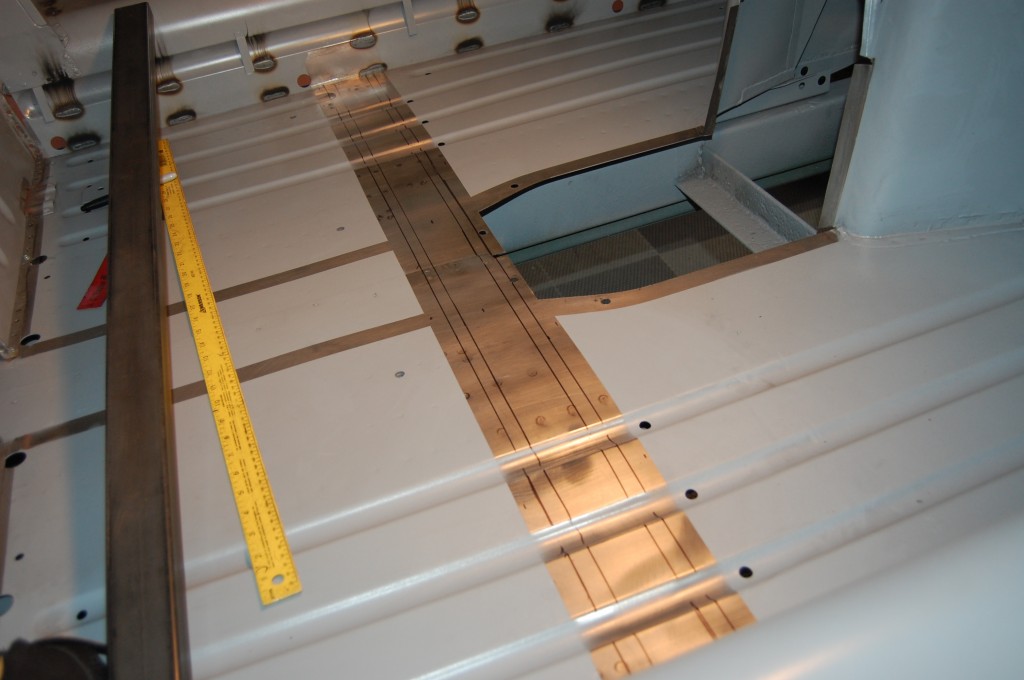
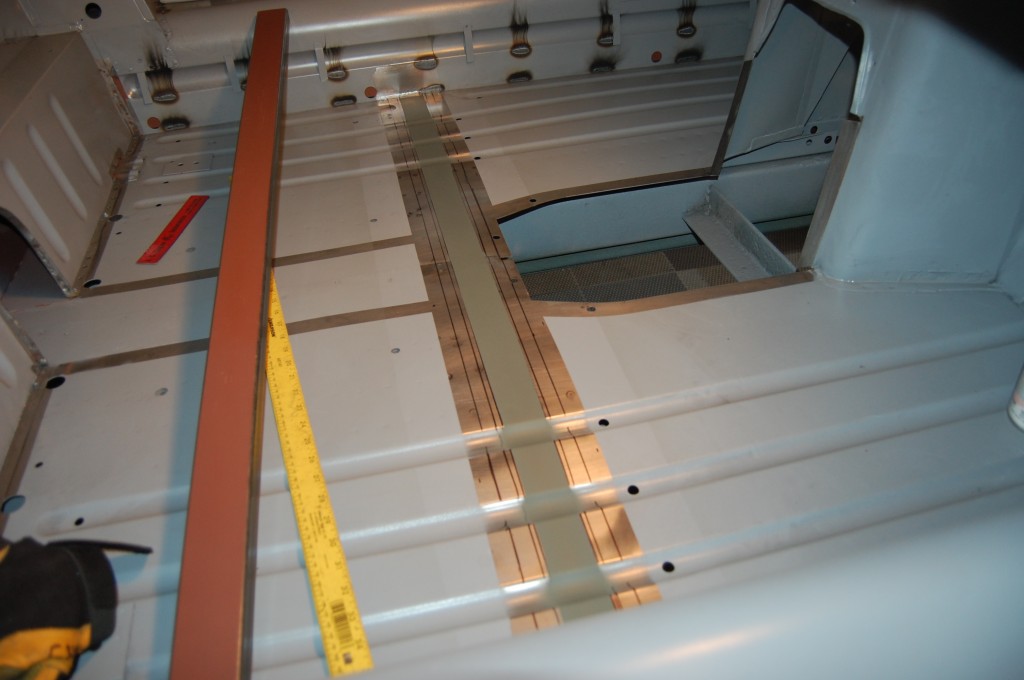
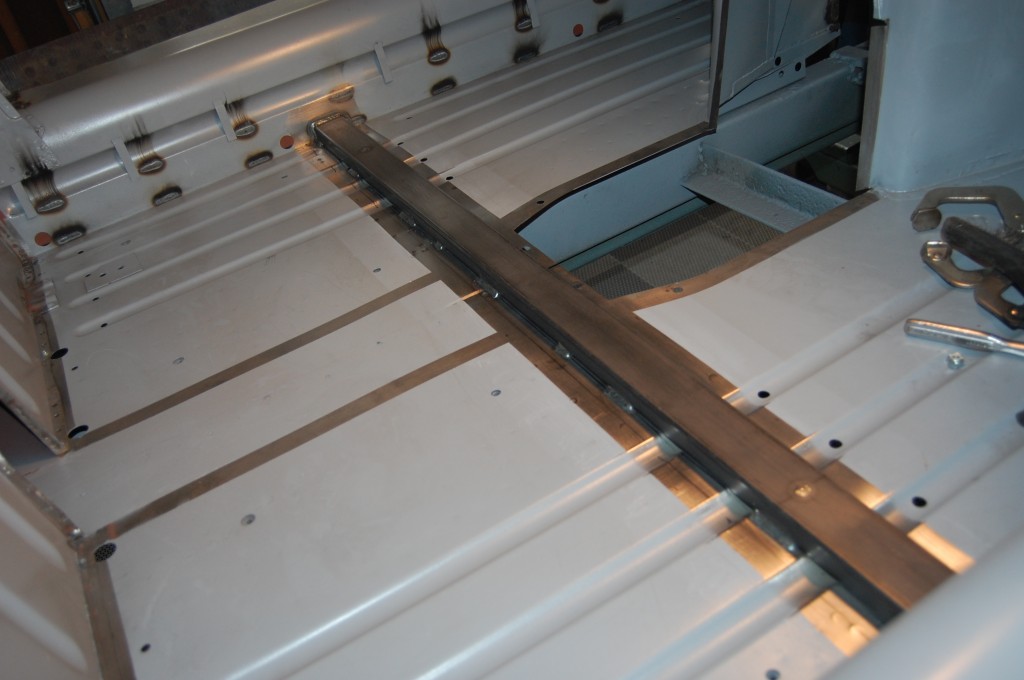
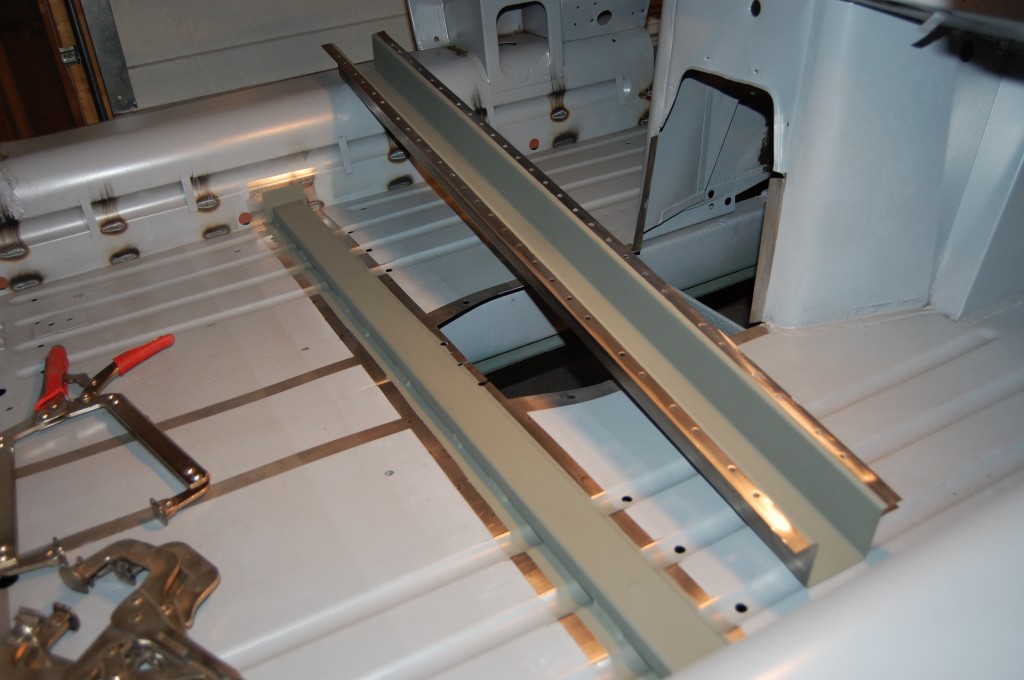
- After the sill tubing is in – and ONLY after it is in – you can start on the crossmember tubing. The reason for this is that the sill tubing will straighten out the inner sills a bit and everything will be where you want it. If you do this tube first, you might find that the sill tubes now don’t fit flush… Center this tube inside of the stock crossmember so that the welds of the tubing do not interfere with the crossmember fit. I should be charging you guys for these tips – ALL of which I learned the HARD WAY!!!
- Don’t forget to prime everything you can! Some of it will burn off, but every little bit helps! BIUT – make sure you give yourself a nice clean weld area – don’t get sloppy with the primer – it will contaminate your weld and that’s not good…
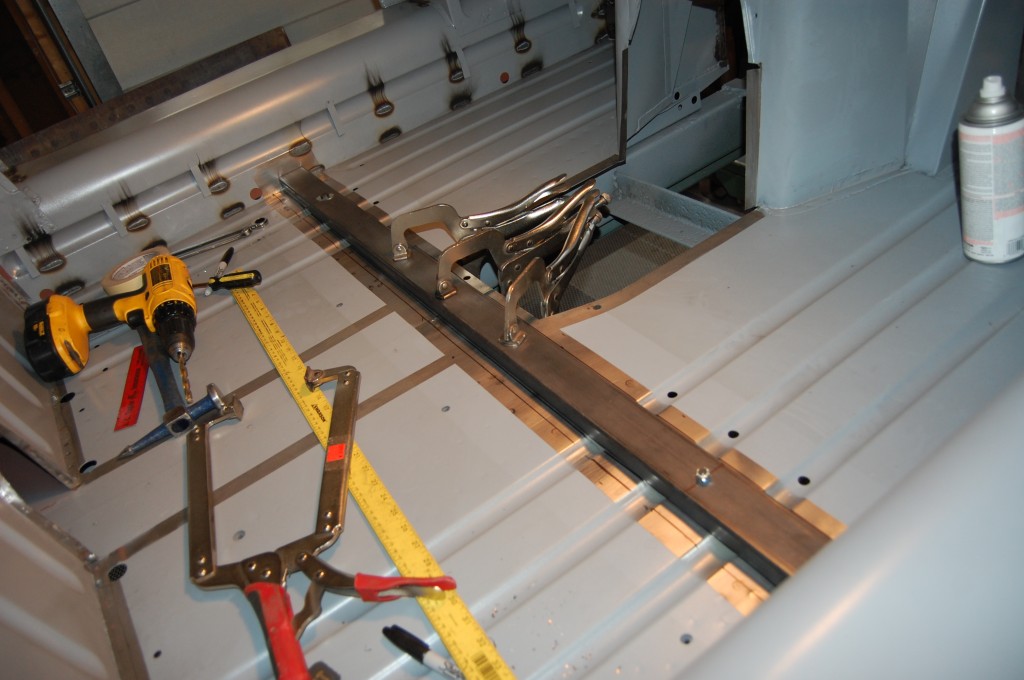
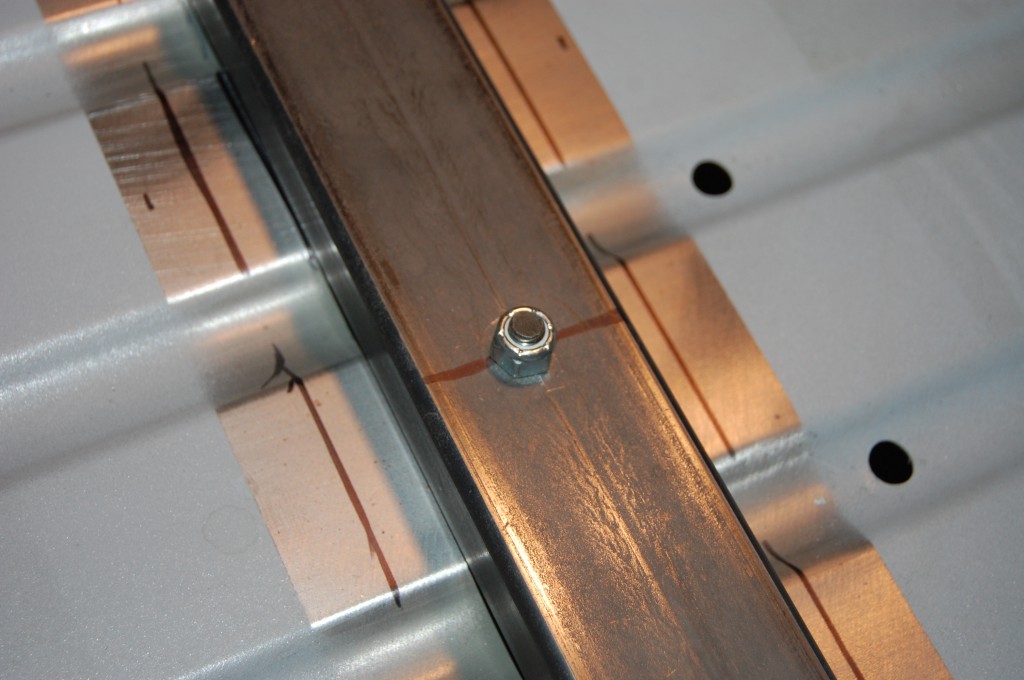
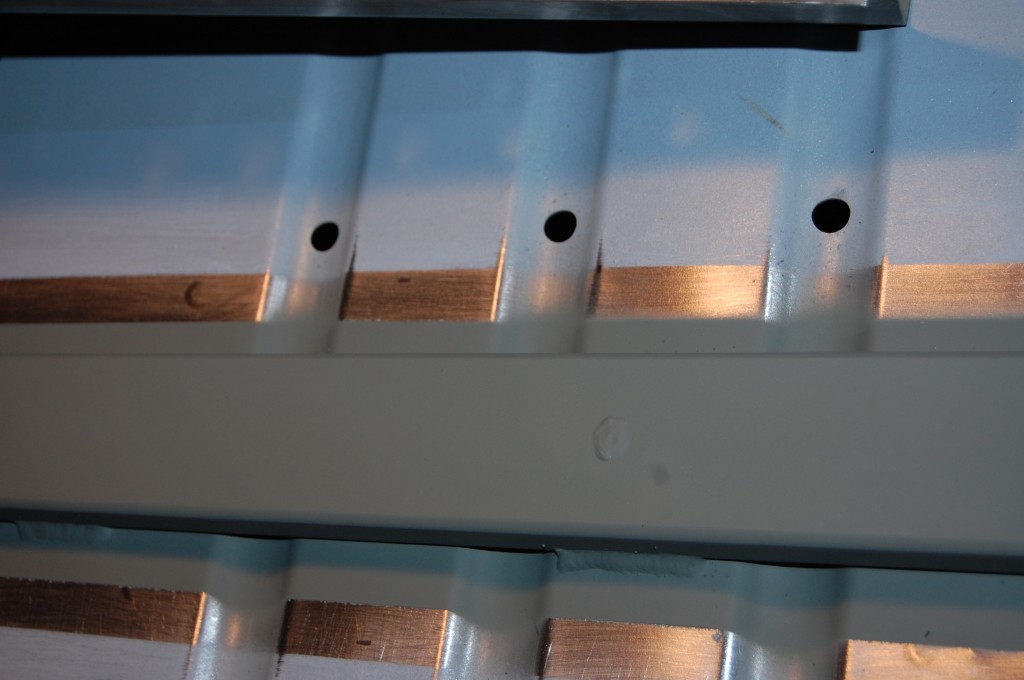
- OK Guys, here is another BIG tip: Note the two bolts that go through this tube toward the outer ends. You will find that the tubing does not fit flush against the floor, and you REALLY want it to… In this case, the tubing will actually help you straighten out the floors. I find that the two ends almost always touch flush, and then once you clamp the center as shown, the floor will droop down in the middle of each side. A simple bolt will do the trick, and it’s a small price to pay for straightening things out and giving a nice flush mating surface for the welds.
- A 5/16″ bolt works nicely, and does not leave too big of a hole…
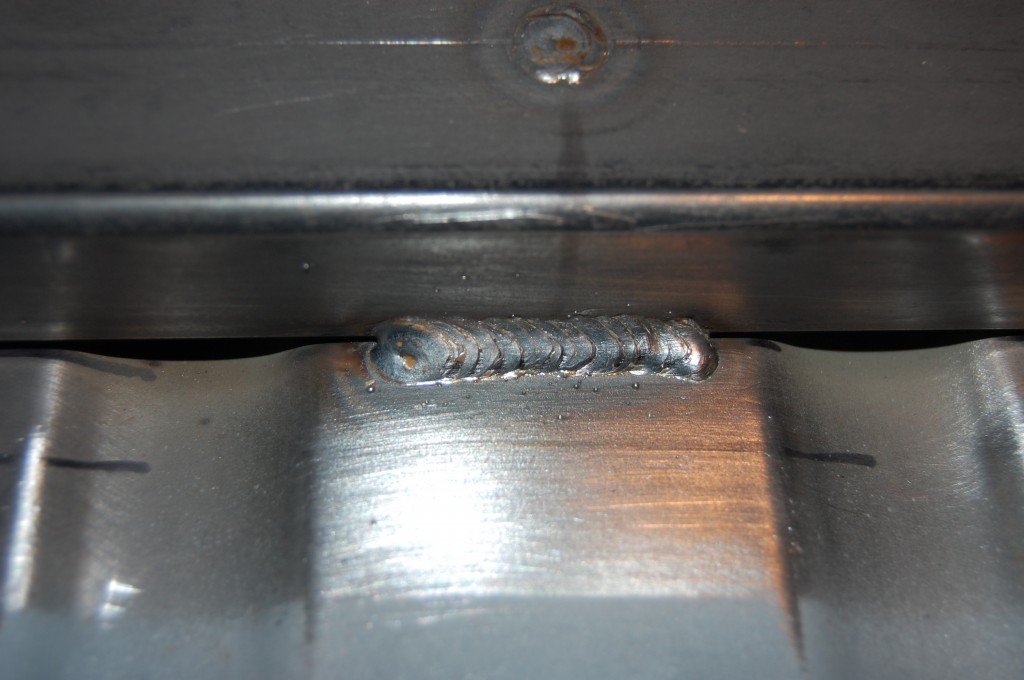
- Now the crossmember tube is welded into place. You can see that we place one good strong bead along each flat section of the floor.
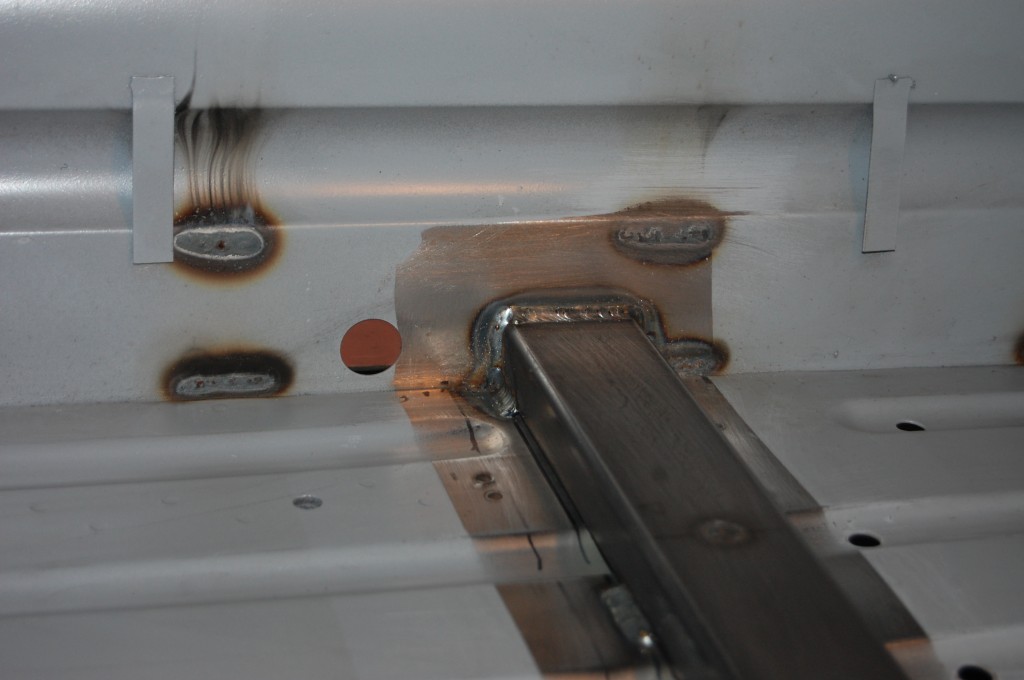
- Here is a close up that shows those beads, and also shows the bolt hole welded back up.
- On the oter ends, weld the tubing directly to the inner sill. In this shot, you can just see a portion of the sill tubing peeking through that drain hole since the backside of it was coated with red oxide before installation. Also note that the welding in of the sill tube has burned through some of the primer – just an example of why it’s nice to get ALOT done before your first big priming – otherwise, you will have to go back and scuff down places like this. It’s really a small price to pay though for getting the shell primed…
- Finally, we close in and “hide” the heavy-duty tubing with the factory crossmember. Honestly, once the tubing is in here, the factory piece really just acts as a cosmetic cover, giving the floors the proper shape for the factory carpeting… But we make the factory crossmember from 18-gauge instead of the factory 20, and so NOW, getting hit broadside is going to be ALOT different than in a stock E-Type!
- And of course, once again, the welds are brushed down, wiped down with solvent, and everything is well coated with primer – 2 coats of etch in this case – which is fine. Don’t get wrapped up in a SUPER fanatical rust-proofing campaign – decent modern primers are going to be WAY better than NO primer in the original cars! The steel in this photo – and in this entire shell – is going to outlast EVERYONE reading this!

