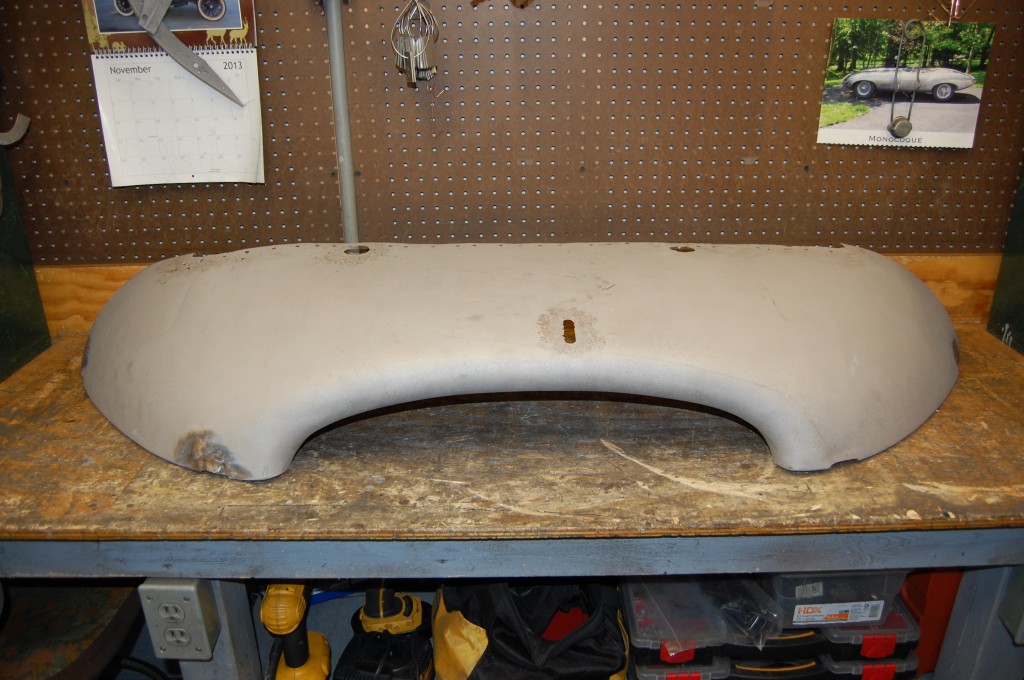
Fall was the season of bonnets around here – we cranked out FOUR complete bonnet restorations in October and November among the other work going on – that’s alot of bonnets in a short time!
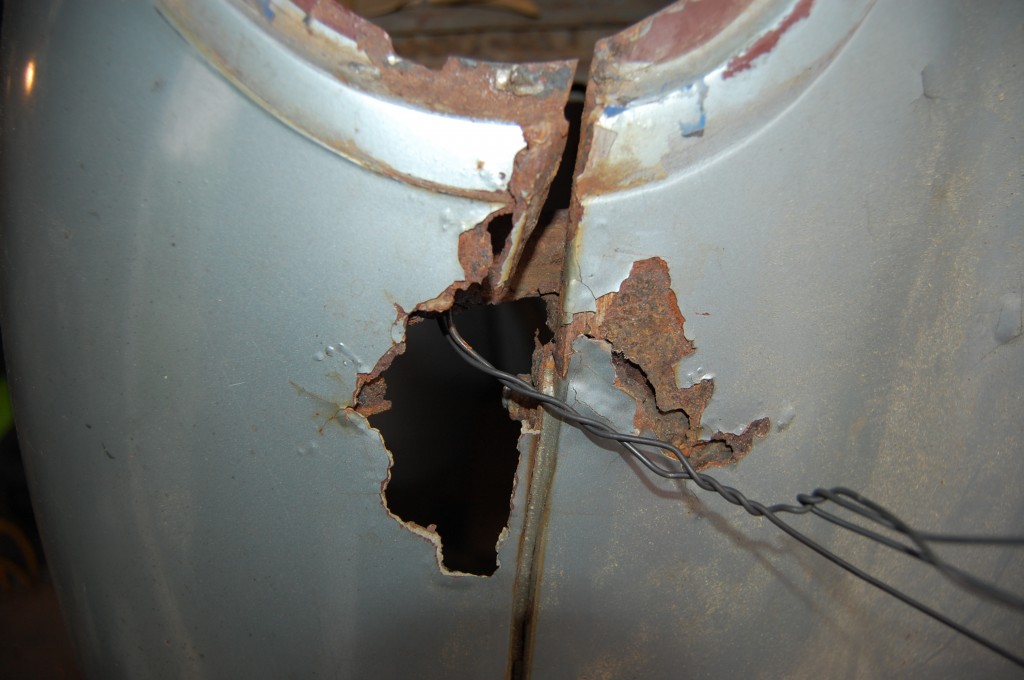
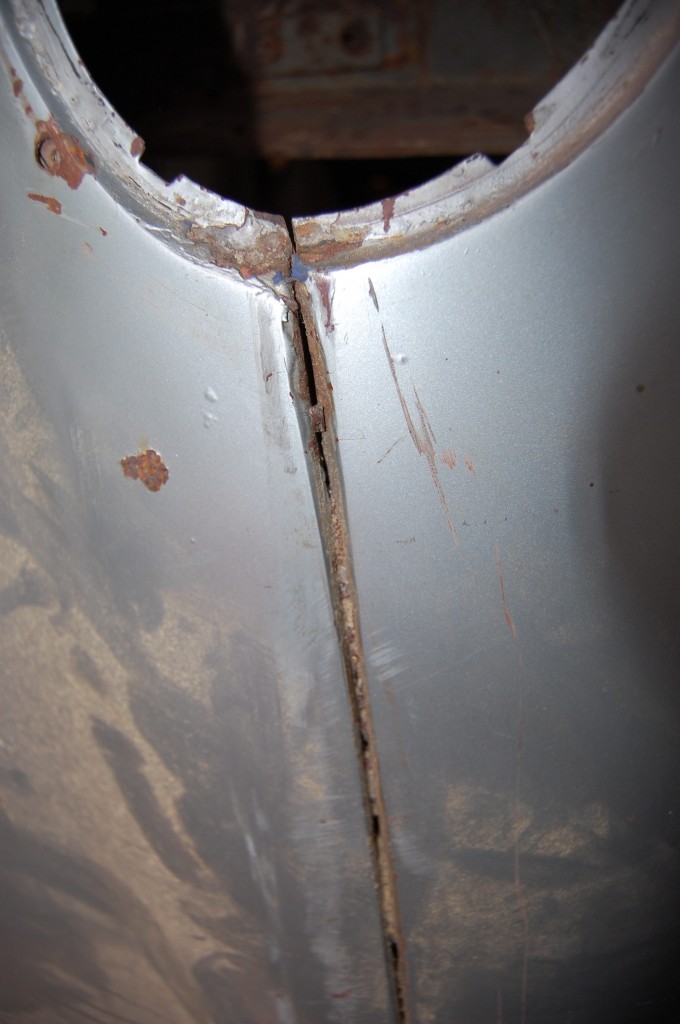
This particular bonnet was a new challenge for me – and I didn’t think that was possible! More than half of the bonnets that we restore have some type of rust issue in the long side flanges that attach the wings to the center section. It is a common rust trap where sand, salt, and mud gets crammed up in this open seam when flung up from the front wheels.
On most bonnets, we do some patching of the turned-down flange itself, or a small patch here or there in the actual surface of the center section right up against this seam.
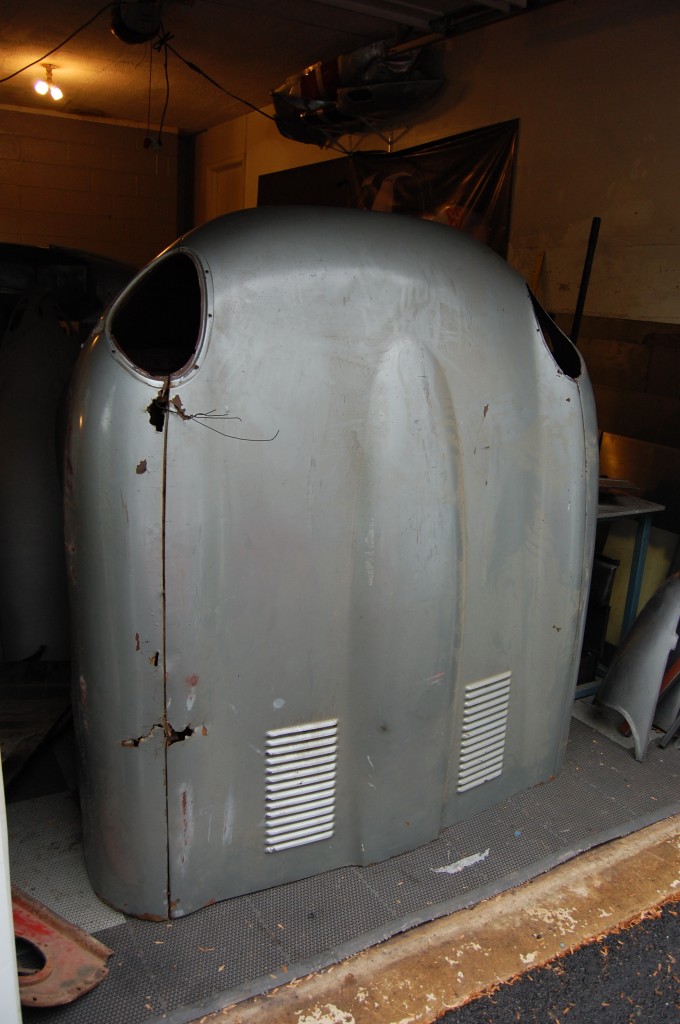
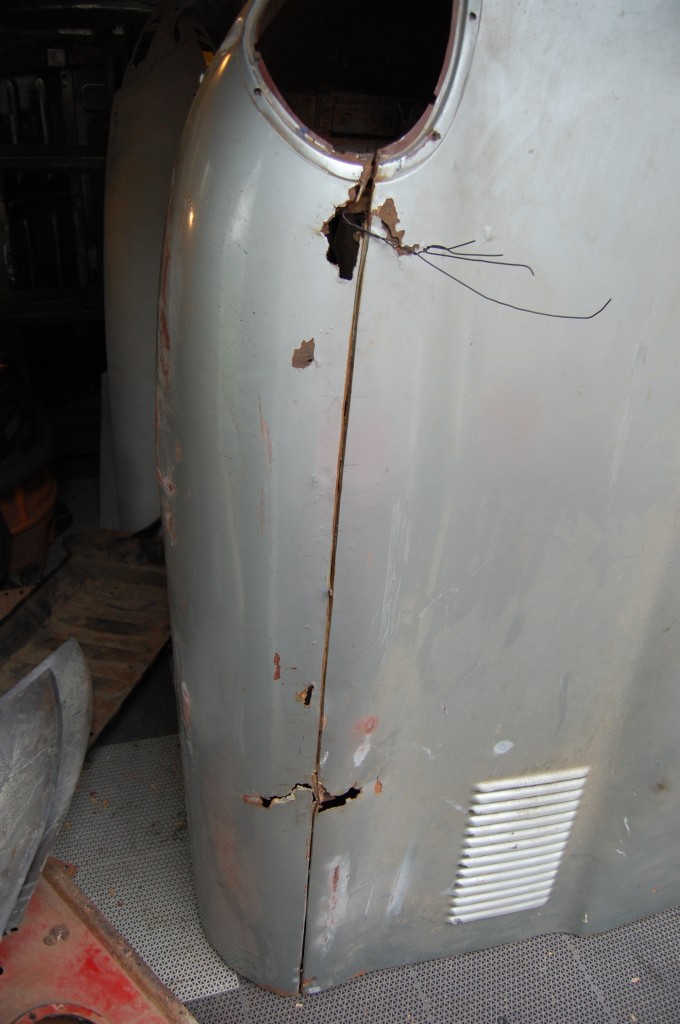
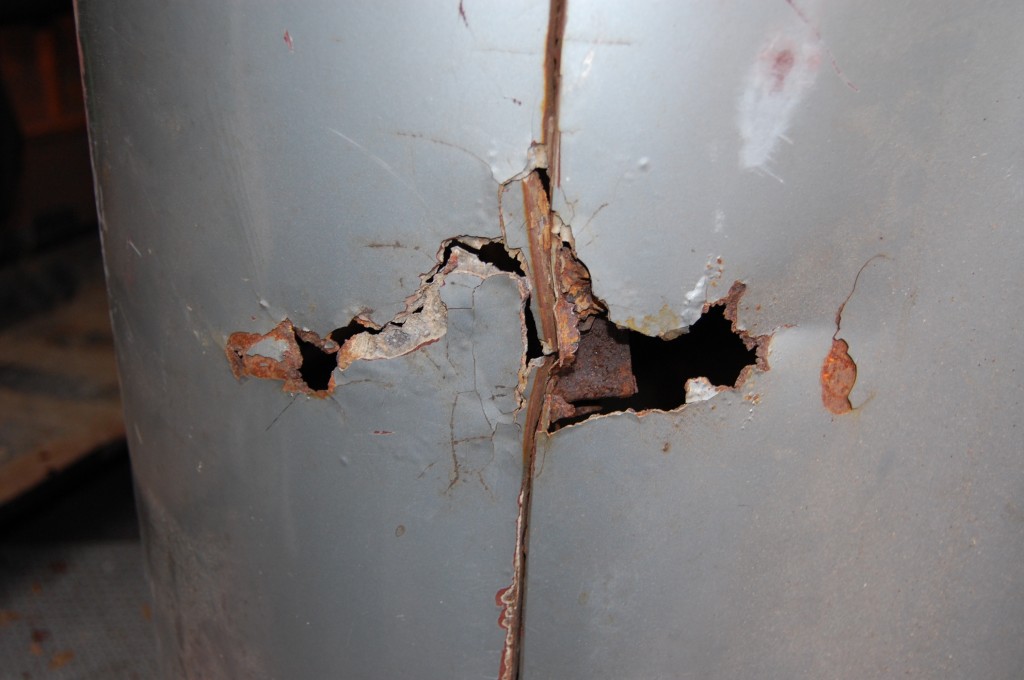
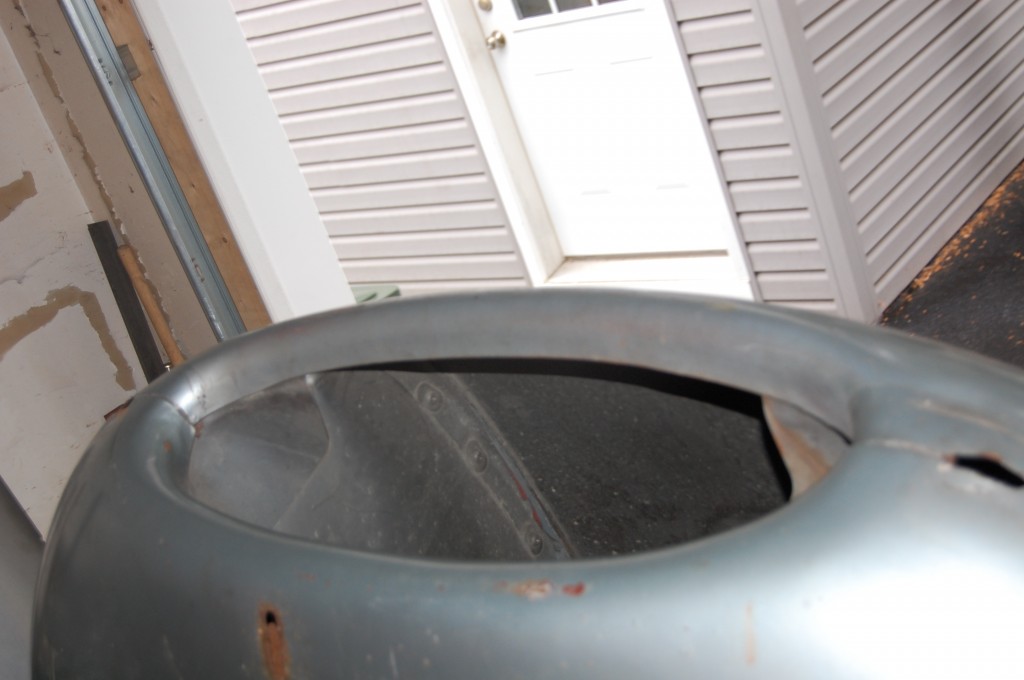
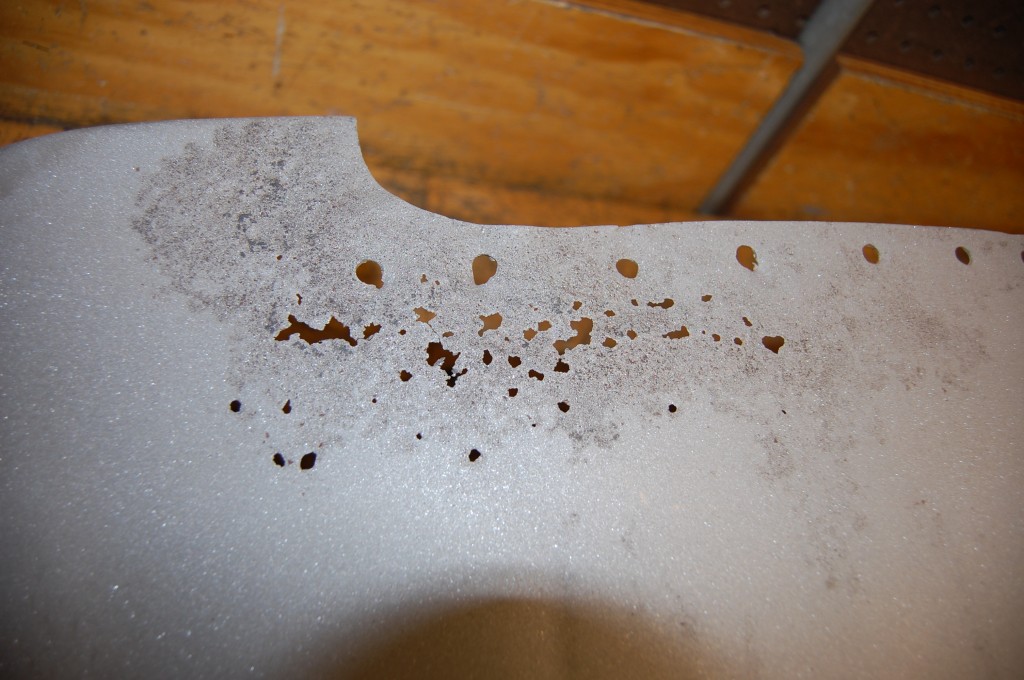
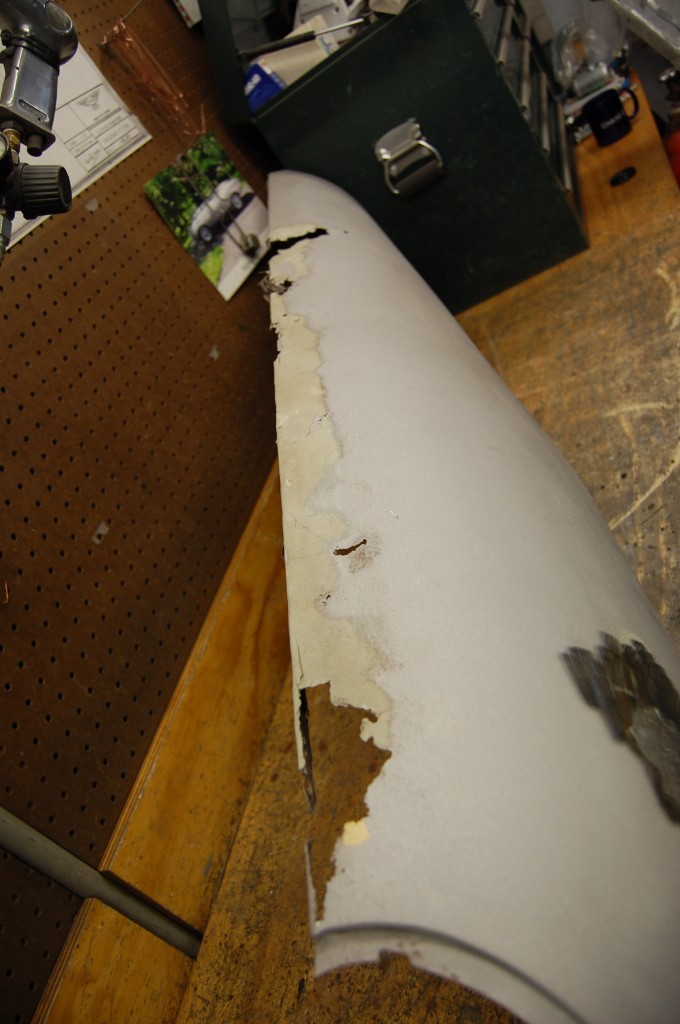
This particular bonnet was a very interesting piece. It was all original – an absolute virgin – without so much as ONE SINGLE DENT! But there was rust in the side seams, and it was BAD!!! To be honest, bonnets that have been this rusty on the side seams in the past have gone straight into the pile in our off-site storage facility. But this one was SO STRAIGHT otherwise – the mouth was PERFECT!
So I took the plunge and decided to tackle this extensive side flange rust. How bad could it be, right? Well, I found out…
- This customer came up from Florida this past Spring on their way to a Summer home on a lake in Wisconsin. Like many before them have done, they actually brought TWO bonnets, and asked us to make the best bonnet we could from everything they had – after which point we would purchase the leftover pieces.
- This was one bonnet – picked up by the customer along the way. The other was “restored by a body shop” – but a mess, of course. FULL of filler, the bonded flanges were welded to the center section skin (kiss of death…), and and aftermarket wing and lower valance were poorly installed. But THIS bonnet – hmmmm….
- At first glance, it is almost a write-off…
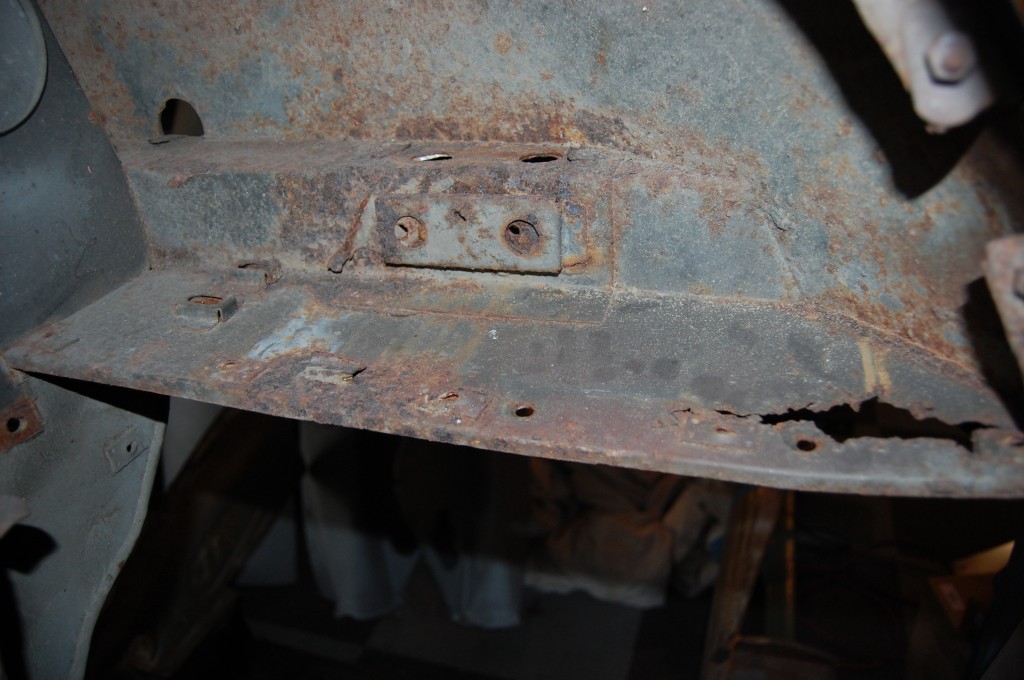
- This is HEAVY cancerour rust in the wheel-well – where gunk has accumulated all around the bonded flanges of the headlamp diaphragm…
- …as well as the top sections of the rear mudshield…
- …and the lower valance support – it will definitely need one of our new pieces (but they all do…)
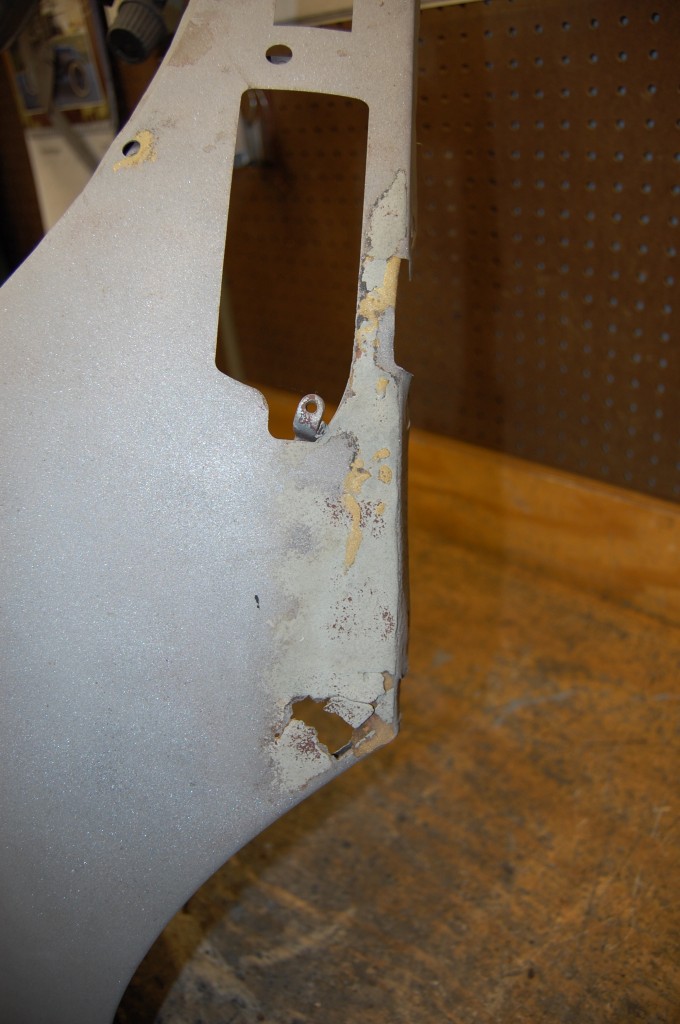
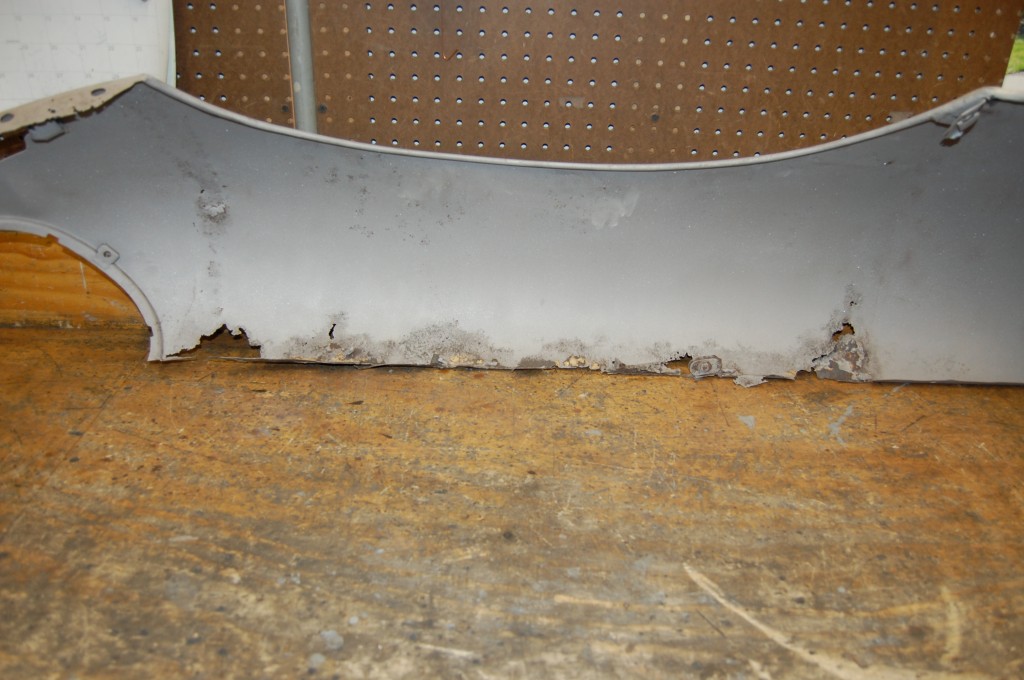
- That LH center-to-wing side flange is just GONE – on both pieces!
- And while the RH looked better – it wasn’t – it had all been crammed full of lead and filler in the past.
- But I just could not get away from this – it makes me think of Santa in the claymation Rudolph Christmas show – “That NOSE, That BEAUTIFUL NOSE!!!” And so I decided that while this would be the same work as re-doing the other bonnet – or maybe a little more – the end result would be a bonnet REALLY worth having! I just NEVER see virgin mouths on original E-Type bonnets!
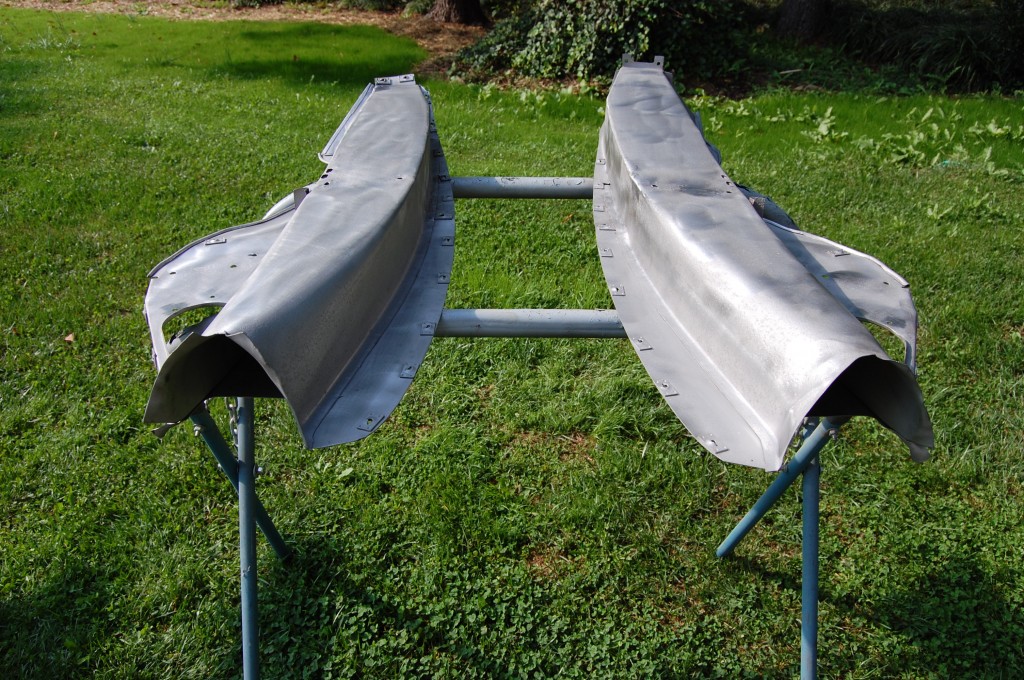
- The decision was made to restore this bonnet, and we got to work. After disassembly and sandblasting, we doctored up the inner valances, which required VERY little work. Here, they are about to be primed in 2-part epoxy in late September.
- Next, we tackled the lower valance. This is the skin, with the rusty original support member removed.
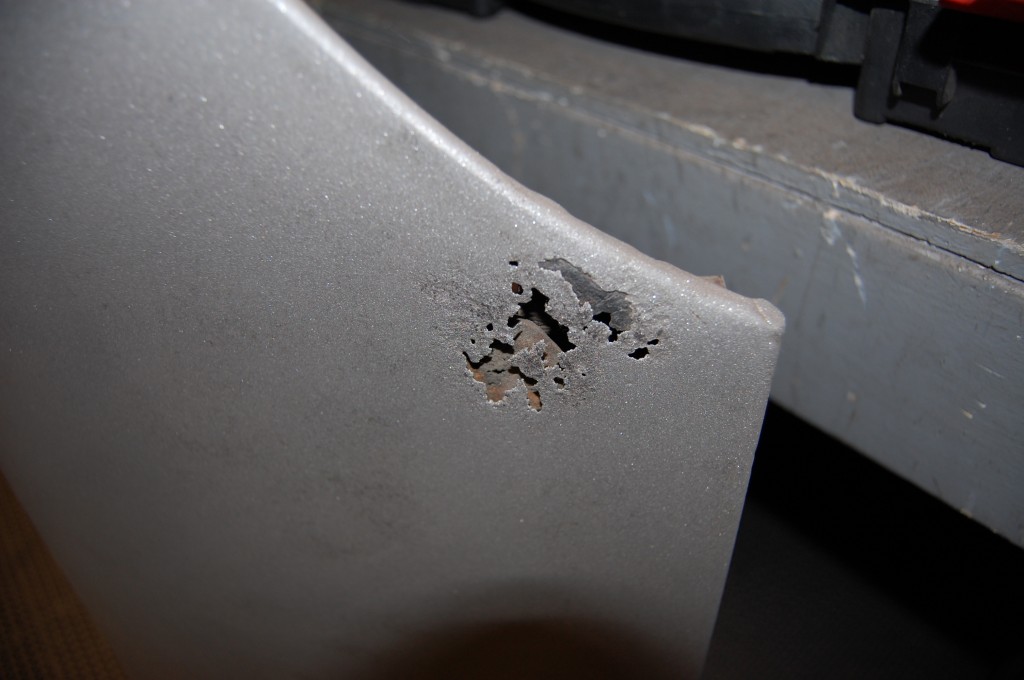
- We began to run into perforated rust in this piece – here…
- …and here.
- So some patches were in order.
- Tacked into place.
- TIG welded.
- And then planished and finished off to be smooth and invisible. Next we clamped in one of our new lower valance support members.
- The new lower valance support is welded into place with a MIG welder – we use the holes created by drilling out the old piece to install the new piece using plug-welds.
- On to the wings – what a mess…
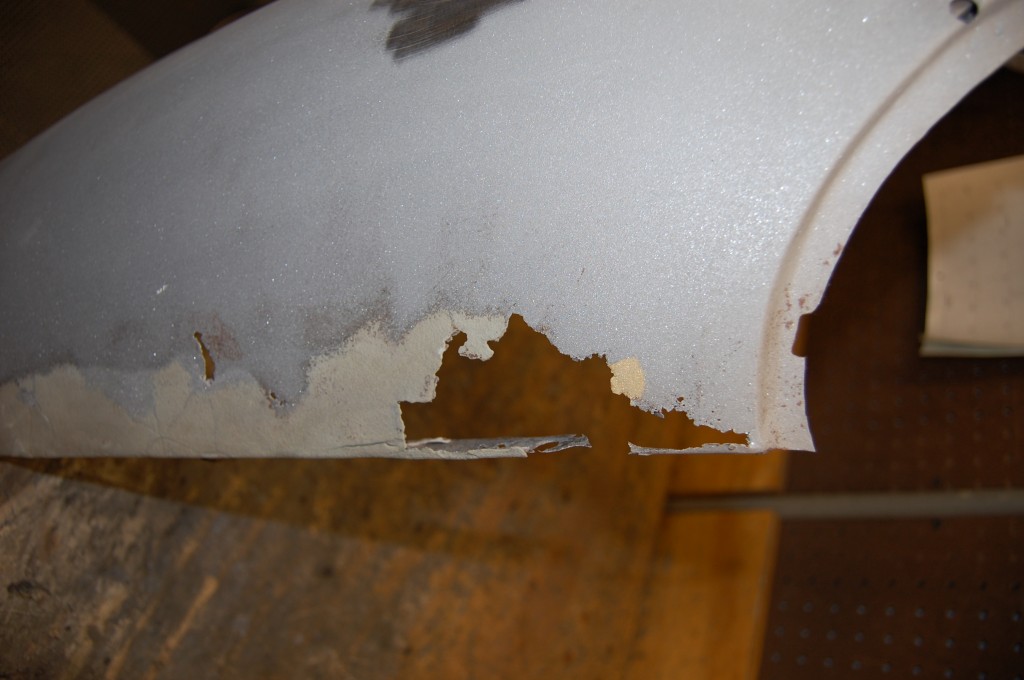
- We didn’t even bother stripping out this filler – or the lead underneath it.
- This corner also touches the headlamp diaphragm – and collected rust-causing gunk as well.
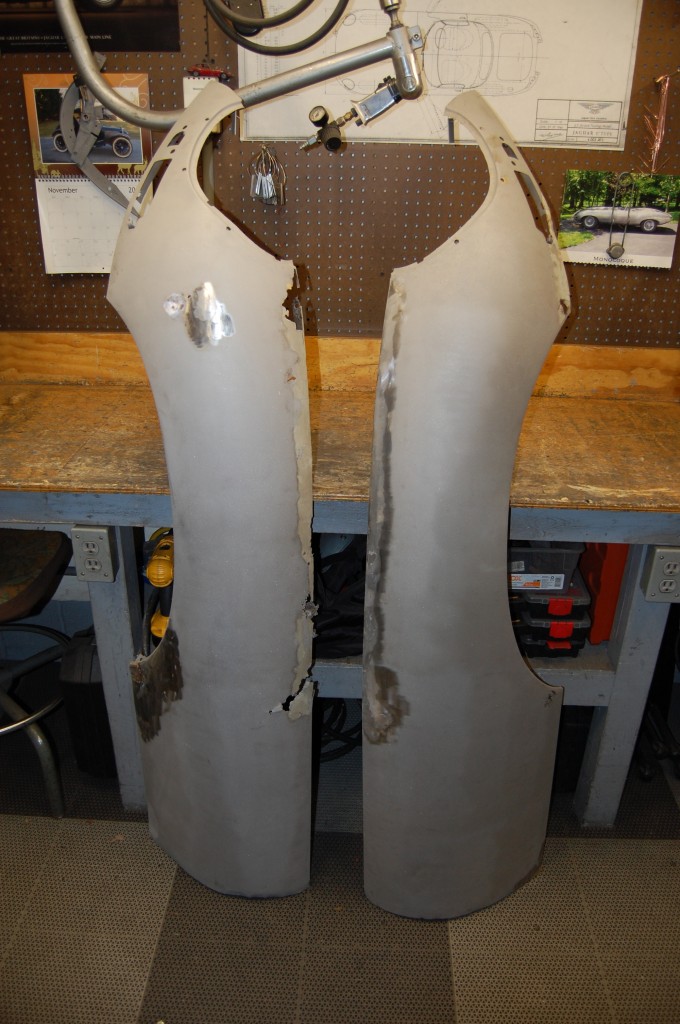
- And of course the lower corners were also perforated – as is the case in 90% of original wings.
- More shots of the horror…
- And more – the problem runs almost the entire length of the wing.
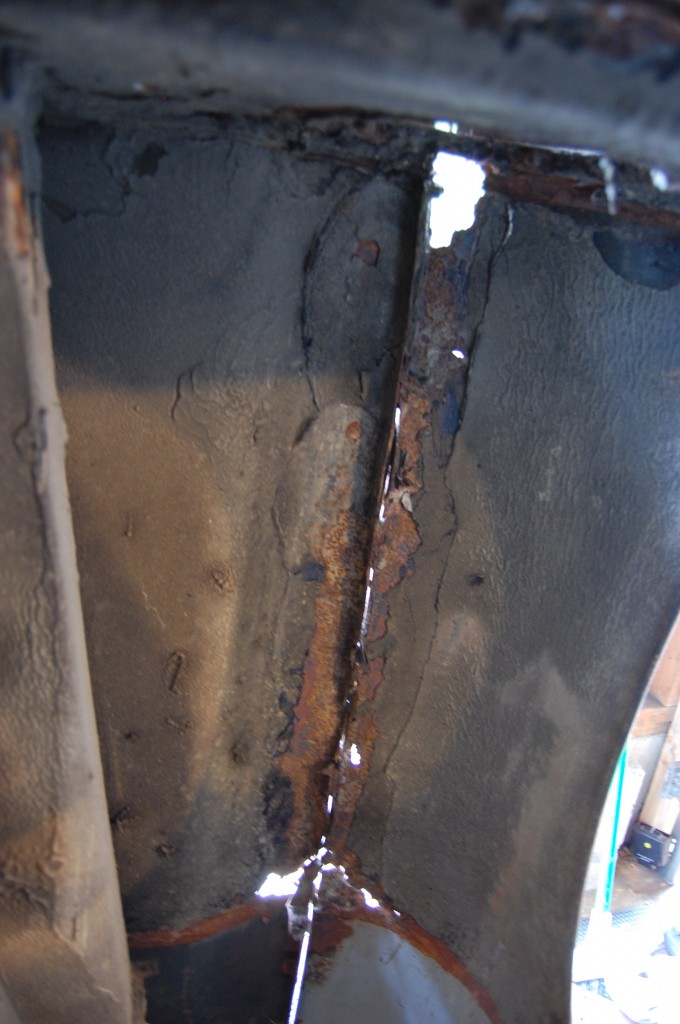
- Here is what it looks like from the inside – just as bad – if not worse!
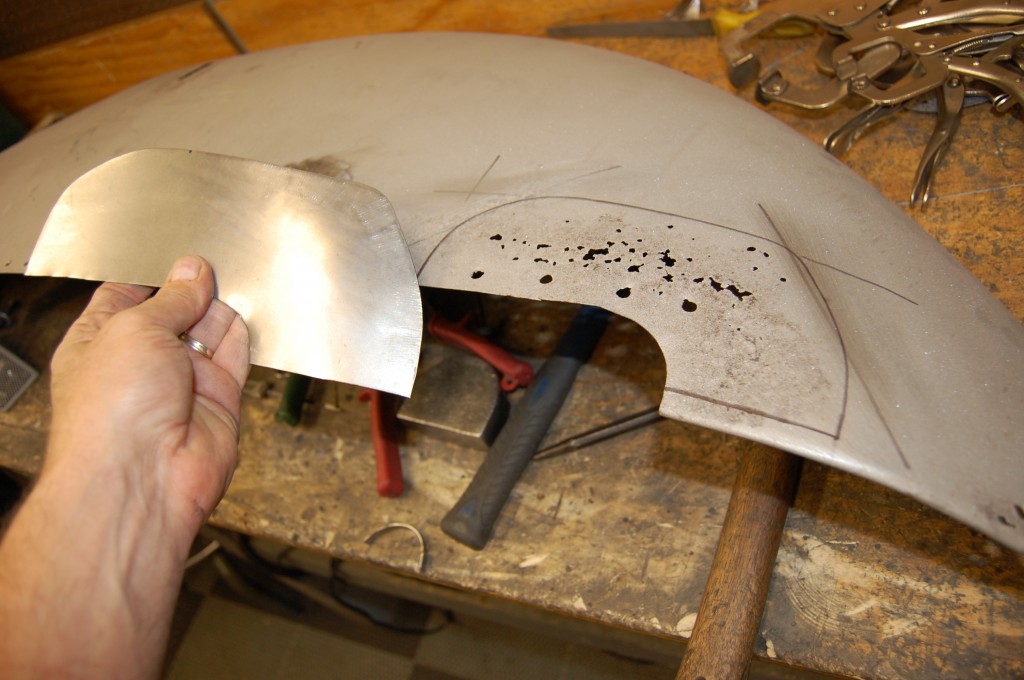
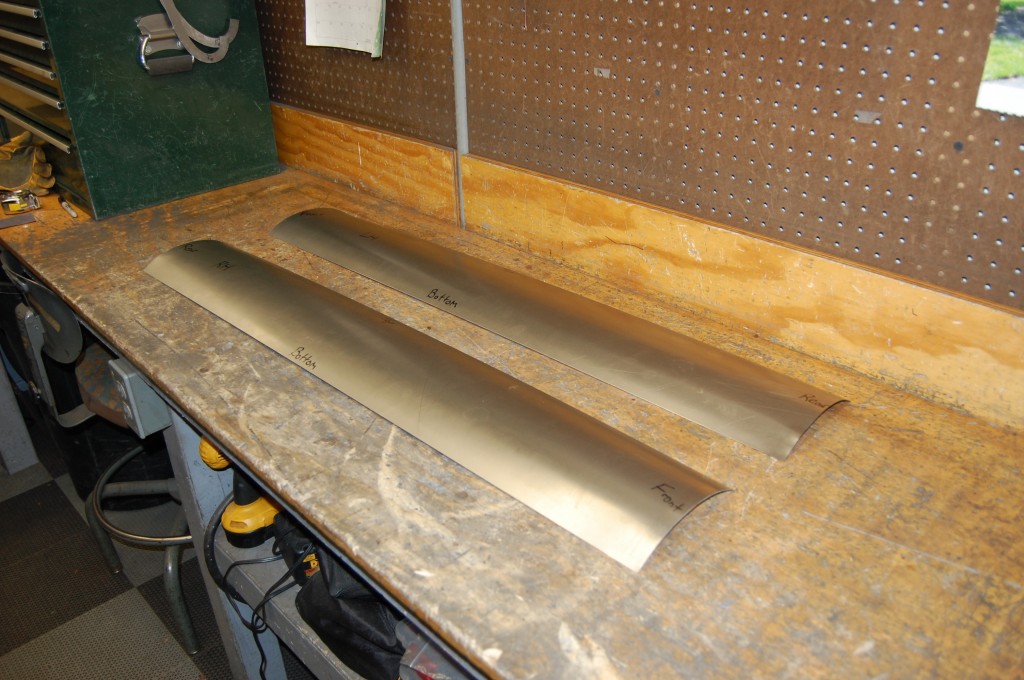
- Time to start making some patch pieces. We do make and stock full-length repair flanges for this problem, but they are designed for rotted flanges with little or no rot in the actual surface itself – NOT the case here! So I started with a couple pieces of cold-rolled 19-gauge steel, run through the roller for the proper curve in this dimension.
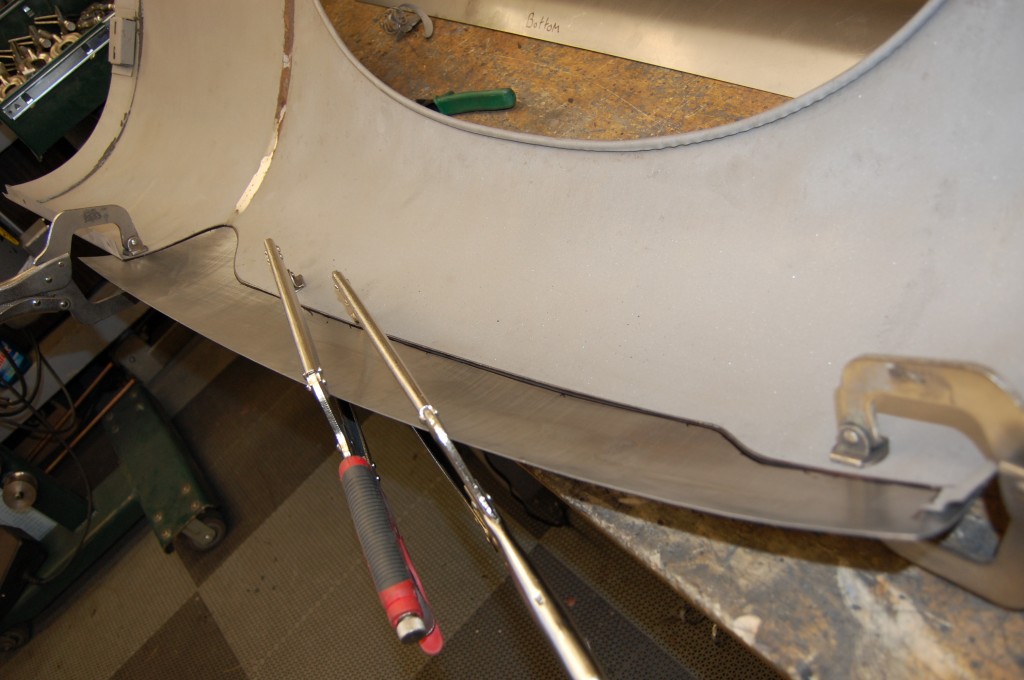
- Next, I put some curve into the pieces in the other direction in the English Wheel, and then began fitting them up against the original skin, which has now had the rust cut out. Make sure you cut it ALL out! Place your cut not only past the holes, but past the heavy pitting as well – otherwise the thin metal along the weld will just disintegrate!
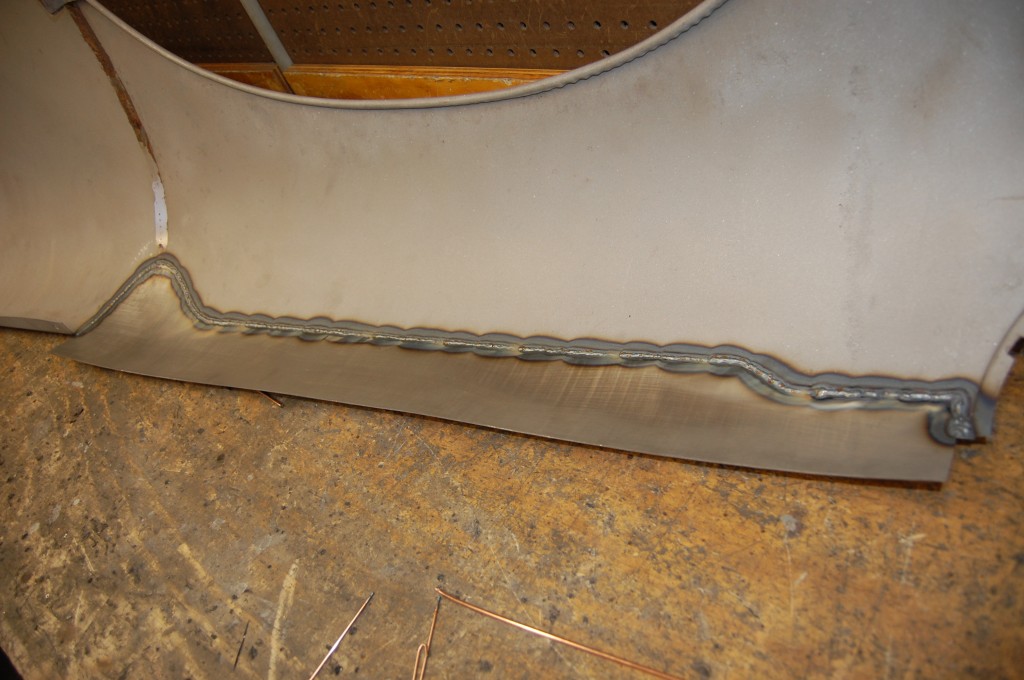
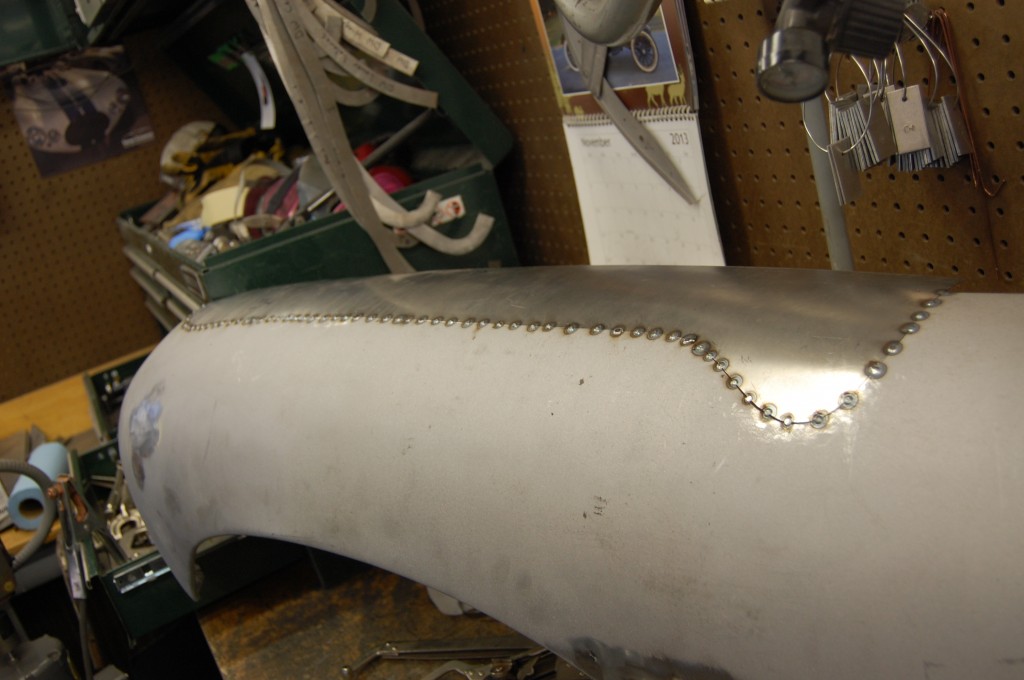
- Jump forward a few steps, and our piece has been trimmed, tacked into place, and TIG welded.
- Here is a shot of the inside, showing full penetration of the weld.
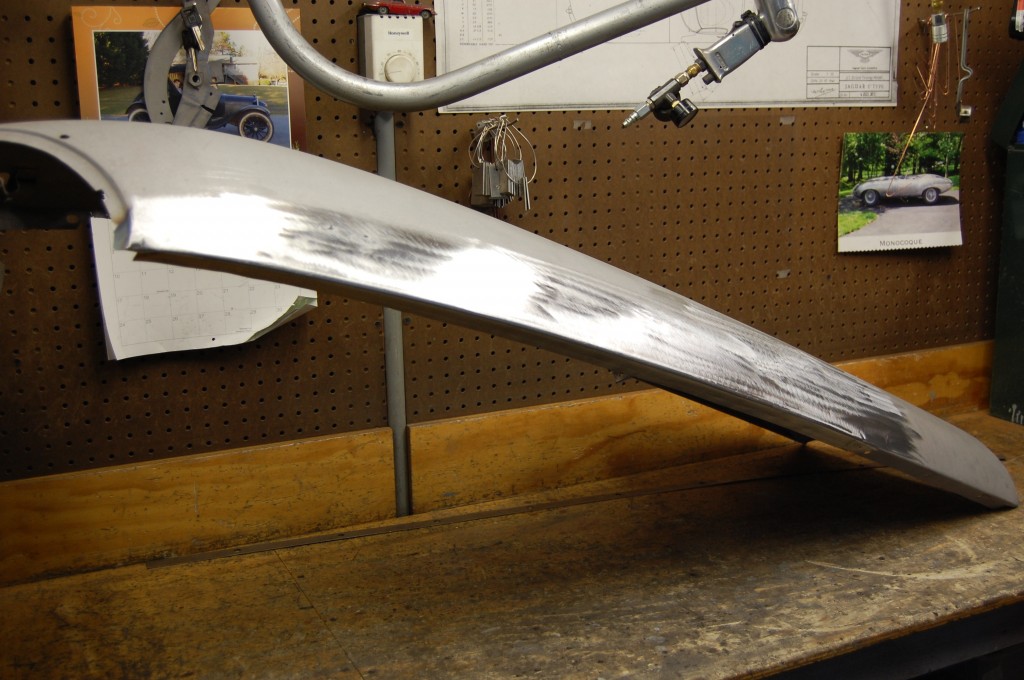
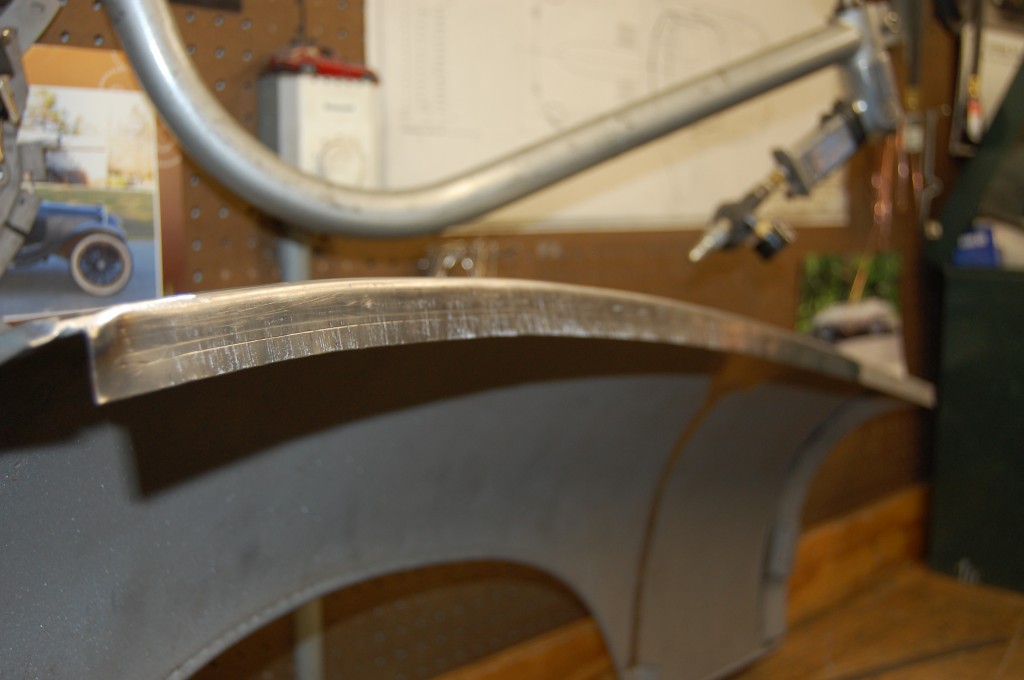
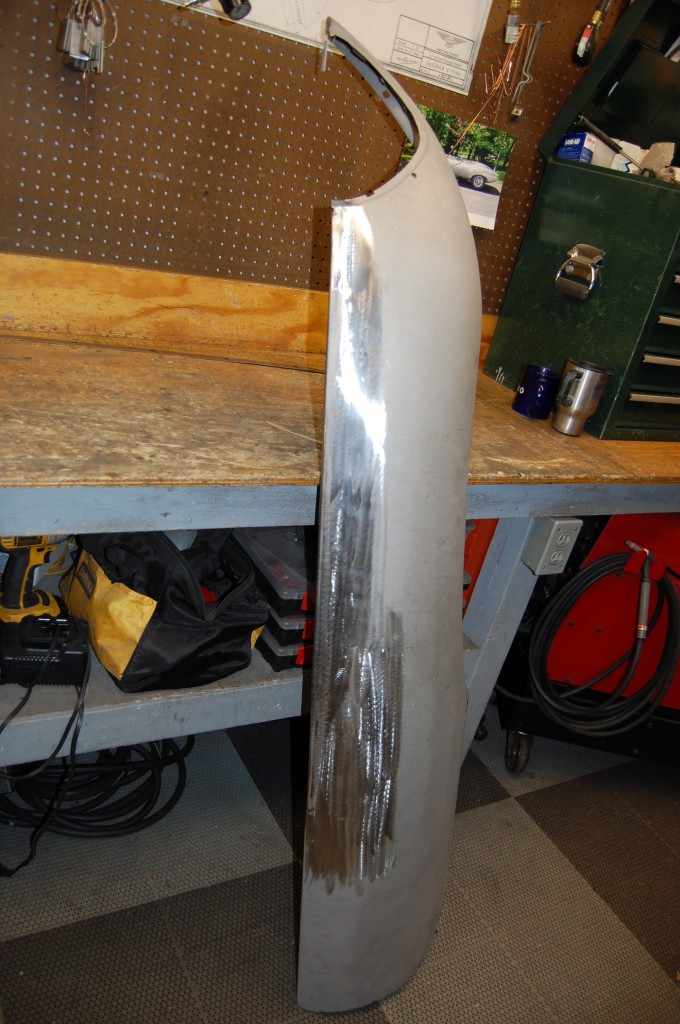
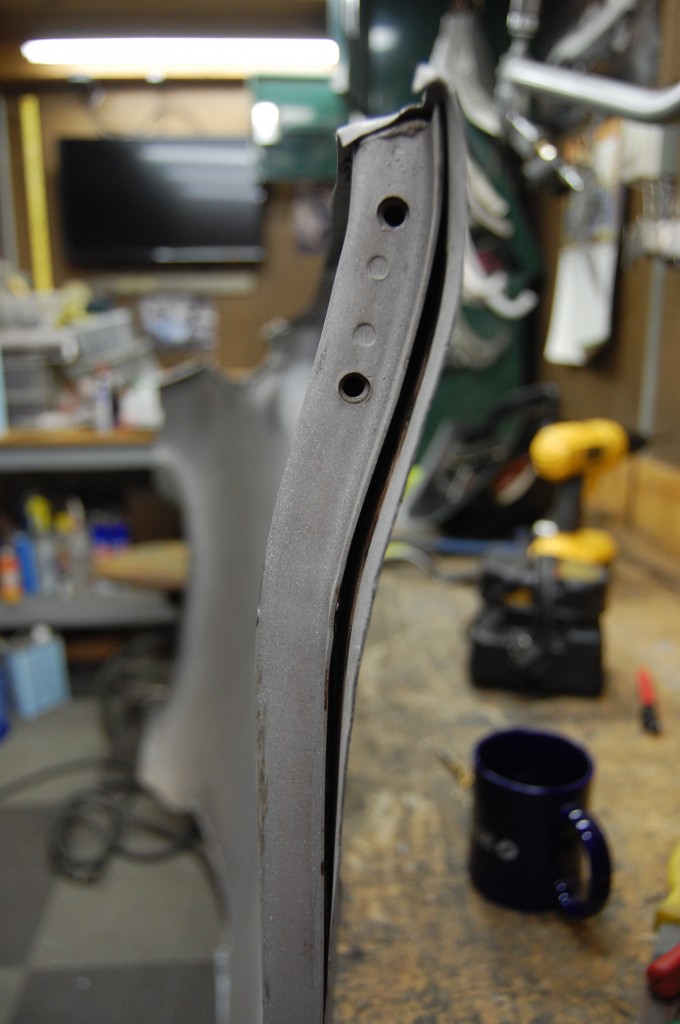
- Another leap forward, and we have finished the surface off, and turned the side flange down. The placement of the side flange is CRITICAL!!! We used a full Flexible Shape pattern from a known good original bonnet to do it – and I think I re-marked it 5 or 6 times – I knew it had to be just right!
- Here is the side flange before the holes were drilled.
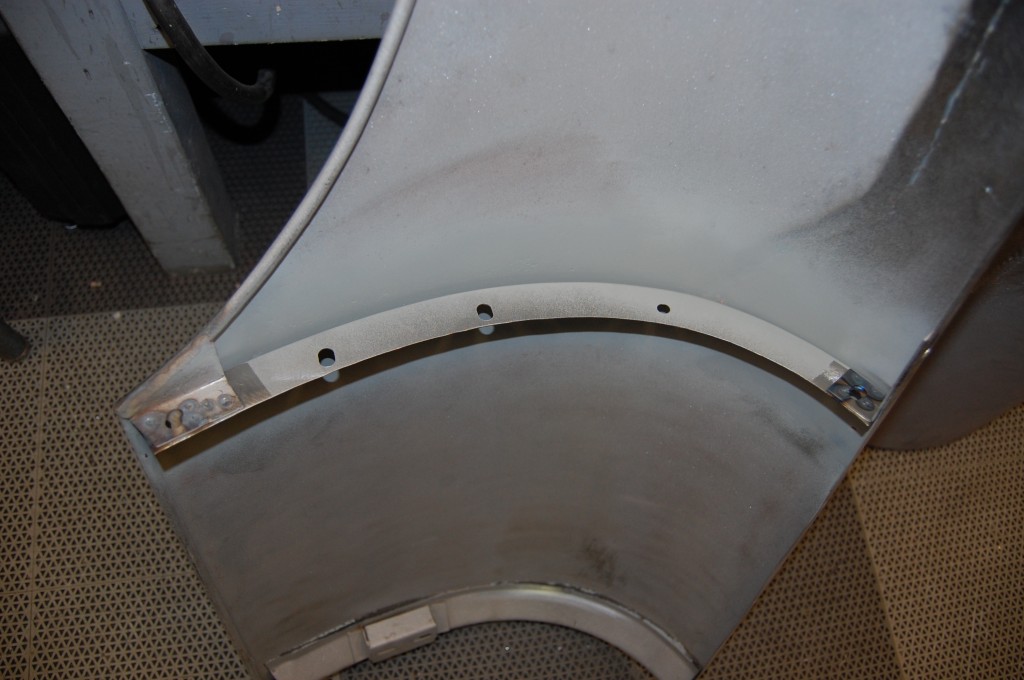
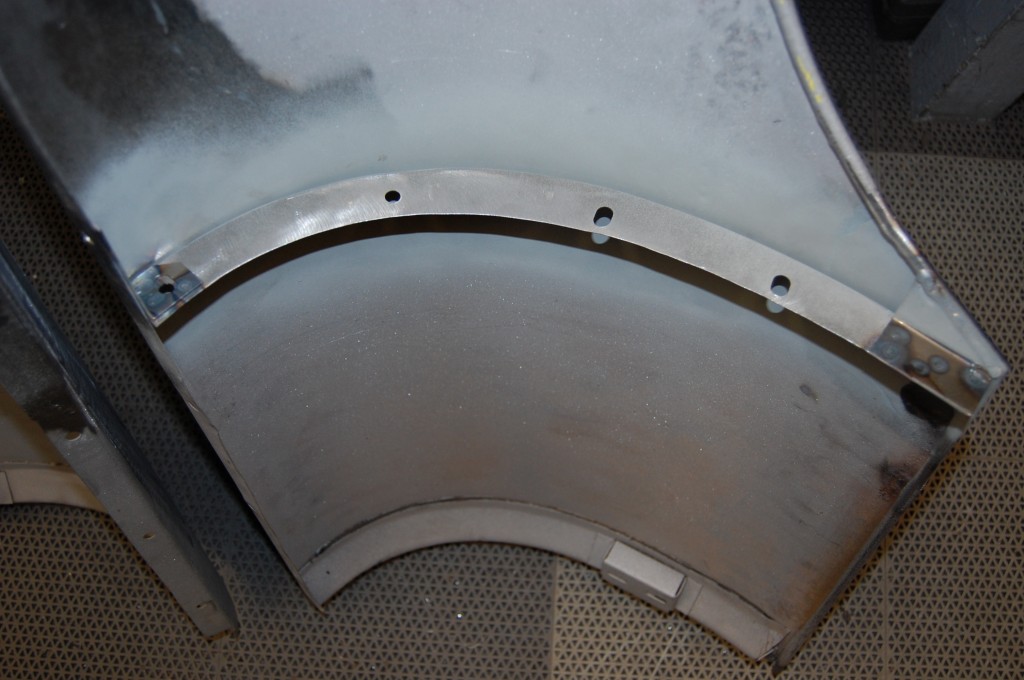
- This is what the inside looks like – not as perfect as the outside, but damn close! Later on you’ll see that even the lightest coat of primer makes this almost invisible. It can be smoothed with light filler, or just left alone to be hidden by the thick bumpy coating of gravel guard or undercoating.
- Good as new!
- Back to the lower valance with the new support member. Look at that mouth!
- Almost every bonnet we restore here uses the original lower valance skin, and a new support – no reproduction even comes CLOSE for dimensional accuracy!
- On to the other wing – which is just as bad if not worse!
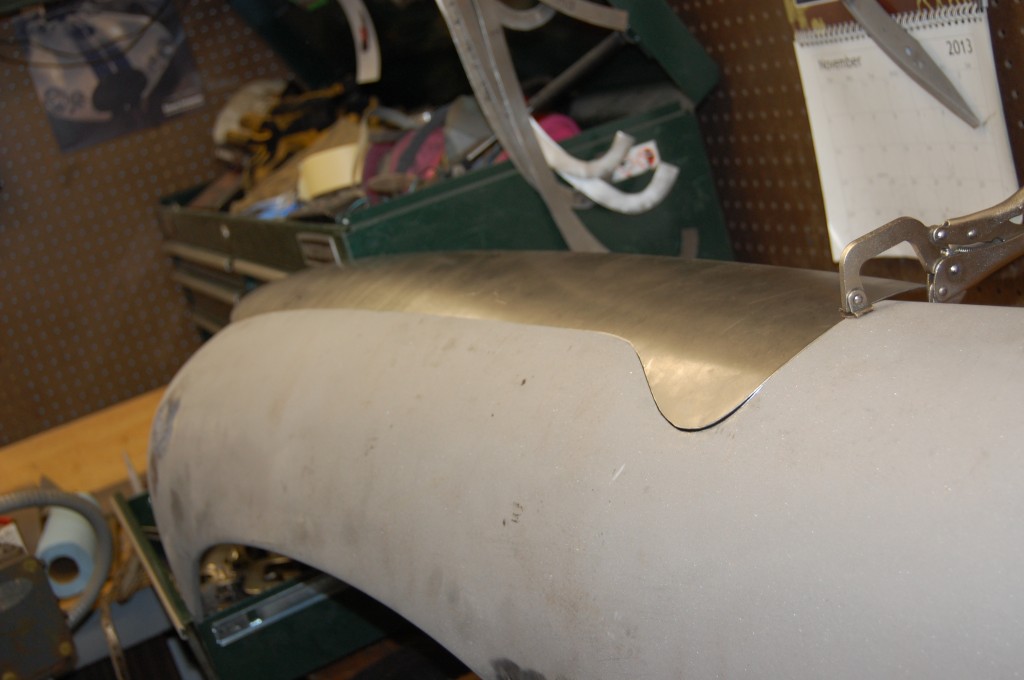
- We’ve formed and carefully cut the pacth to fit.
- Then tack it into place.
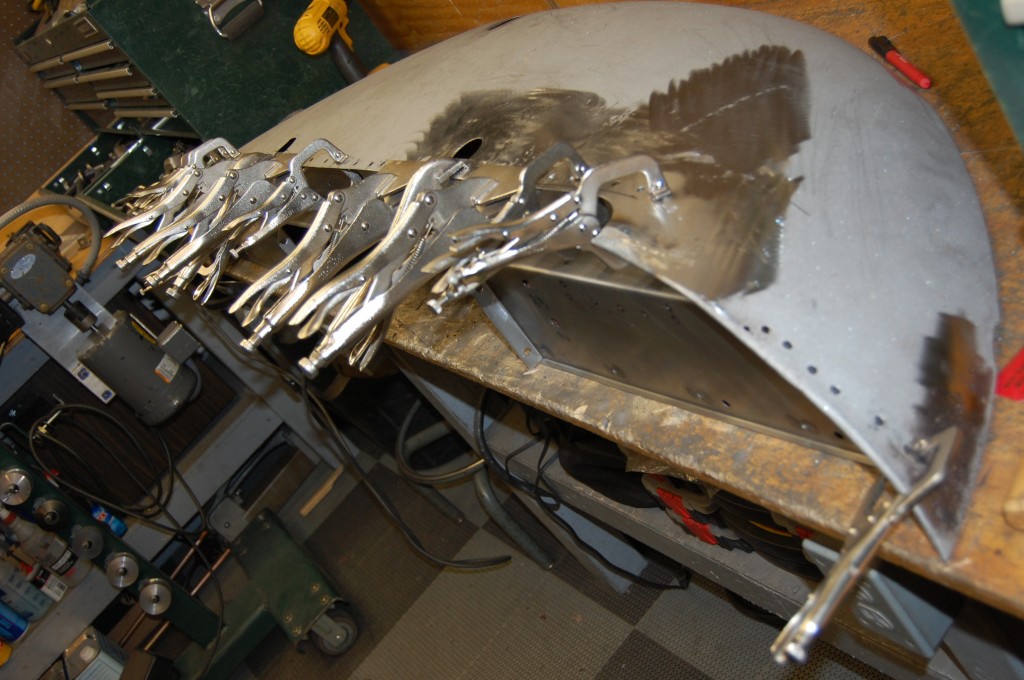
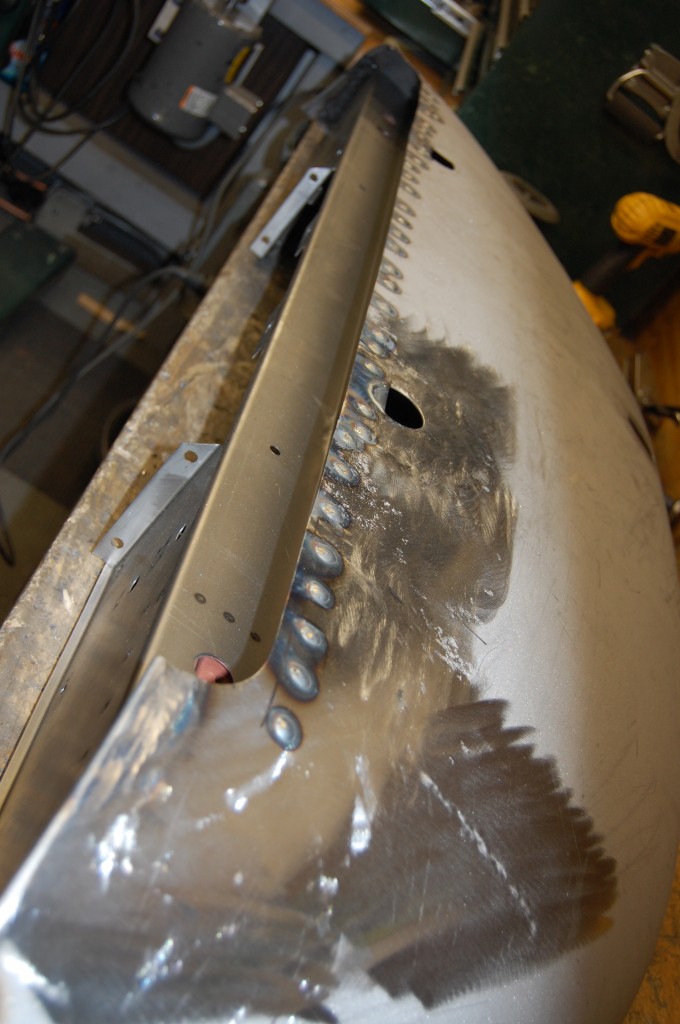
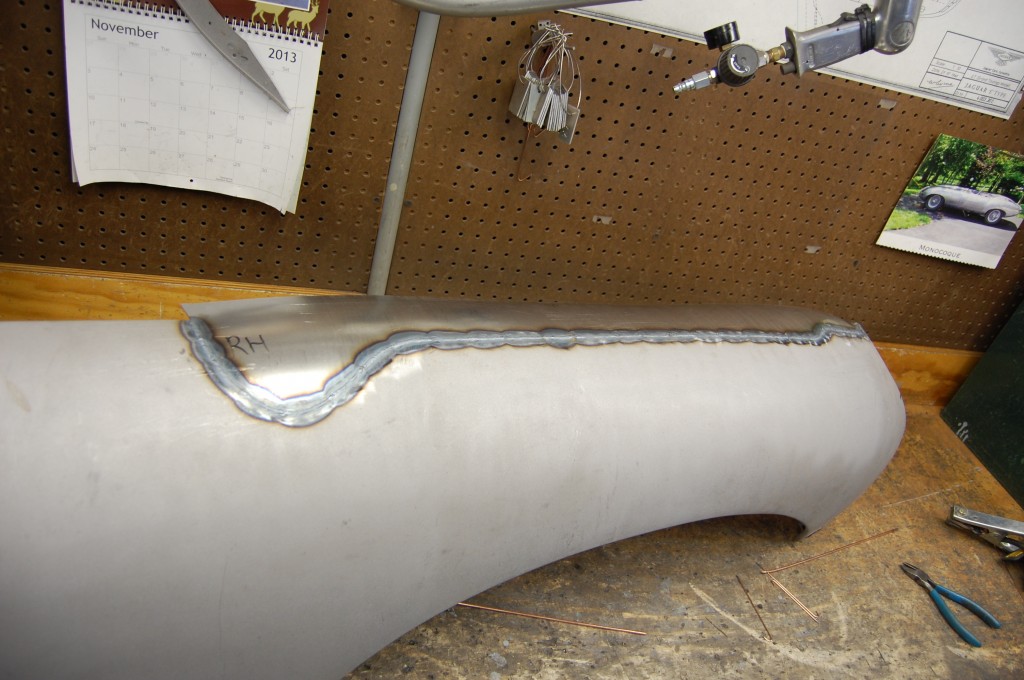
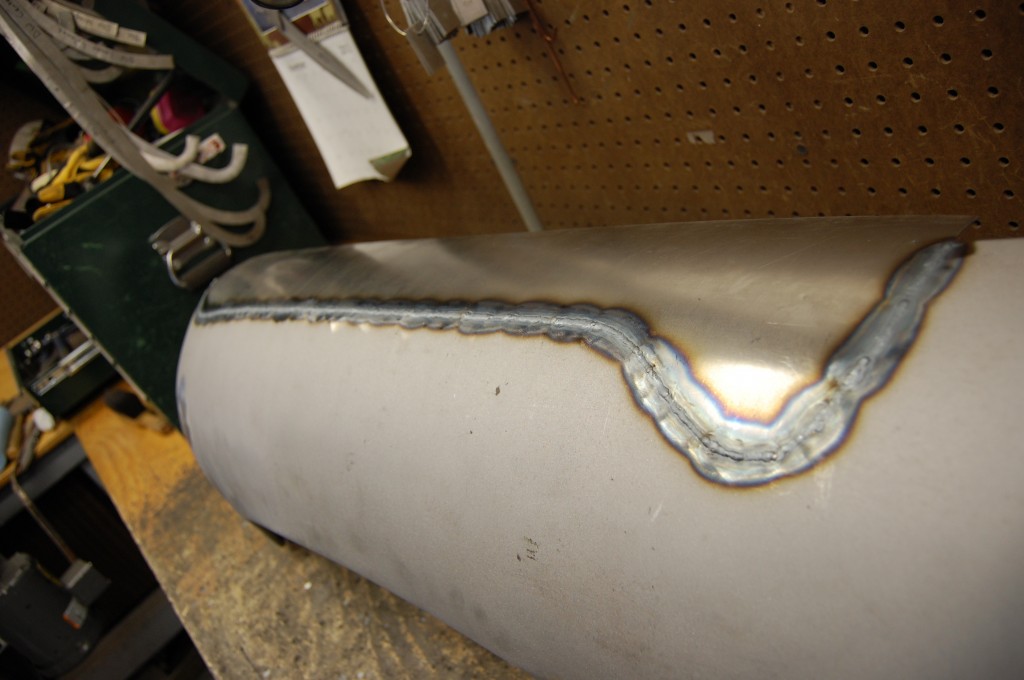
- Then weld it completely with the TIG.
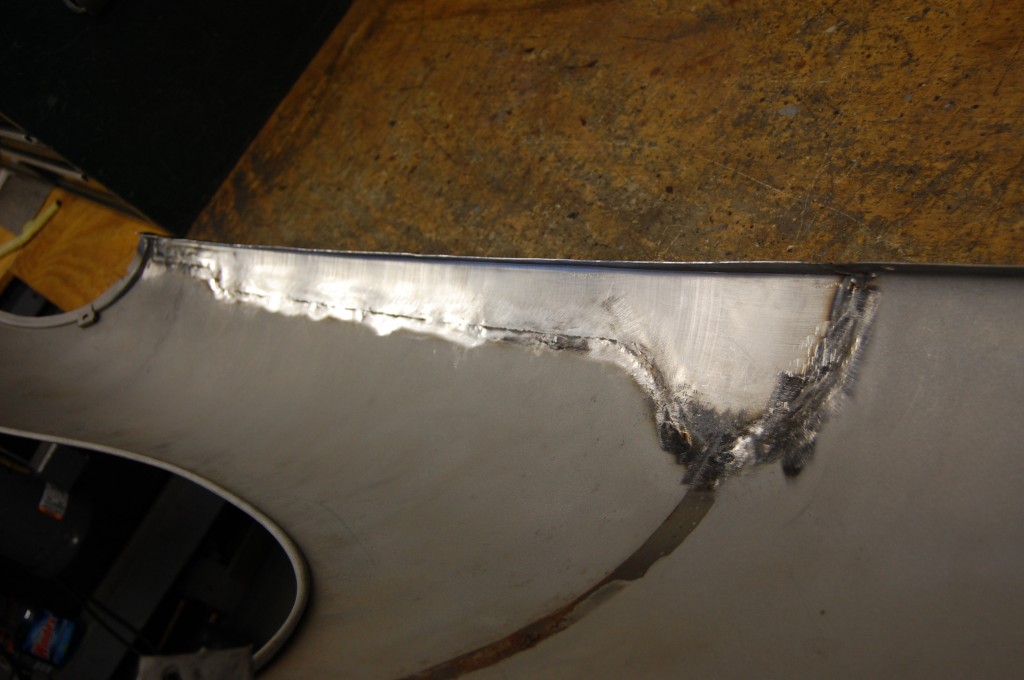
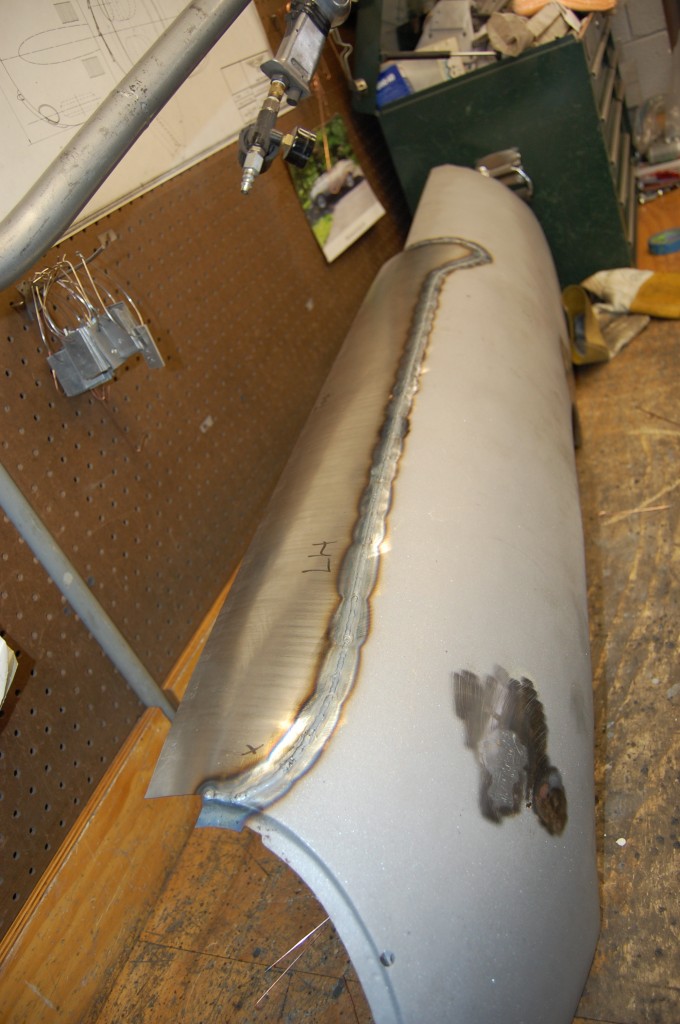
- Here is another shot of the long, delicate TIG weld. This also shows another little mess we’ll fix – a patch of rust filled with lead near the front of the wing.
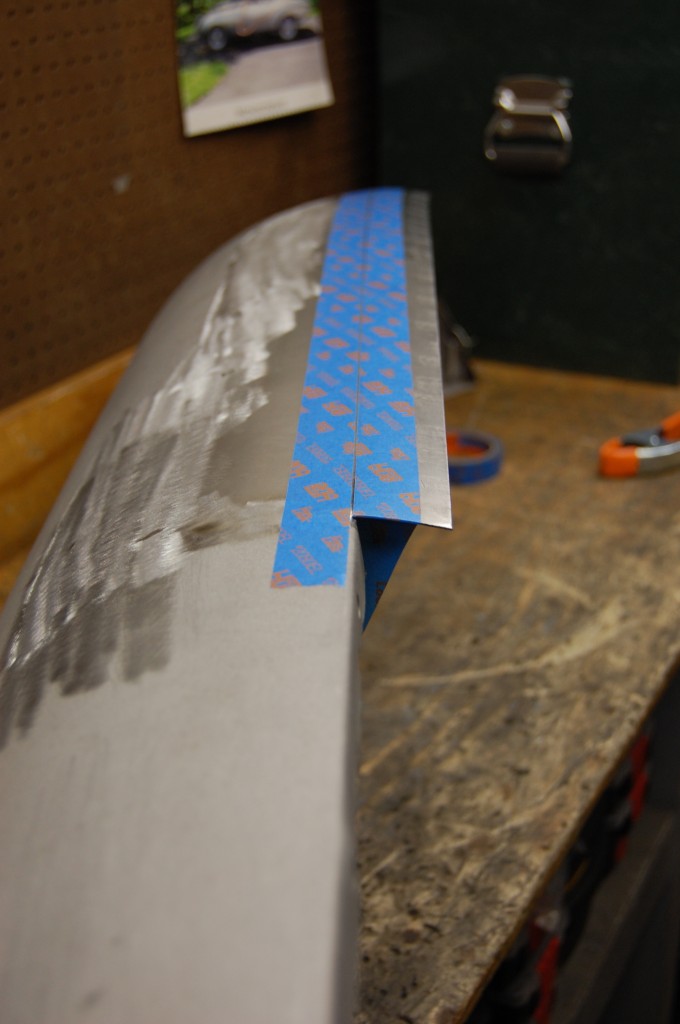
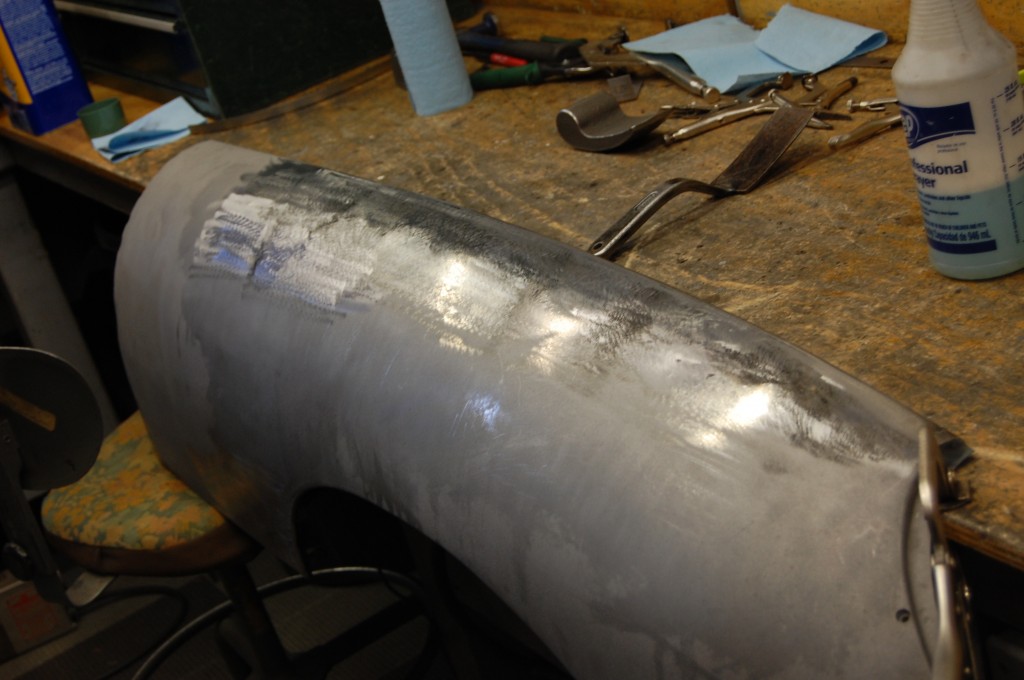
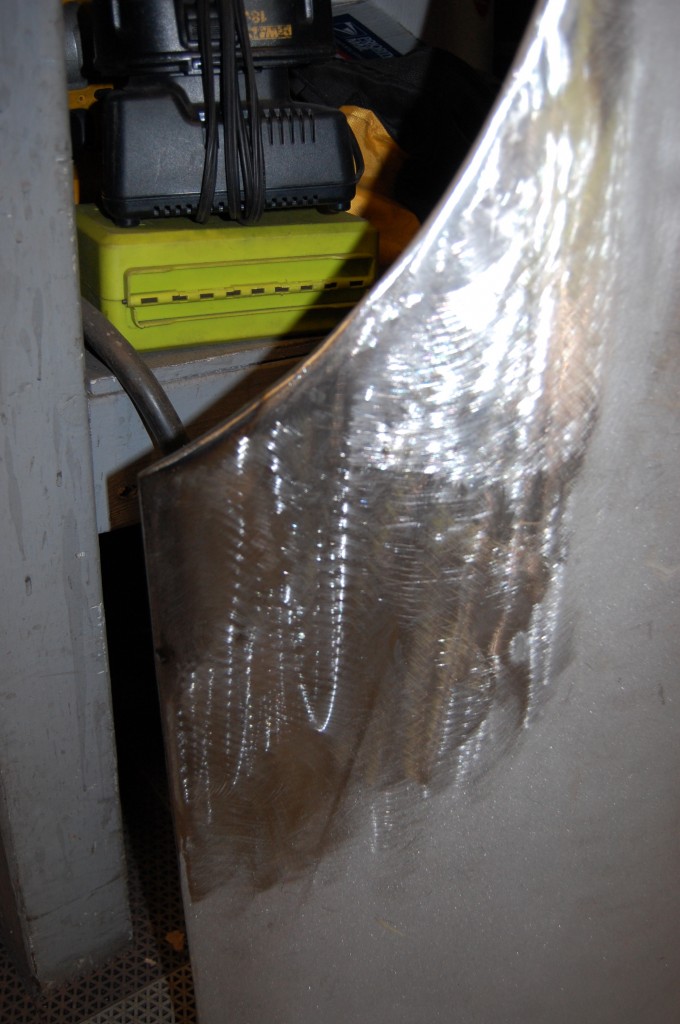
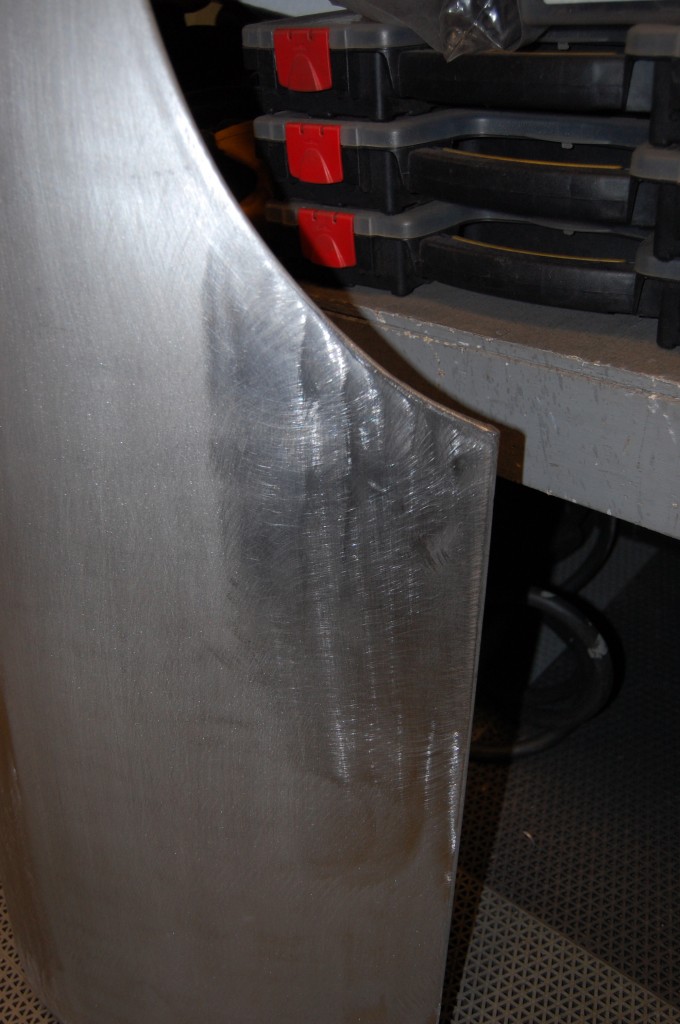
- Here is this side dressed down, but before the flange is turned down.
- This tape marks where the turn will be, and also where excess metal needs to be trimmed off..
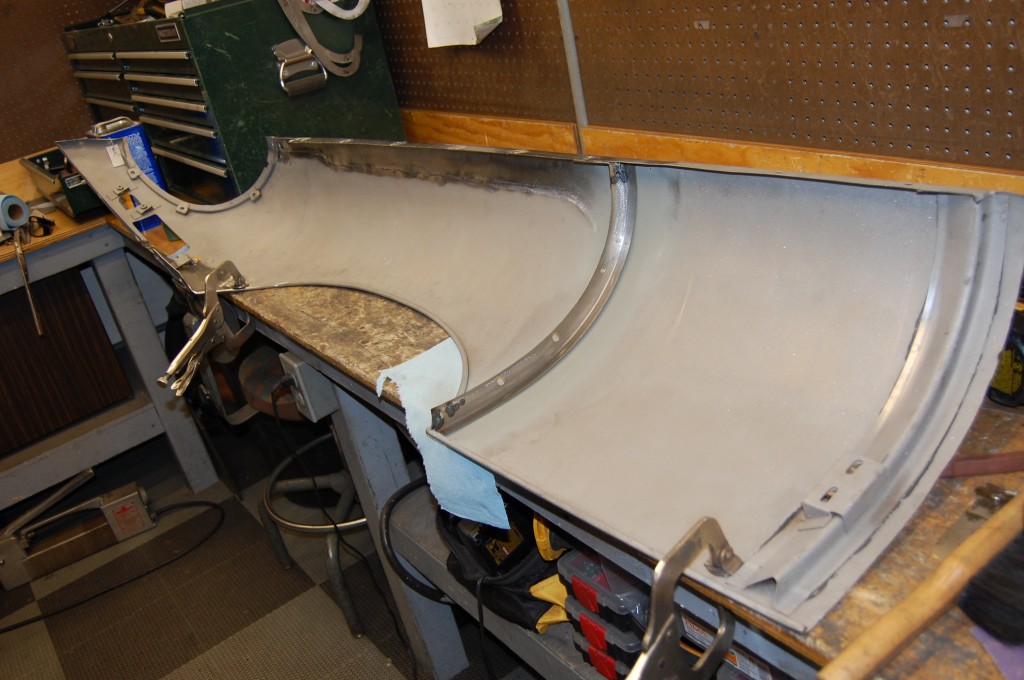
- Goiung backwards a bit, this is the completed RH wing, showing new internal middle flange and tabs welded into place.
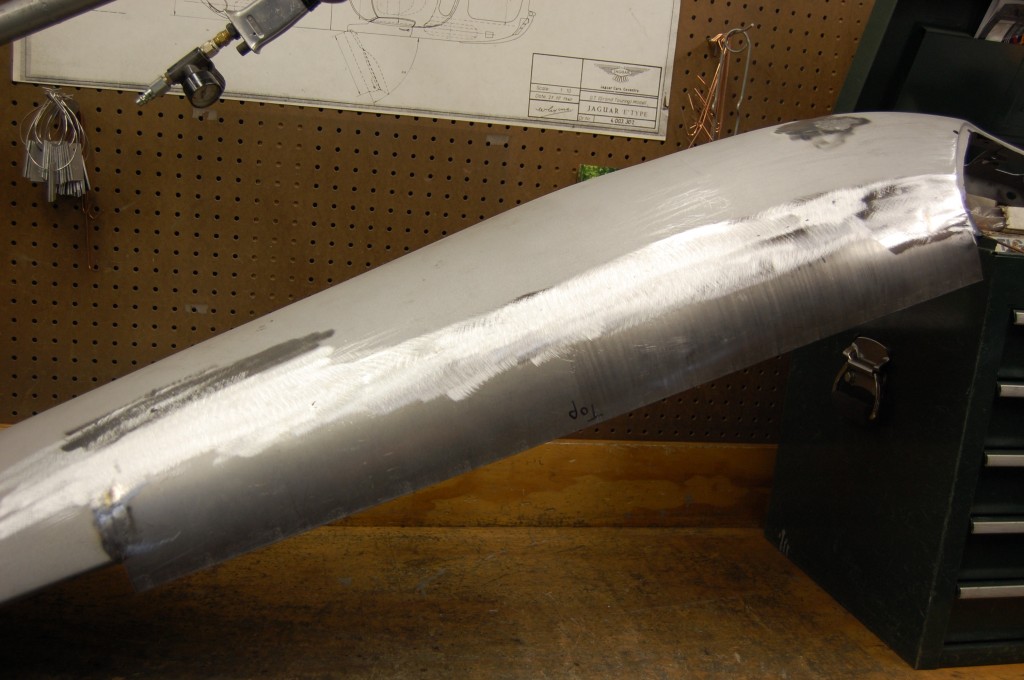
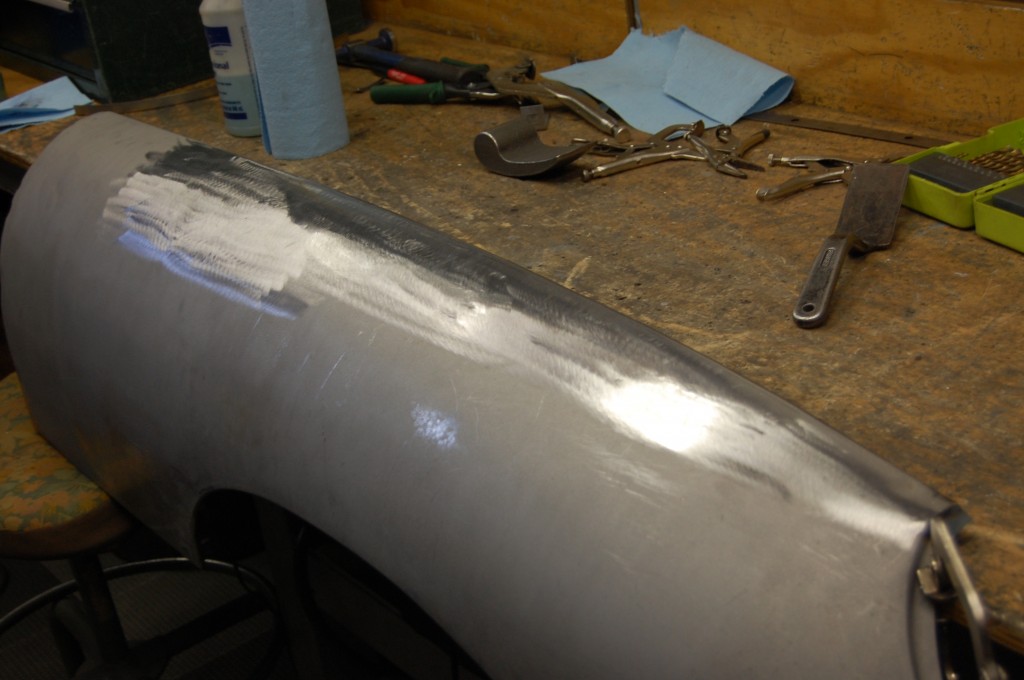
- This all looks SO much easier – and SO much faster than it goes down in real life! This blog covers WEEKS of work! Here, we have finished the work, and made the surface as uniform as possible with the dolly and slapper – but we can make the surface smoother!
- So we get out the shrinking disc to shrink down the high spots and level out the surface across the entire repair.
- We have to repair this corner as well. The bad metal has been cut oiut, but the original steel rod has been salvaged, and treated before being repaired. I make all of these curved now versus a squarish patch – it helps to eliminate a concentration of weld shrinkage in the corner of a square patch.
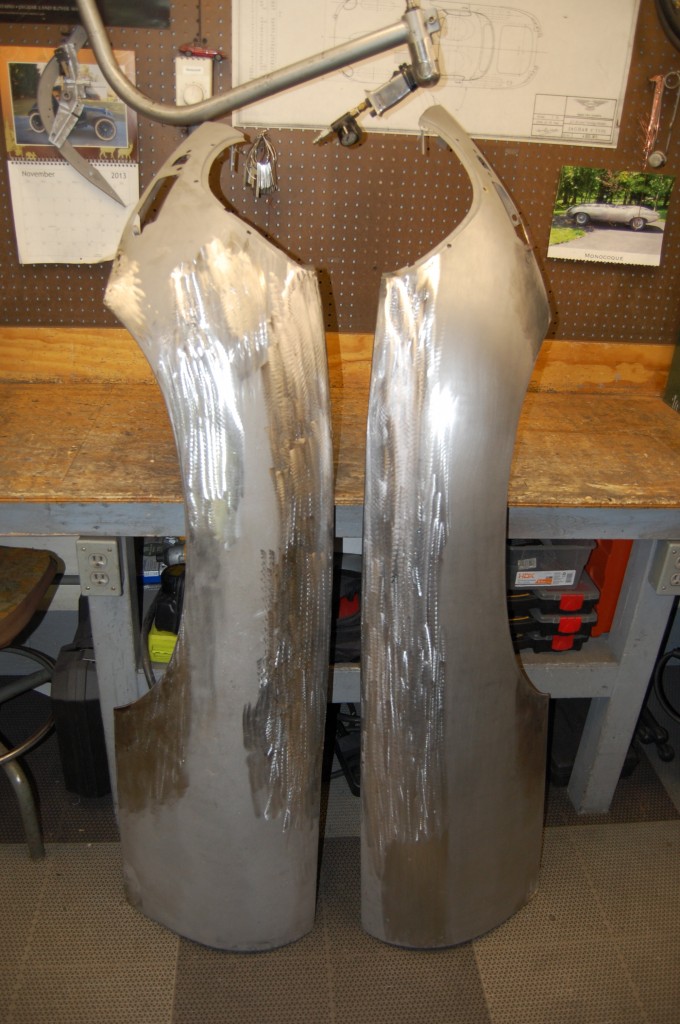
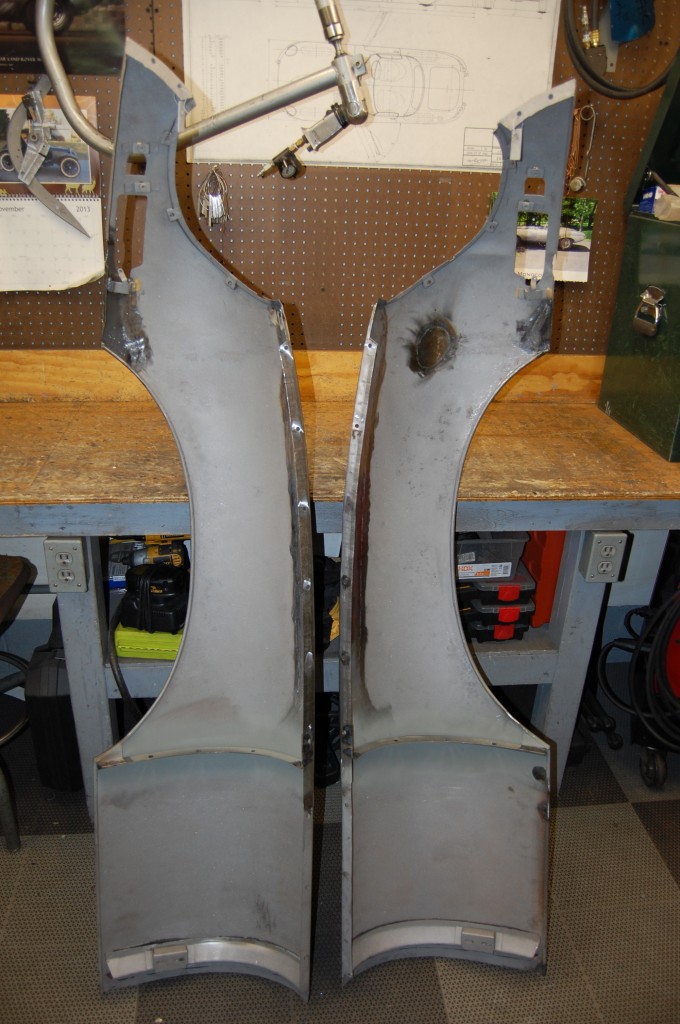
- All done! Two beautifully restored original wings!
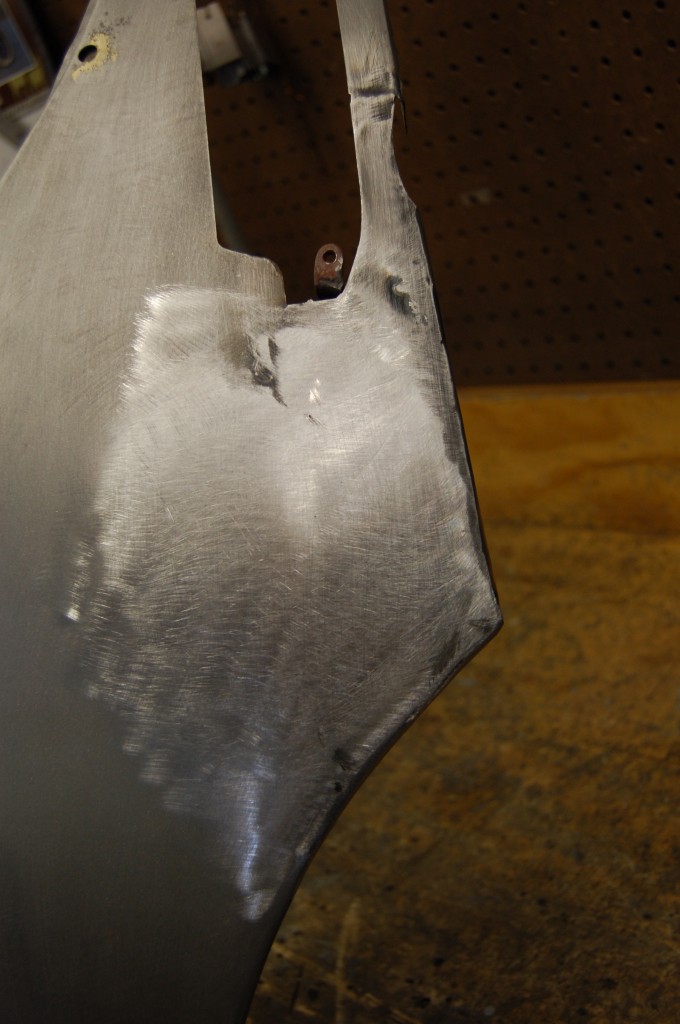
- Remember this forward corner? It has also ben treated to a patch of new steel.
- Here is that completed lower corner we saw from the inside a few photos ago…
- And I think this side received a little work as well.
- The inside of the restored wings with new middle flanges to hold the mudshields.
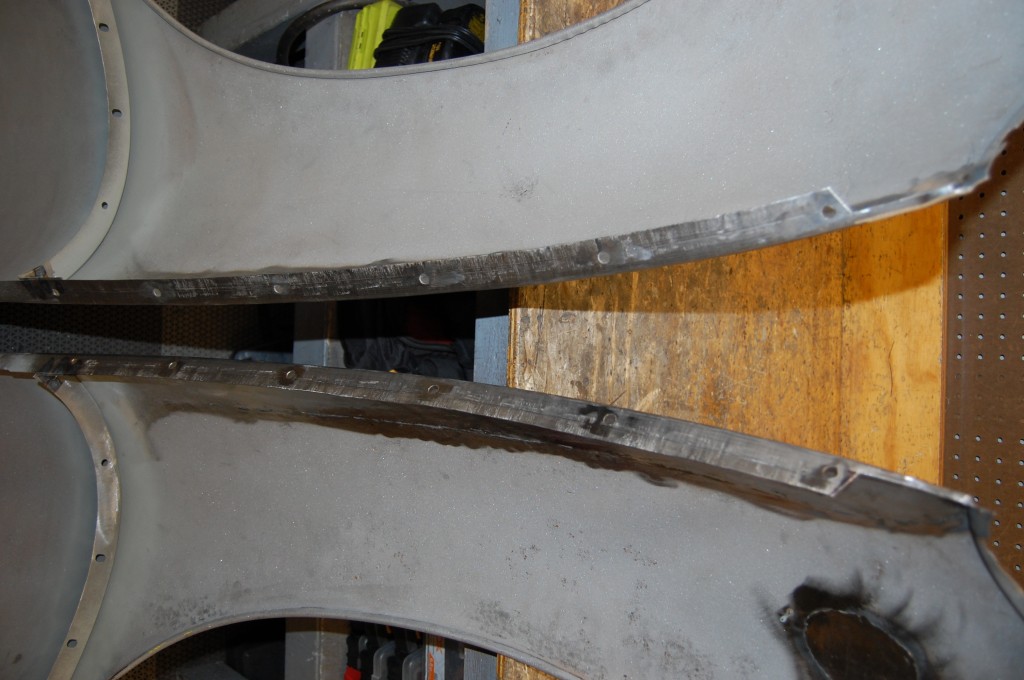
- The holes in the sides were marked and drilled with our template. Also note that small patch in the lower right-hand corner of the photo to repair the perforated and leaded area I mentioned earlier.
- New flange and end tabs – we stock these pieces.
- nd the same on the other side – 90% of the wings we do need these pieces replaced.
- OK – the wings worked out GREAT! I was proud of the work and it was a nice boost for my ego – JUST what I needed to tackle this!
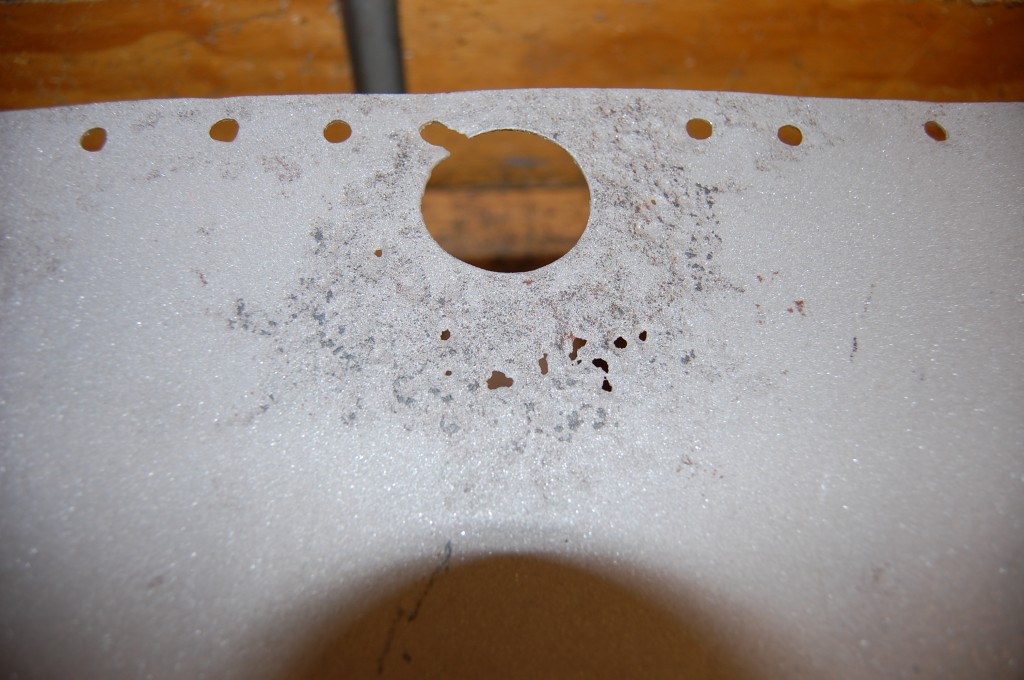
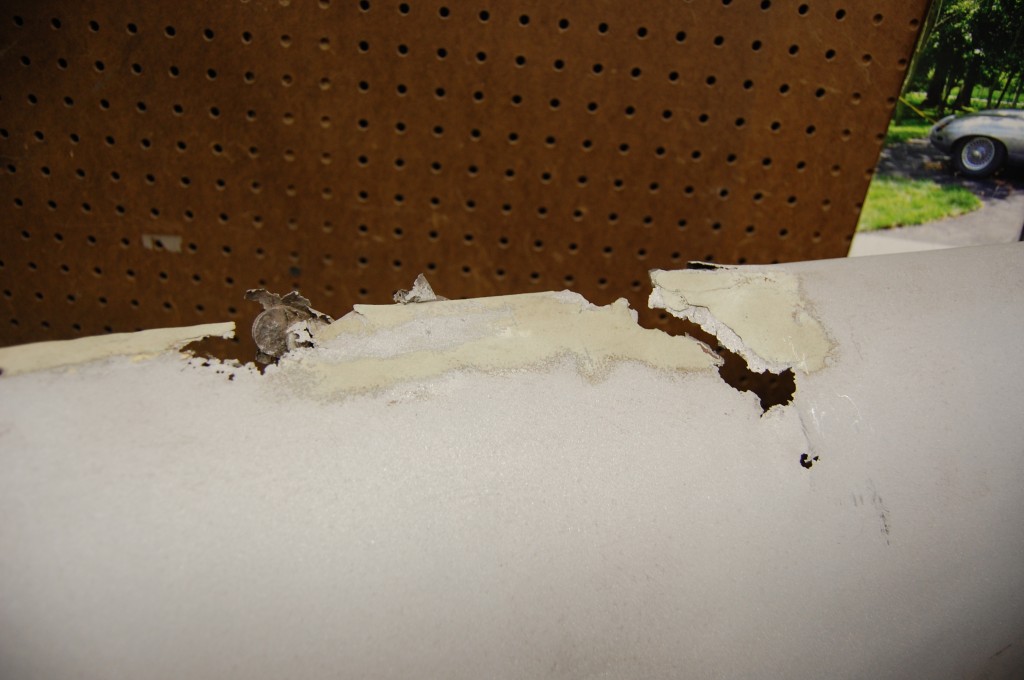
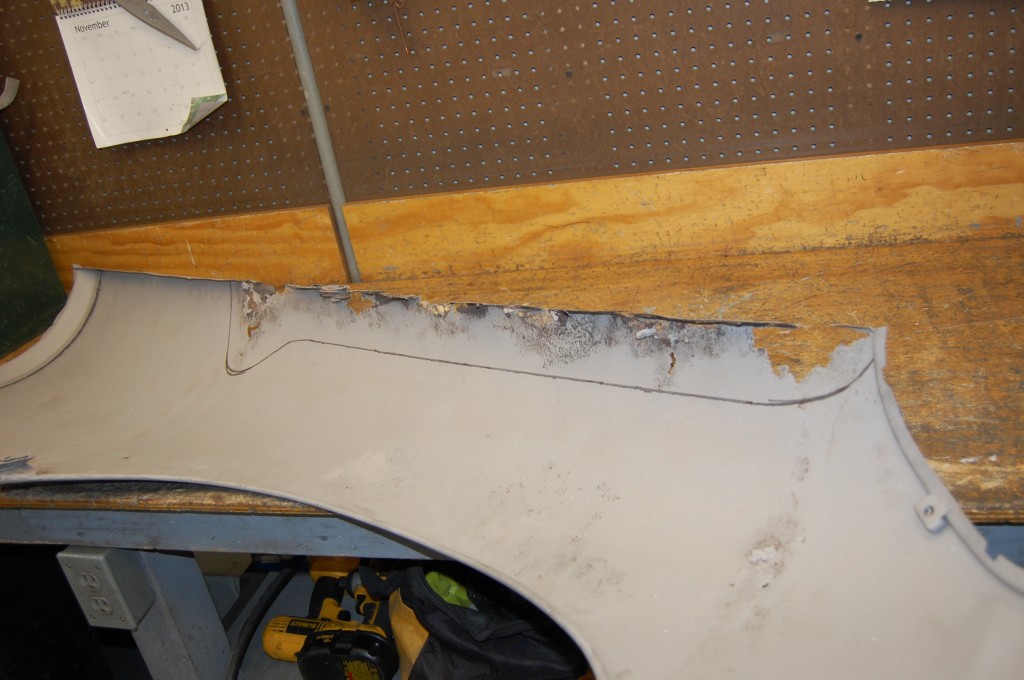
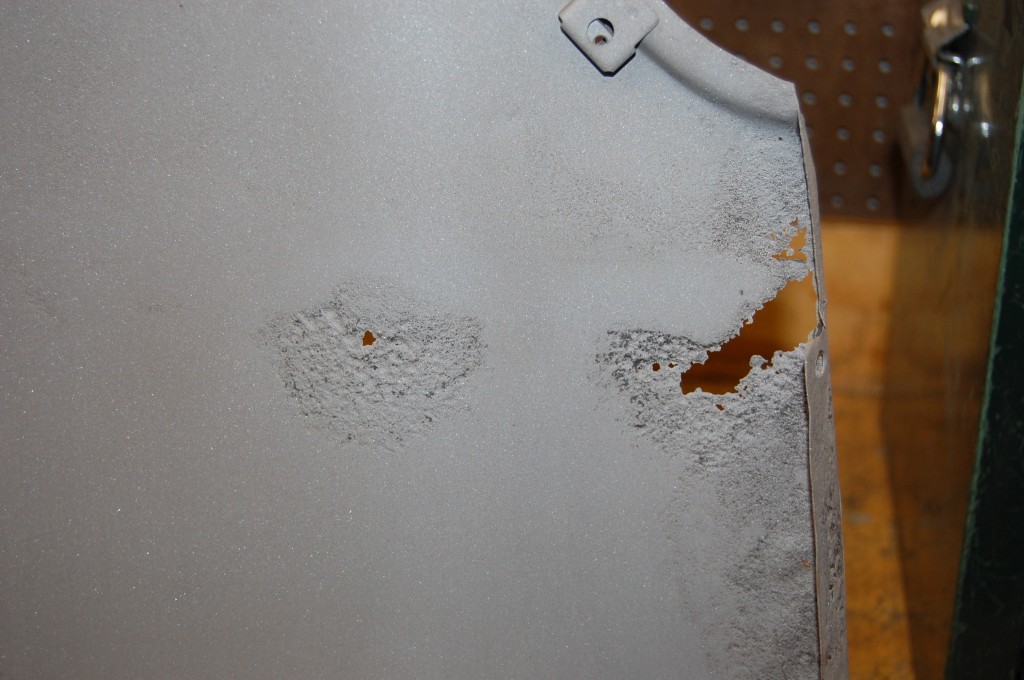
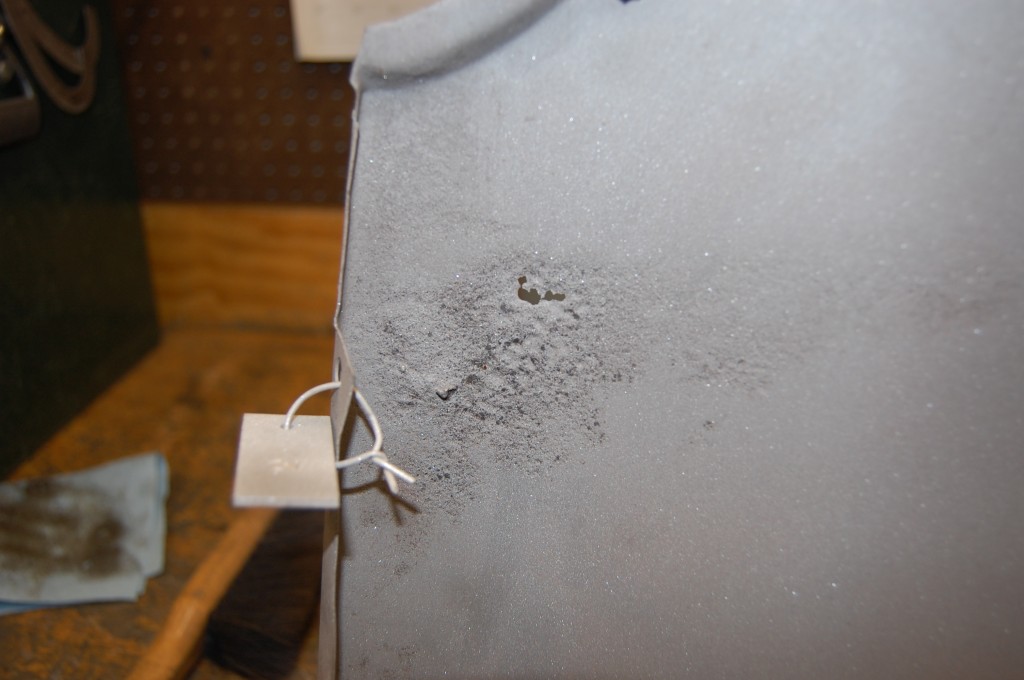
- The rot in the center section went in even deeper than the wings. Luckily, I WAS able to weld in a small piece in the center of that heavily pitted circle to the left – that was a big help…
- So both sides needed long patches with “bumps” on both ends, just like the wings. There is one of my aluminum tags to keep everyone’s stuff seperate – although this bonnet DEFINITELY had its own signature!
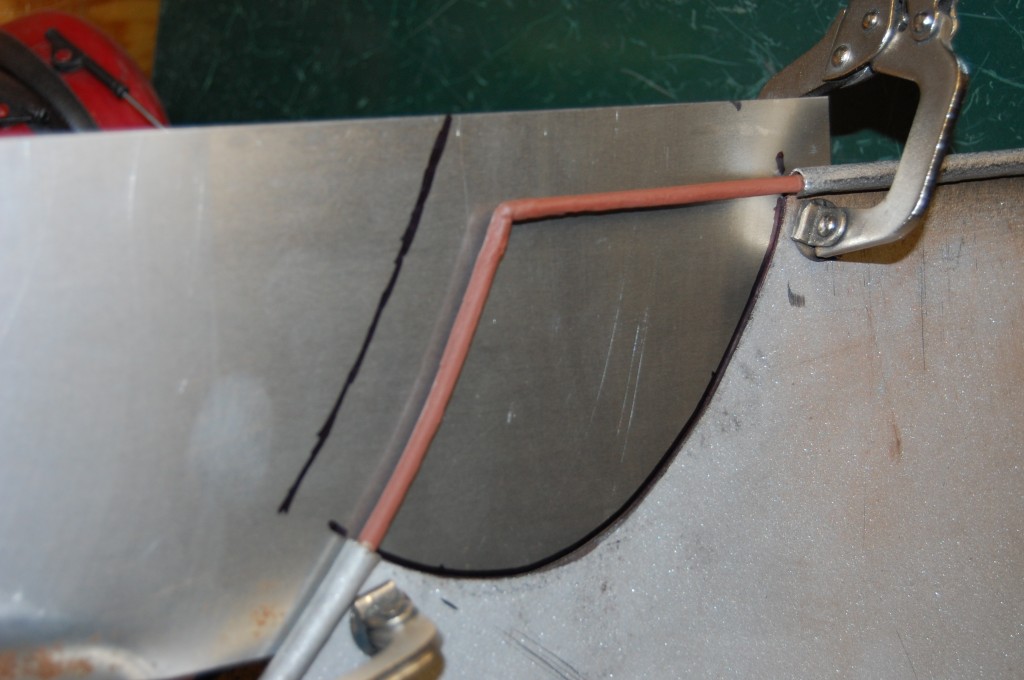
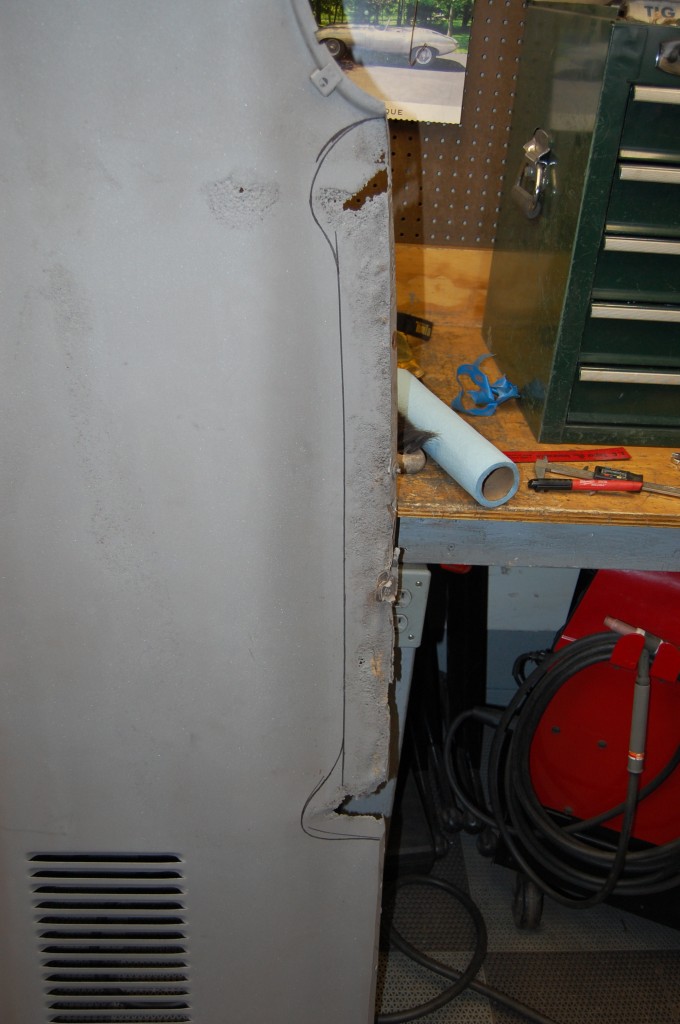
- Here is where we will make the cut – it is designed to be paralell to the flange as much as possible, and then have sweeping curves on the ends to minimize shrink in the welds.
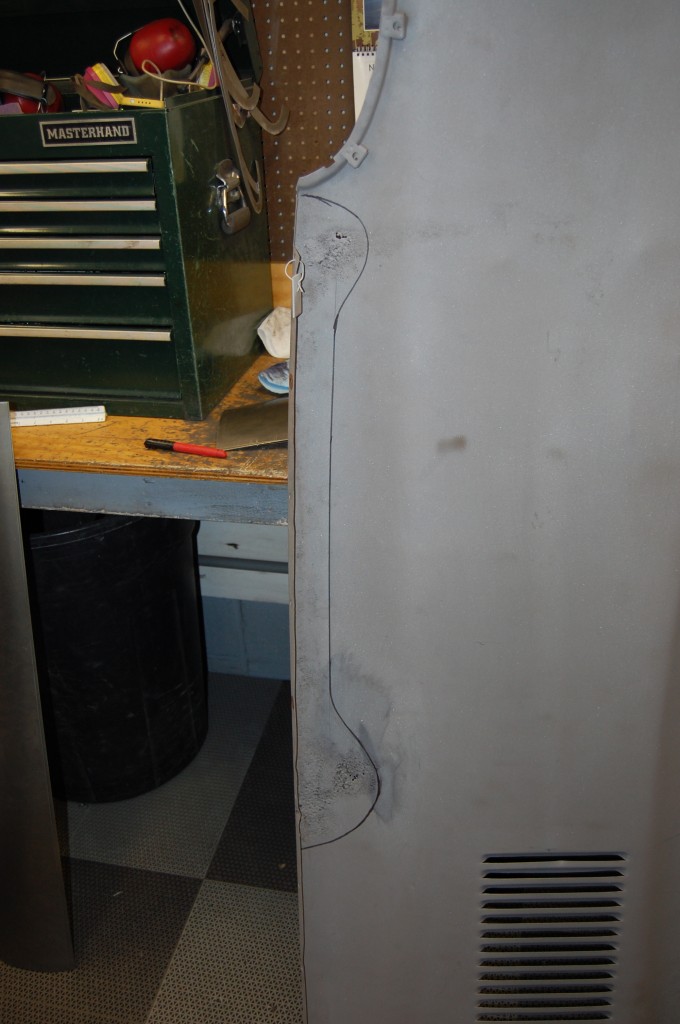
- The marking for the other side. Note that we have tried to go well into the “good” metal, and out of the heavy pitting.
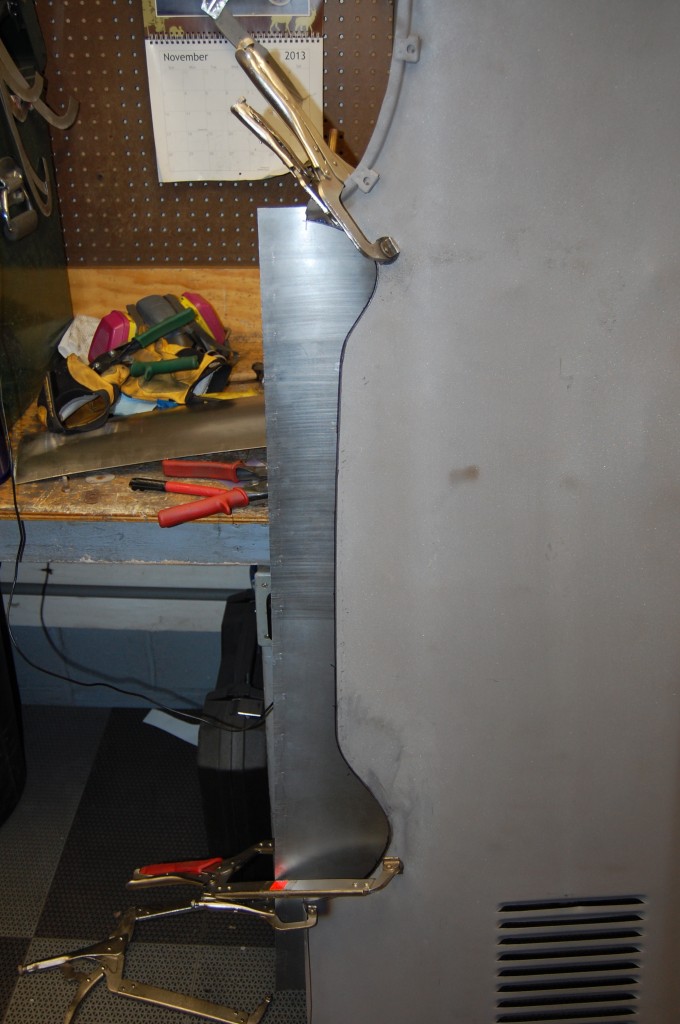
- More new pieces were rolled and then wheeld in the opposite direction, then fitted tightly.
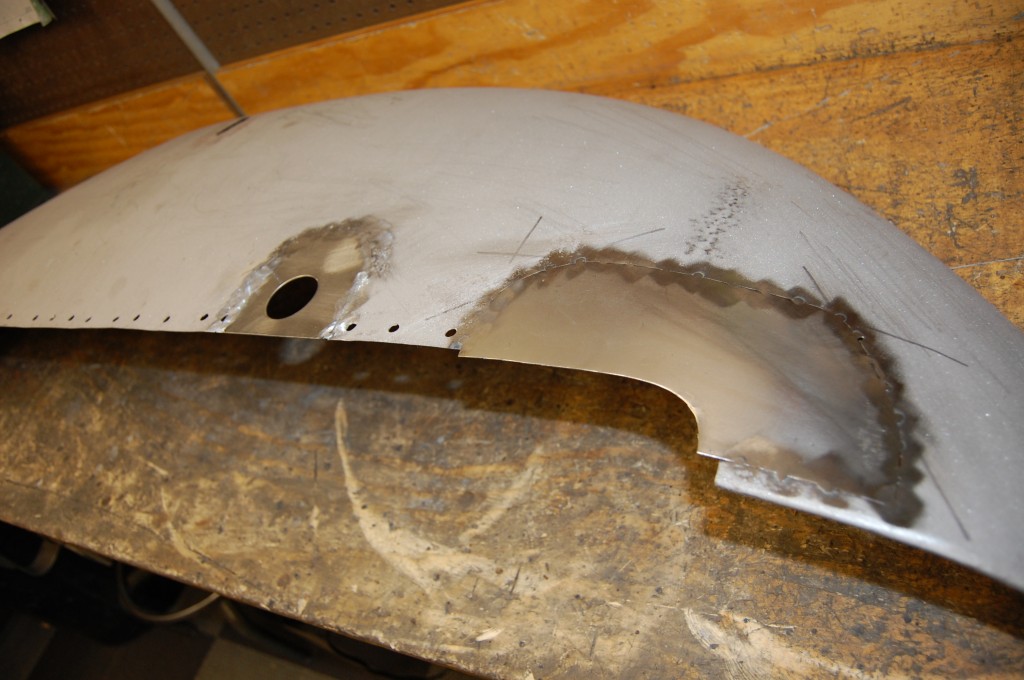
- Fast forward (it started getting hectic, and working with a piece this big is “trying” on the nerves…) – here we have fitted and tacked patches for both sides into place.
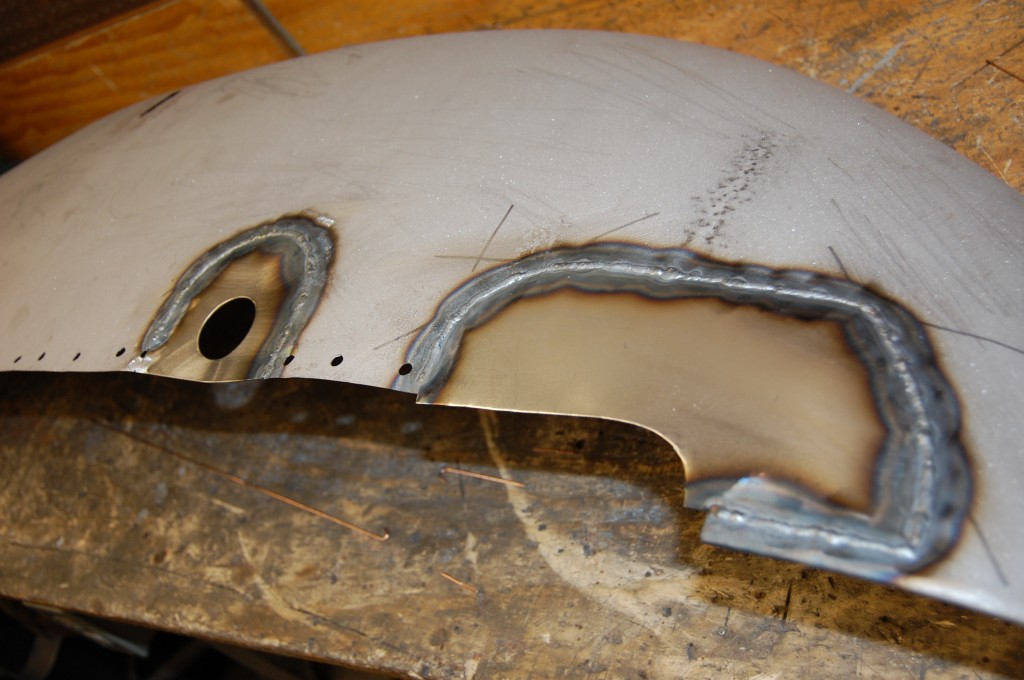
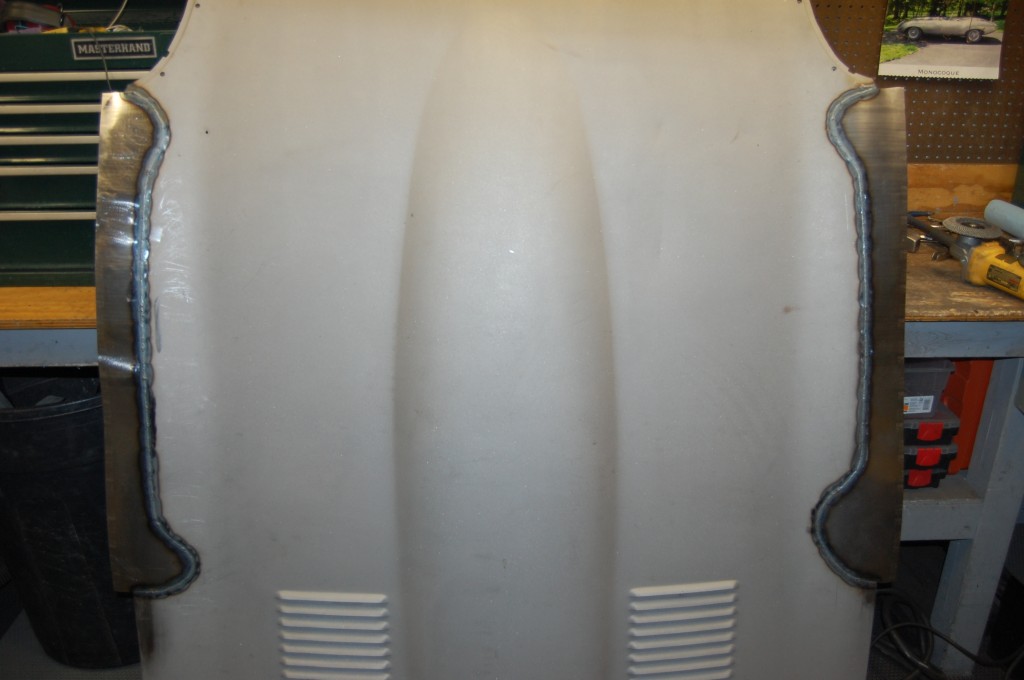
- Both patches went VERY well! Here they are TIG welded in and this is where I called it a night that day – feeling VERY proud!
- And then this is a COUPLE of days later… The grinding, planishing, and metal finishing of these patches turned out to be a REAL chore – MUCH harder than the wings! Then, turning the edges down was ALMOST IMPOSSIBLE! I hadn’t really put much thought into the physical act of running the center section through a bead roller until it came time to do it – woops! It took Brent and I three hours to turn down both sides – which turned our arms to jelly! Brent made it through without quitting OR getting fired – no small feat when you’re holding the other end of a panel I’m trying to steer through a machine just where I want it!
- So we made it through… Part of that three hours was not only turning the edge down, but arching it to match this template EXACTLY – which the wings have already been matched to. Here, we are checking that, and then marking the holes.
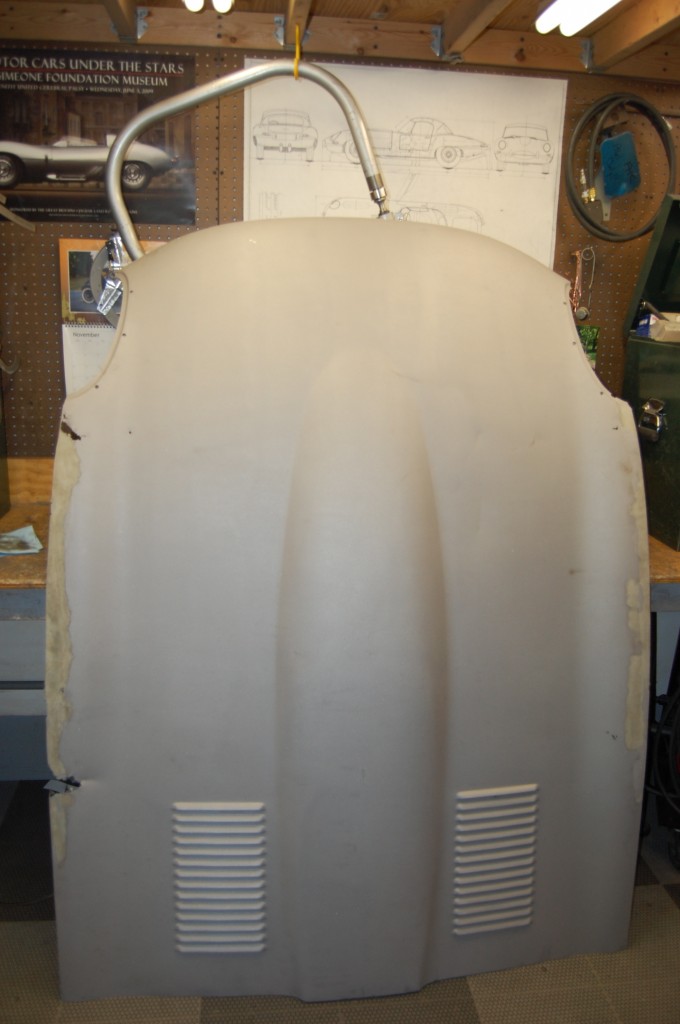
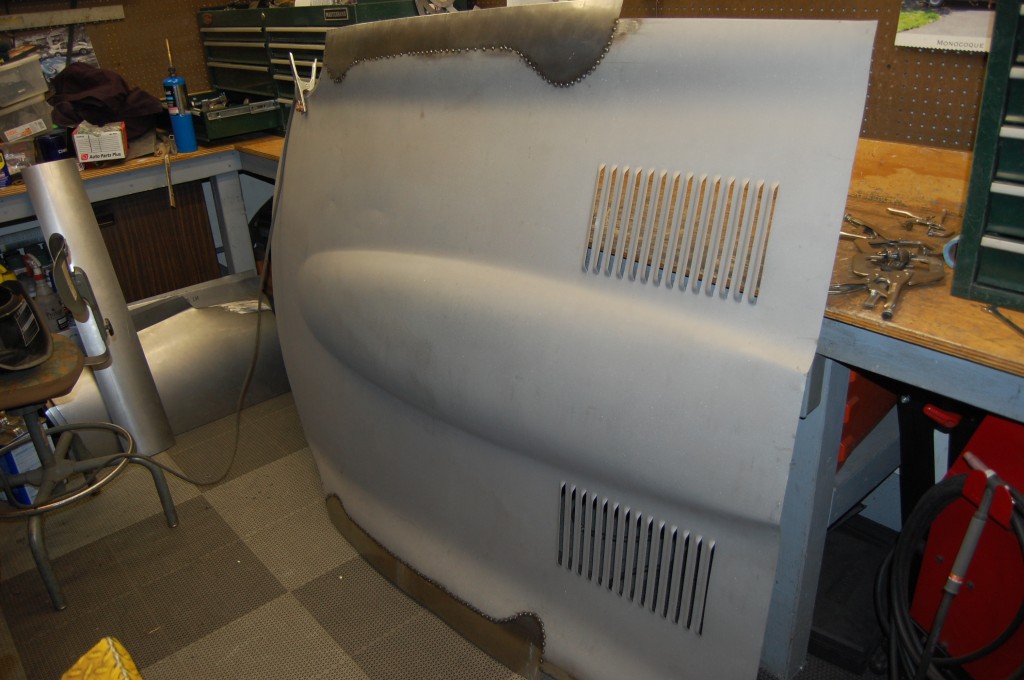
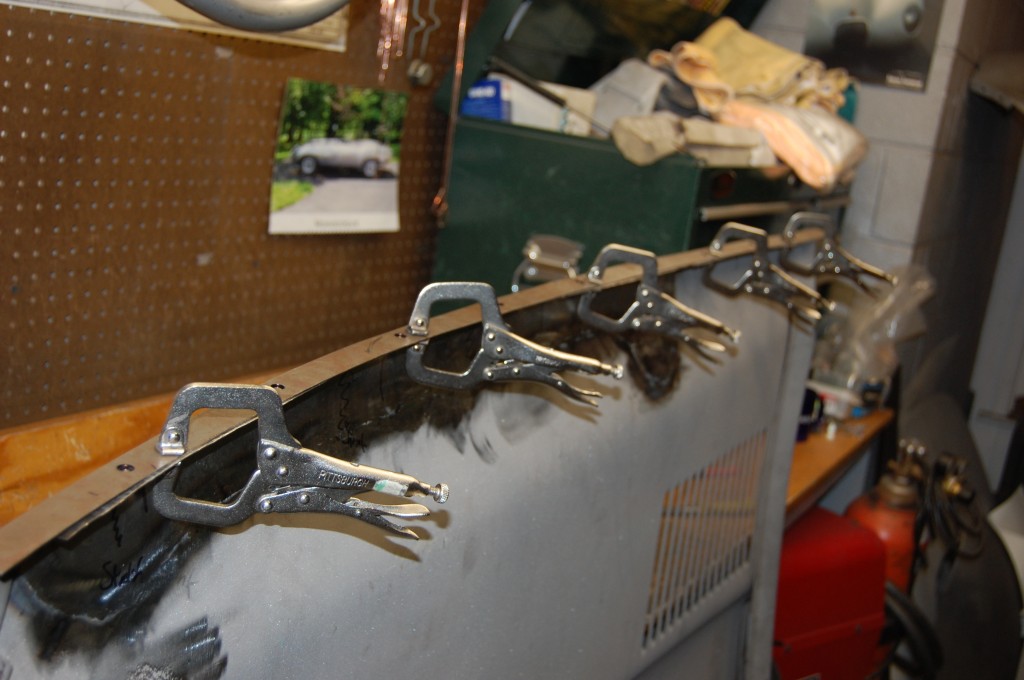
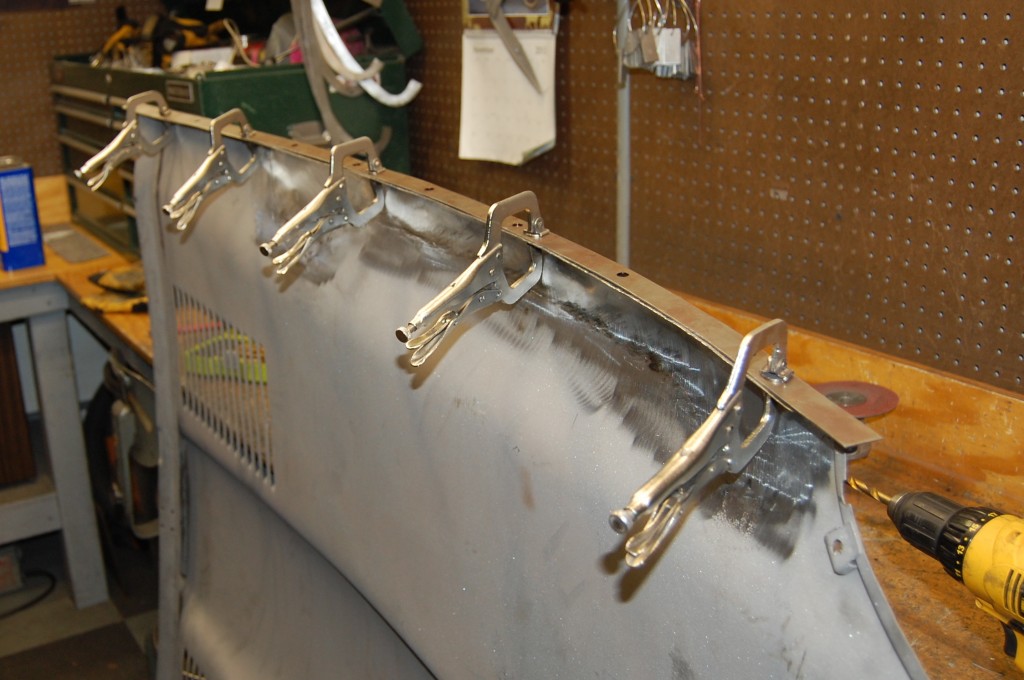
- One last repair – you MUST do this! This rear support member is spot-welded on the ends, and in a section about 10 inches wide directly behind the louvers, but is GLUED in this section. And EVERY SINGLE ONE comes unglued! And you just can’t have that when trying to match the curves of the bonnet up to the cowl – another lesson I learned the hard way…
- So now it’s official – I do this to ALL of them. Which is to scrape out the old glue, clamp it down tight, and weld it. I’ll pass on some help here – you are going to have to drill the skin and plug-weld it – spot-welding doesn’t usuall work because the metal in here has surface rust, etc. And YOU MUST GET ALL OF THE GLUE OUT!!! ALL OF IT!!! If you don’t, our weld is going to go nuts like the gas is turned off, and you will make a big mess of an otherwise perfect center section.
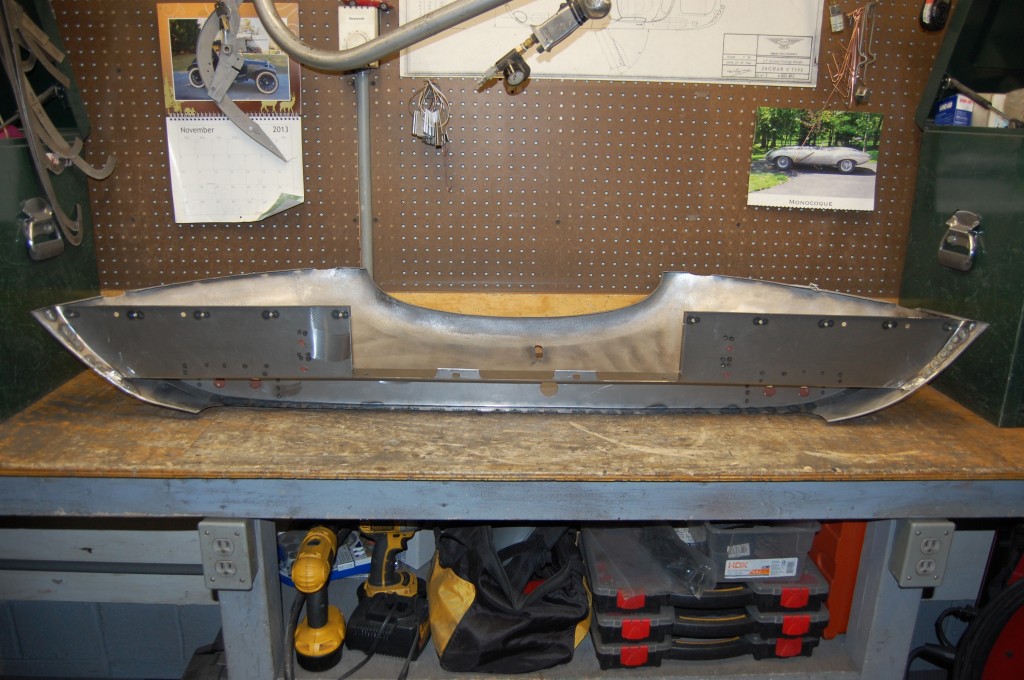
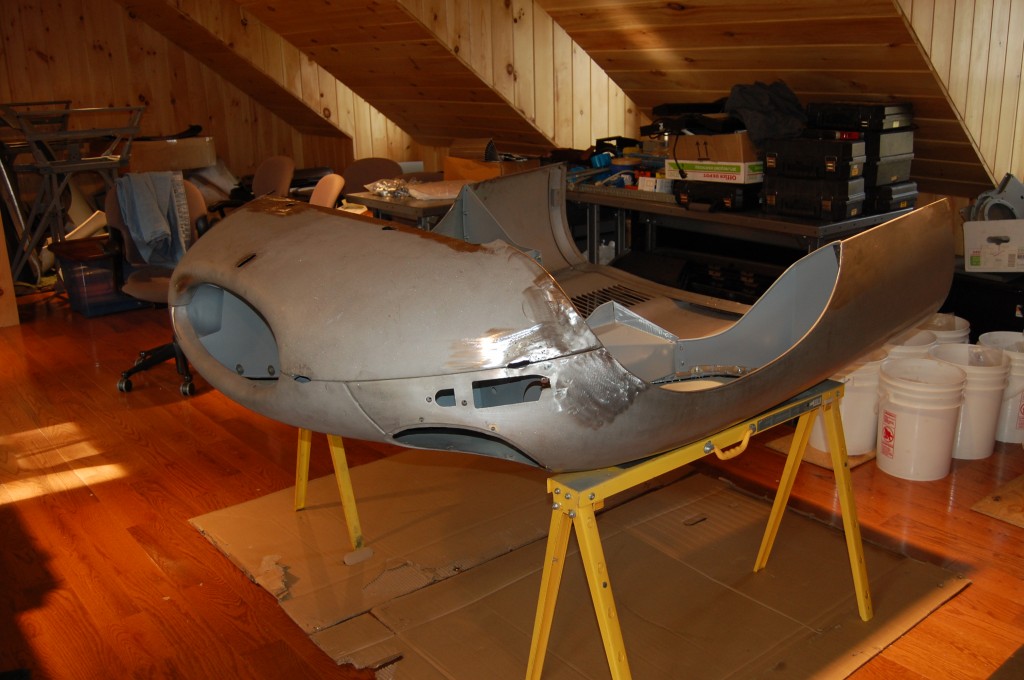
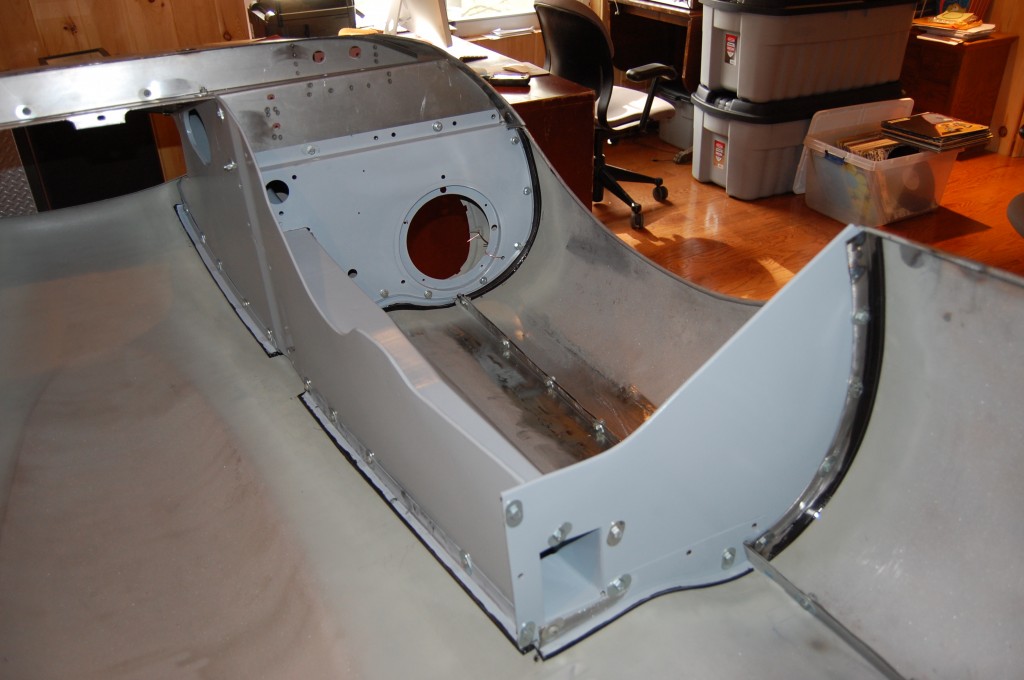
- Everything is done now, and it’s time to test assemble and glue in the flanges. We have been doing this all year upstairs in the “office-parts-packing room” – it’s the only place where we have space to have a bonnet sitting around undisturbed for 72 hours after it is glued. I like it – I need to be in “my happy place” to glue these things – it’s meticulous and MESSY! But LOOK at that MOUTH!!! See how nothing has really been sanded or worked on – it was just untouched after all these years!
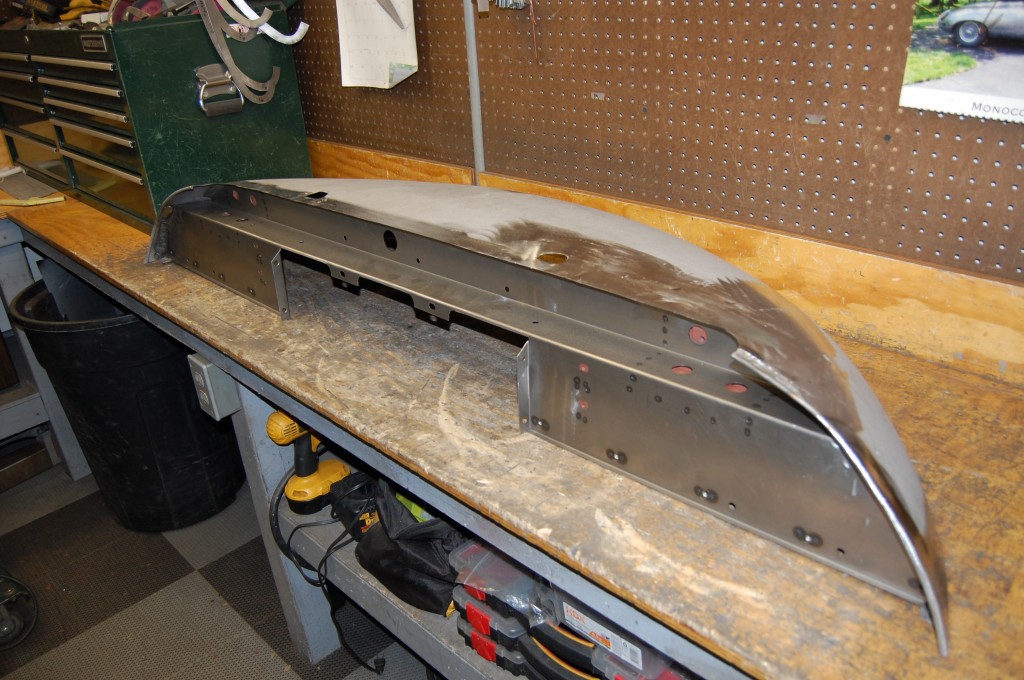
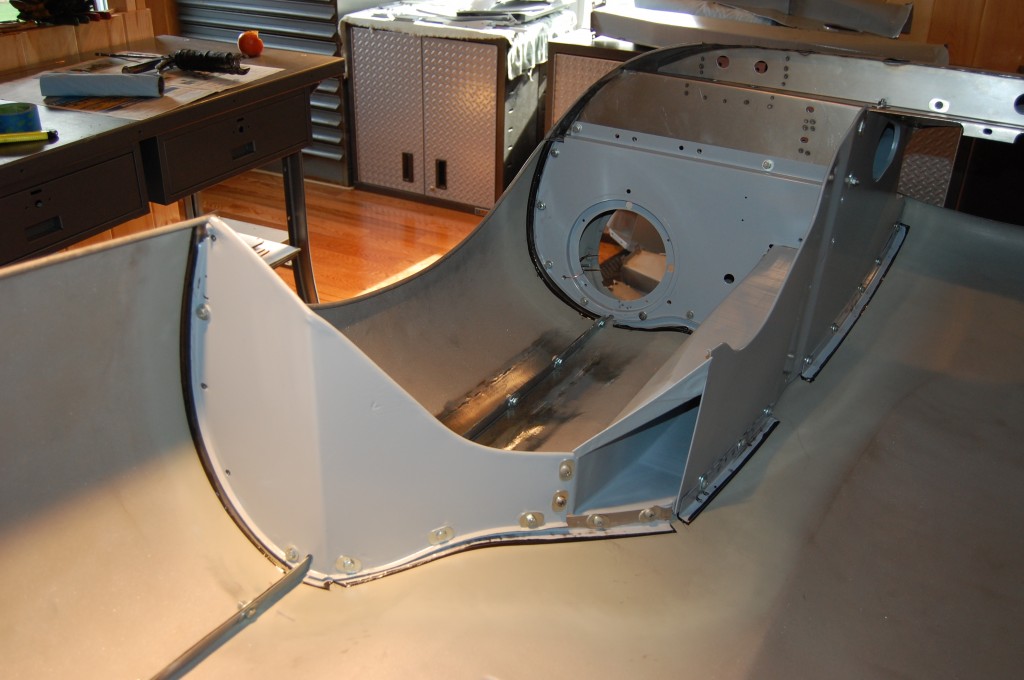
- Here is the RH side all glued up. This will all be disassembled, the residual glue will be cleaned up, and then the 4 main outer pieces of the bonnet will be epoxy primed – after and necessary adjustments are made that we have discovered during this test assembly.
- Here is the other side – showing a flange that is a little messier, but we do a whole procedure with the dried glue to make our bonnets SUPER clean in the finished glued flanges. There is my desk in the background – I spend alot of time there writing emails, blogs, and doing the “business” of Monocoque Metalworks. It’s cool, though, when bonnets are up here being glued, to sit at the desk right next to them – it just seems “right” for me! When I’m gluing, I turn the computer screen around and watch old movies on Netflix.
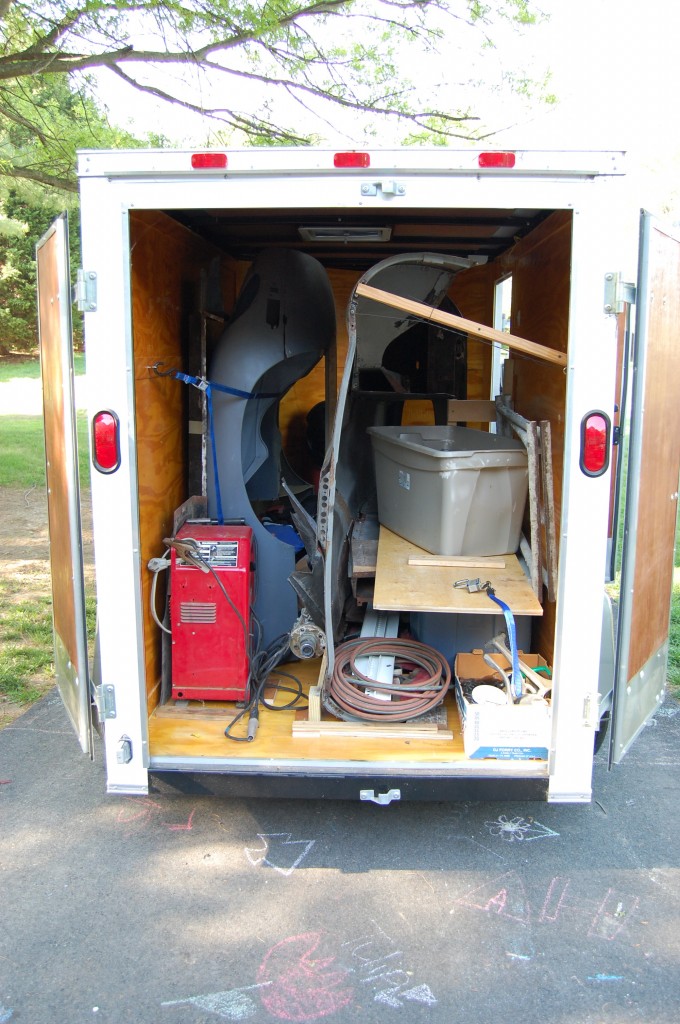
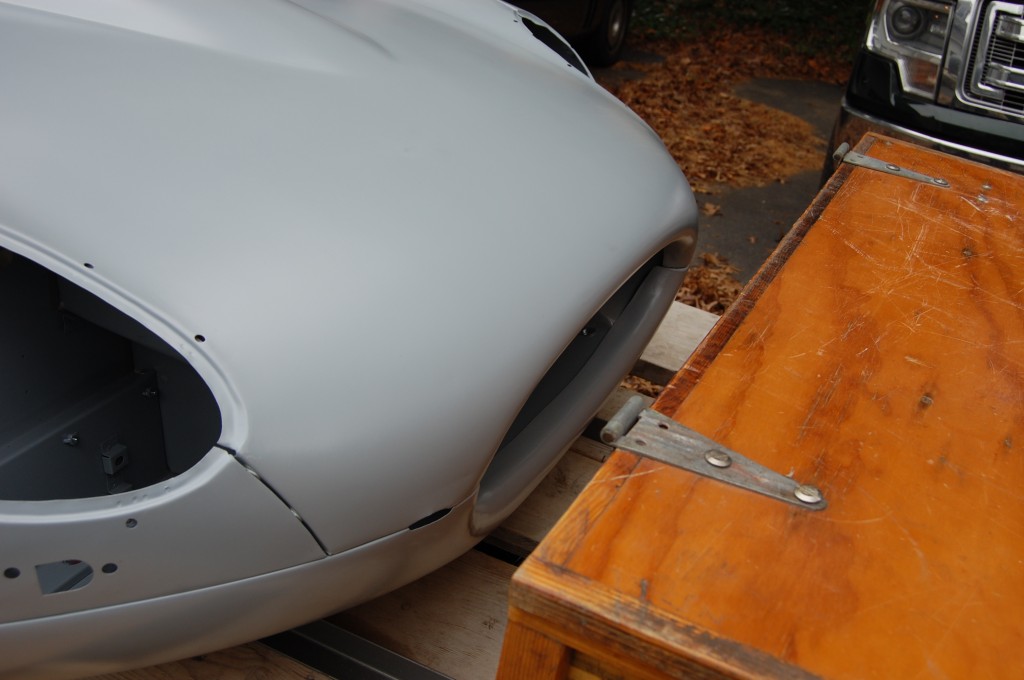
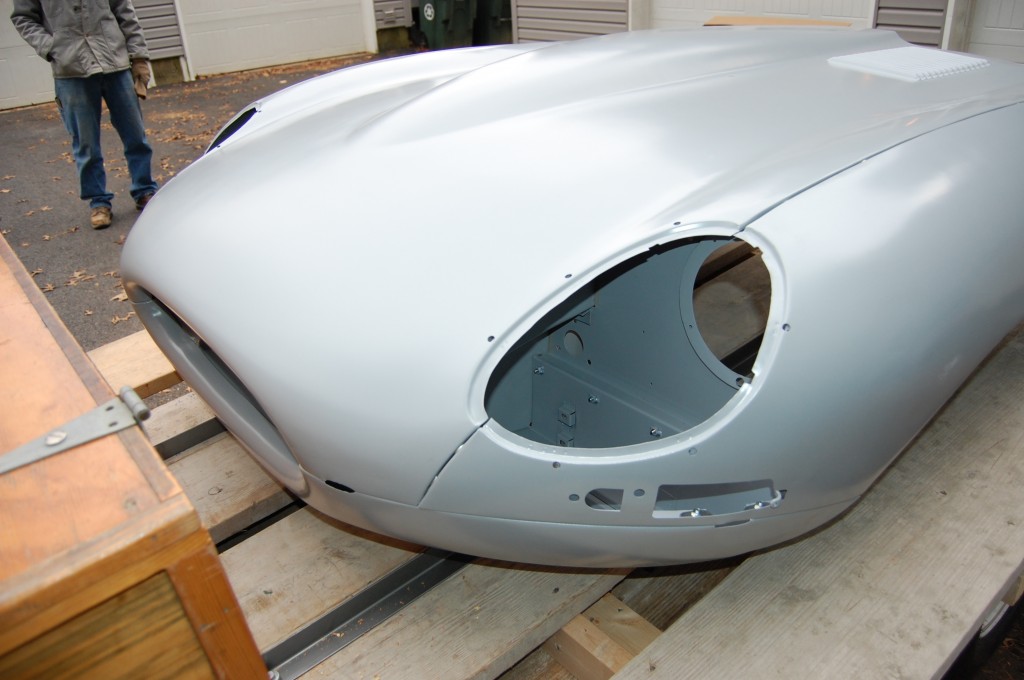
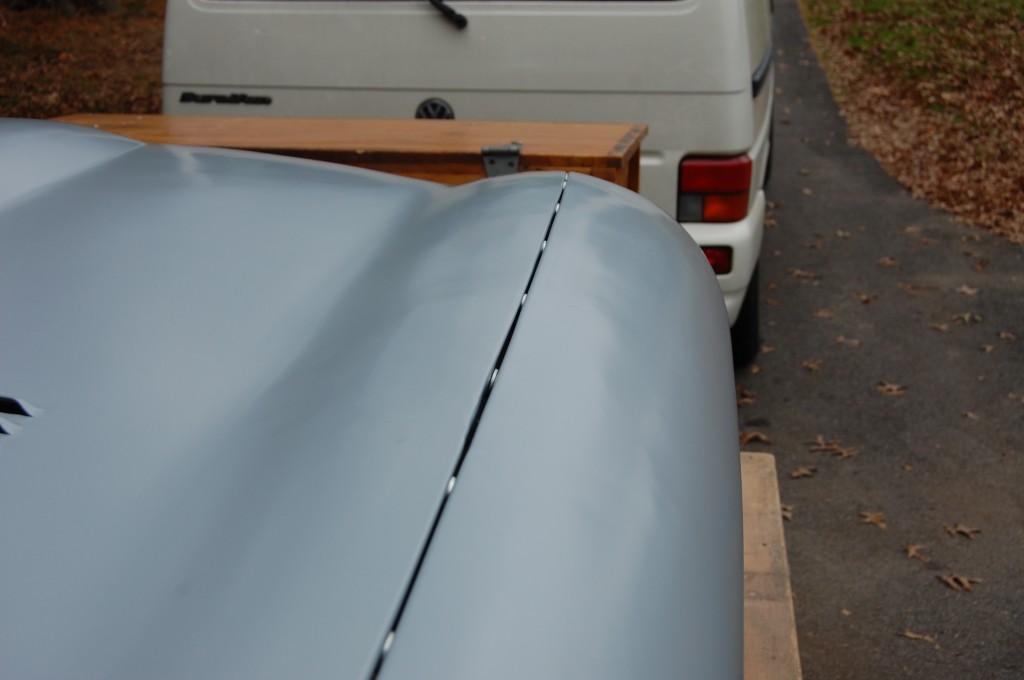
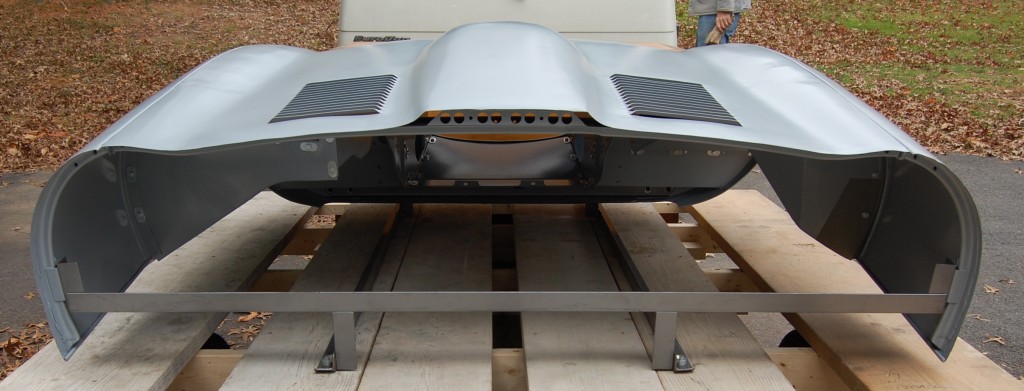
- And then things got really busy again, and so the only finished shots I managed to take were once it was loaded up on the customer’s railer on the way back to Florida a few weeks ago. But LOOK at that MOUTH!!!
- That’s just steel and primer, baby!!!
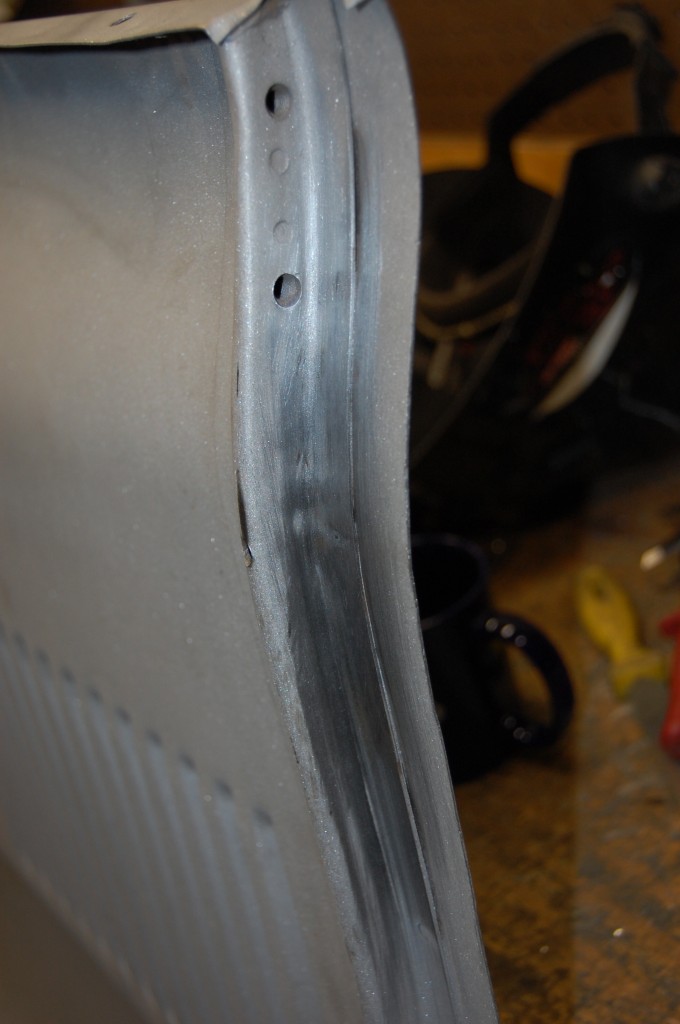
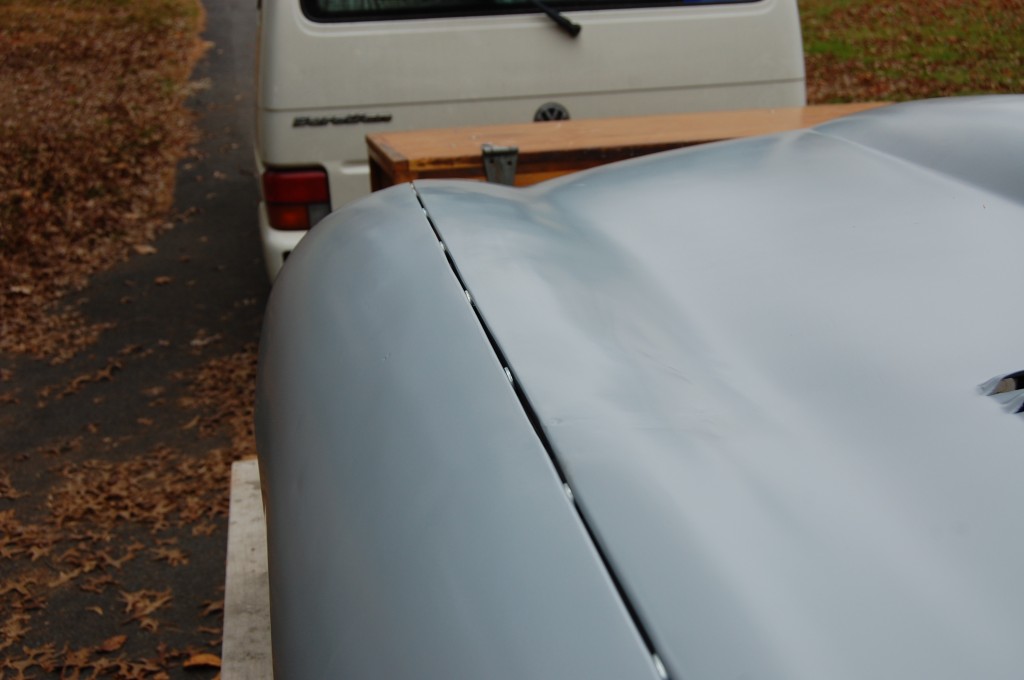
- Here are the completed side flanges. The epoxy primer is very glossy compared to the etch, and so surface imperfections are much more obvious. Note that the area we have repaired is “wavy” – it will need minimal filler to smooth things out. We’re talking something in the range of about .020-.040″ – about the thickness of the metal itself…
- Here is the other side – pretty good considering it’s JUST steel! This turned out GREAT!
- Here’s the parting shot – pulling out of the driveway. It’s weird to put your heart and soul into a piece like this for several weeks, and then have it leave – often never to be seen by me again. This bonnet was EXCELLENT, and a 100% concours-quality piece when completed. Good luck, old girl – you’ll probably last ALOT longer than me now!

