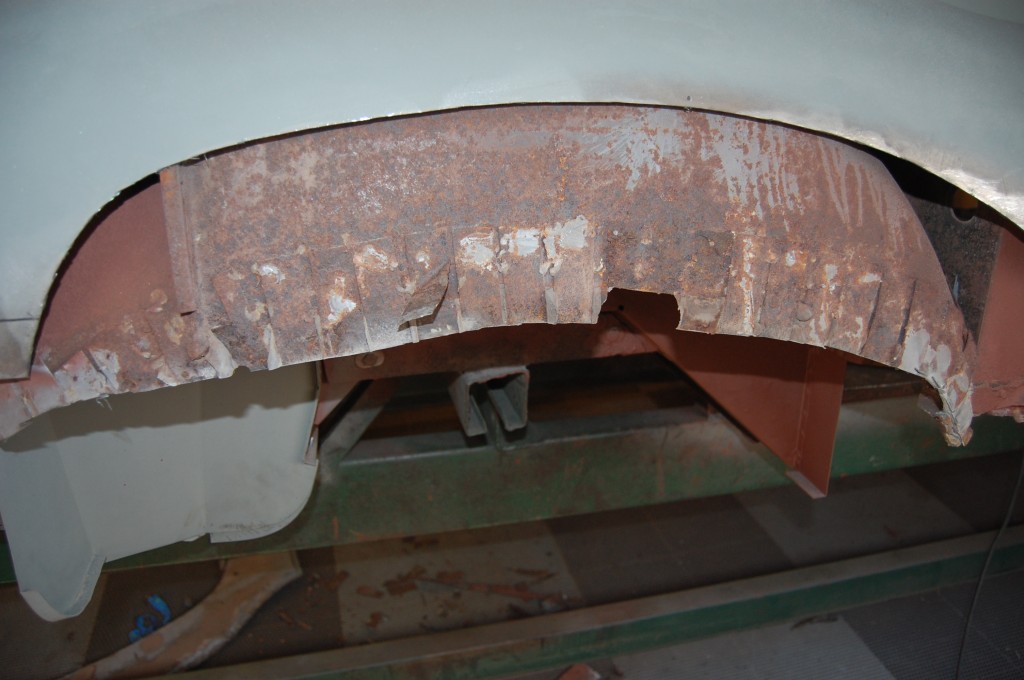
Well, here we go again – my old nemesis – the rear wheel arch on the E-Type coupe…
In case your new to the blog, this is the repair that I dread the most. On bonnets, I can take ANYTHING and make it as smooth as glass again – requiring little or no filler. I’ve done this on everything from your “average” bonnets with mangled noses, dent puller holes, rust in the seams, etc. – to aluminum bonnets that are race-crashed – even a brand new V-12 bonnet that a building fell on! But I can do that because I can get to both sides of the panel! I’m getting better with the hammer and dolly work all the time – on some stuff, I’m not even using the shrinking disc to smooth it – but I HAVE to be able to get to both sides of the panel!
Because the coupes (and 2+2’s) have an inner wheel housing in the rear, once the rear wing is repaired, that’s IT – the back side is closed in and except for a few small areas on the end, you can’t work the panel from both sides. The factory got around this by putting the wing/roof assembly on DEAD LAST – they spot welded it on around the edges and that’s it – there was no heat in the cenger of the panel, and hence, no shrinkage or warpage. But now, when we repair the typical rust in the rear wing along the wheel arch, we are doing a welded seam up in the center of a panel that is closed in…
I have seen photos of this patch being done in the typical way – tacked with a MIG and then stitched in with the TIG, but there’s just NO WAY they’re not warping the panel and handling it down the road with copious amounts of filler… I’ve tried doing this a couple of different ways with varying results, and I’m getting closer and closer all the time, but the answer always seems to be to stay REAL close to the lower edge of the wing – which is what I suggest you do – cut down the patch so that it is as close to the edge as possible – this will give the weld the least opportunity to start pulling the metal in when it shrinks.
Well, then this car came along… Someone has already put these patches into place, and OH BOY, did they ever! So on this one, I knew that it was going to be the final battle between me and this repair – I simply HAD to get this nailed down this time! And – after years of doing lots of roadsters, my schedule is packed full of coupes for probably at least the next year!
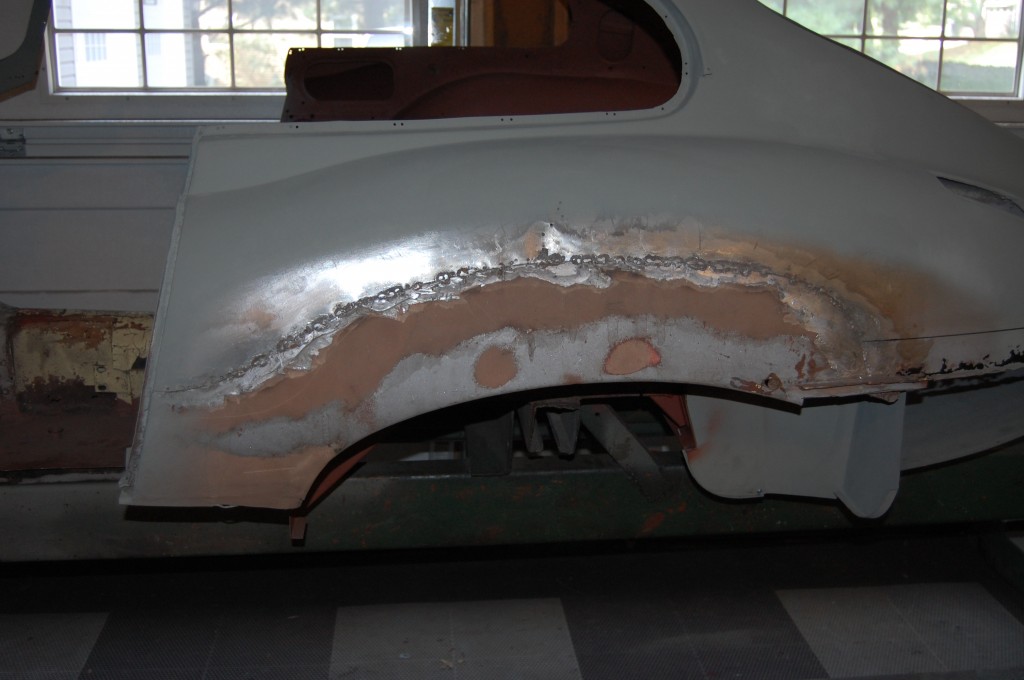
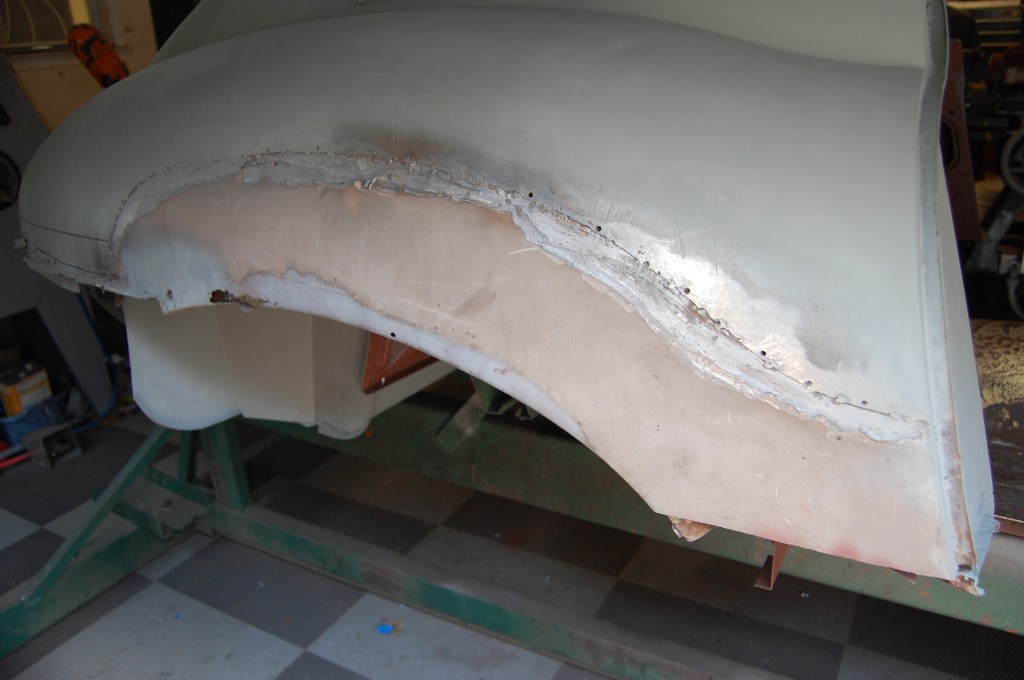
Take a look at this carnage – and you’ll see why I’ve been putting this car off day after day – week after week – month after month…
- Well, here it is… this has ALL of the “don’t do’s” – and then some! This E-Type probably had rust along the wheel arch in the lower 1-2 inches when this repair was done. And instead of cutting down the patch panel, the previous bodger put the whole thing in – cutting out LOTS of perfectly good wing, and in the process, moving the weld WAY up into the danger zone where warpage is unavoidable…
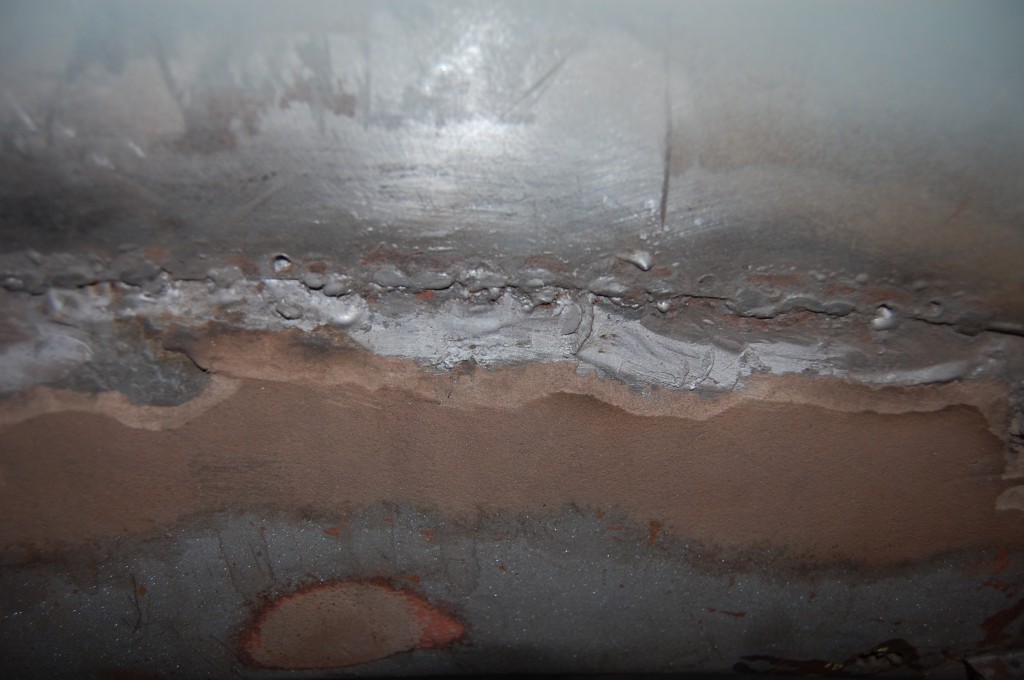
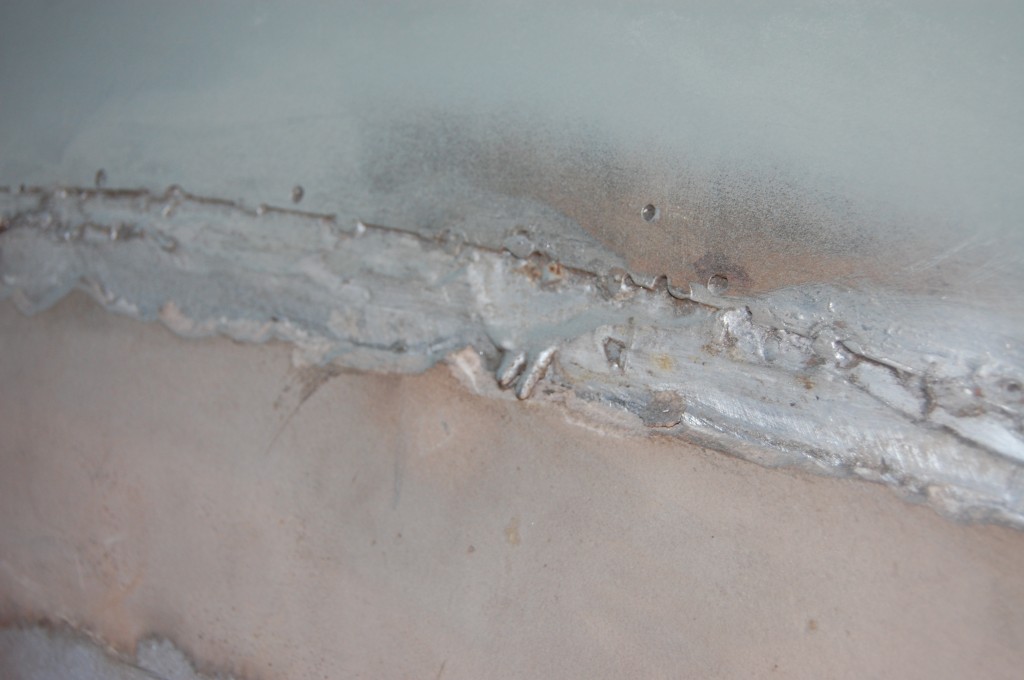
- They tried “just making little tacks” to keep the heat down, but listen to me people – THAT DOESN”T WORK! You’re putting the heat into the panel – you might be doing it in lots of smalll doses, but it still adds up to shrinkage and warpage. Also, by moving the seam way up into the panel, the wing lost it’s strength to curve itself outward, and the repair “sunk” the whole wing in. Then out comes the filler – lead AND Bondo in this case – LOTS of it…
- This is a classic… The welding in of the patch warped the wing so badly, that after the patch was in, they had to pull this kink out with a dent puller!
- Another shot of the massive filler. When this car was painted, you could tell the rear wing was all out of whack – even with this much filler, the wing was still “sunken” – it didn’t have the bulging hips that an E-Type should…
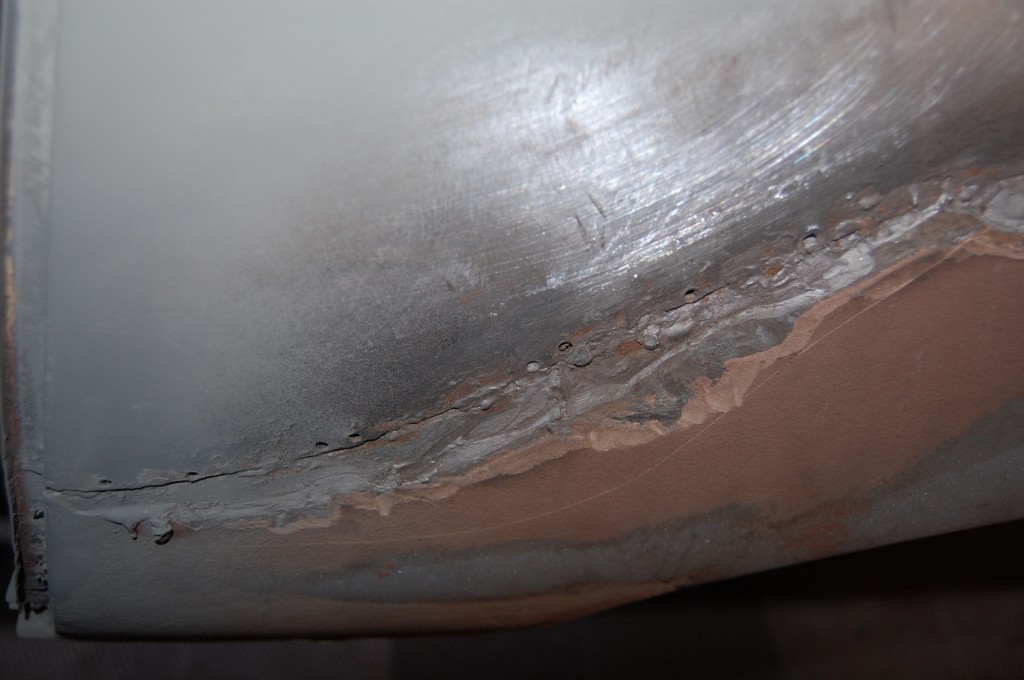
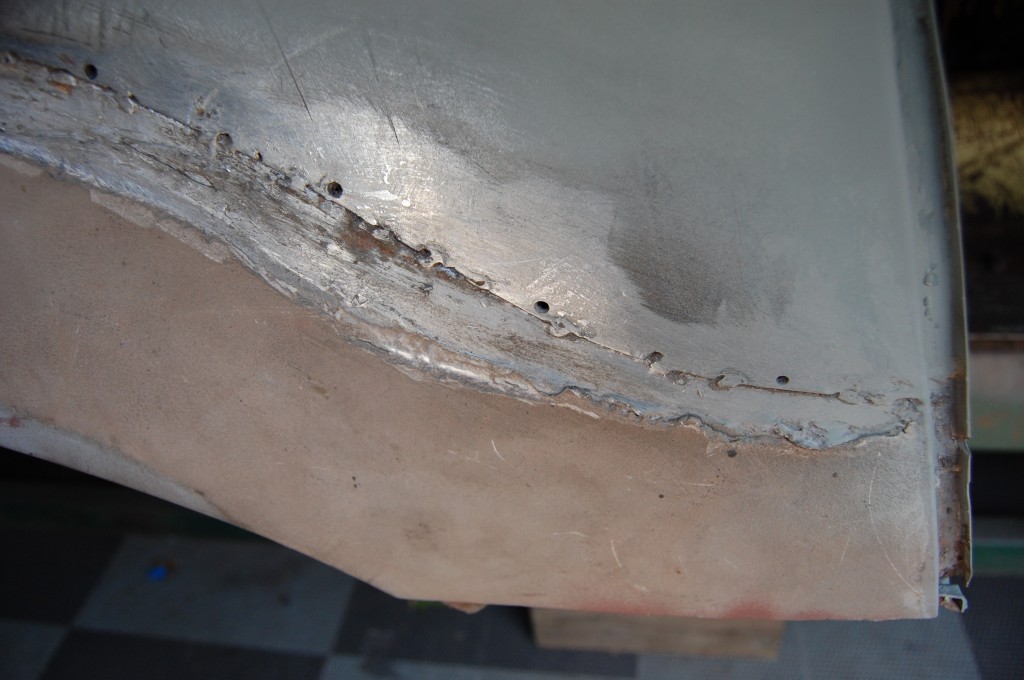
- Here is the other side – and we’re adding yet ANOTHER classic screw-up to the list – Poor or NO prep of the panels as they went in led to the REPAIR panel itself rusing out AGAIN! Sorry I don’t have a better close-up of that, but it’s REALLY rusted out in the back half there. And while you’re looking at it, notice the poor quality of the patch itself with an edge that is much too soft and rounded…
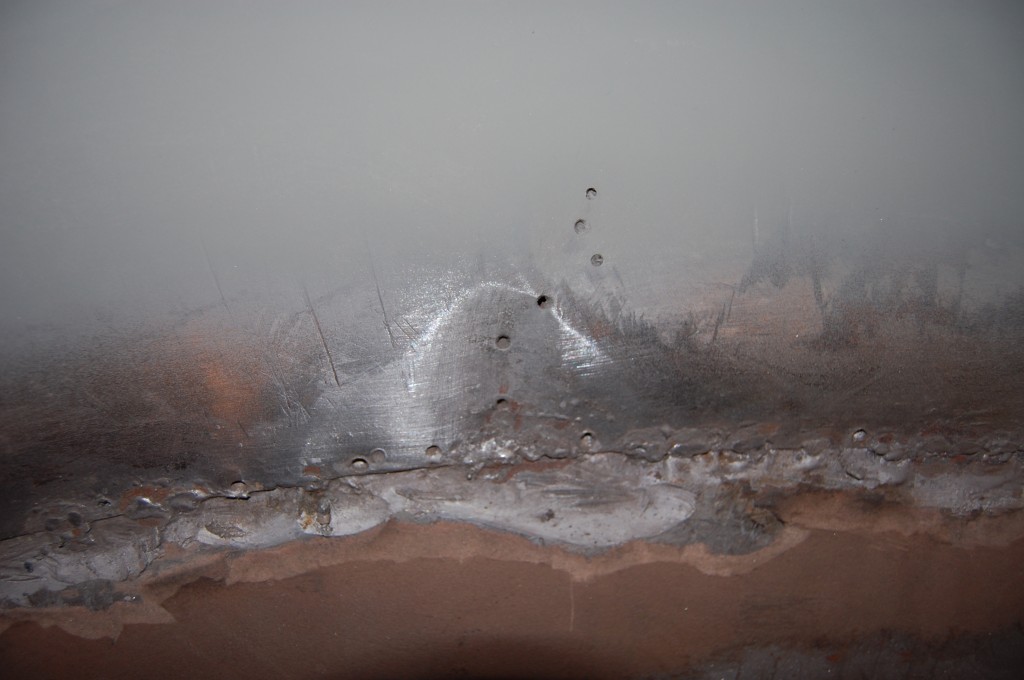
- The “tacked” seam on the RH side – they must have done this side second, and then put even less tacks in – they at least didn’t get the masive buckling and need the dent puller over here – they didn’t even dare to weld up their screw holes from the initial positioning!
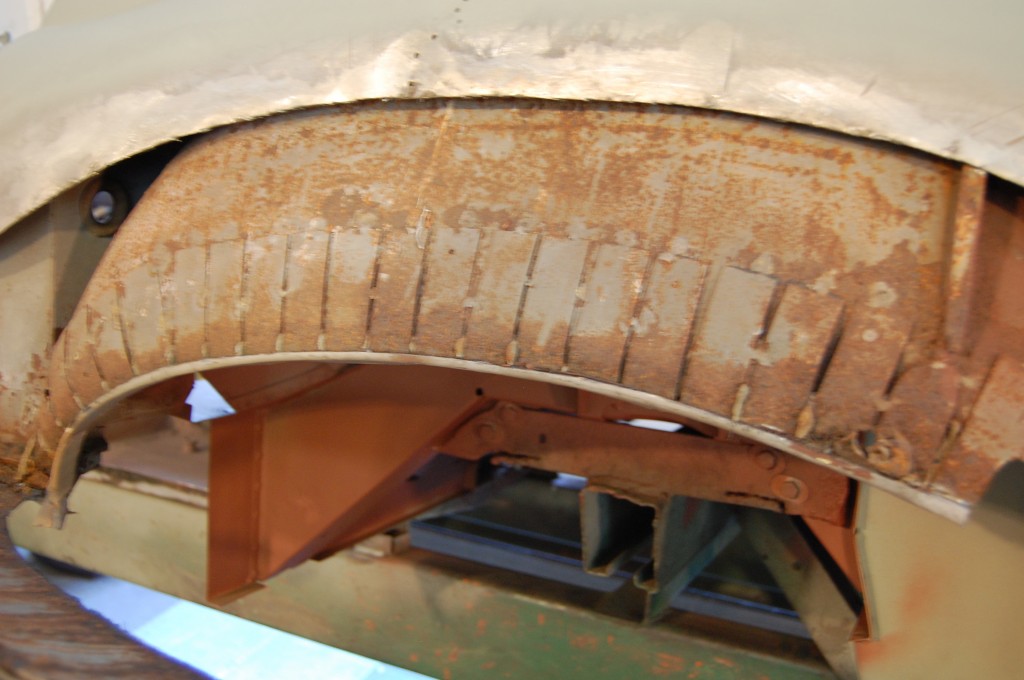
- One last shot – then I finally got the courage up to jump in, cut these out, and start the repair. I knew there was bondo on the INSIDE of the wheel well in the lower couple of inches, so I figured the inner wheel well would be a little messy probably and need some work, but…
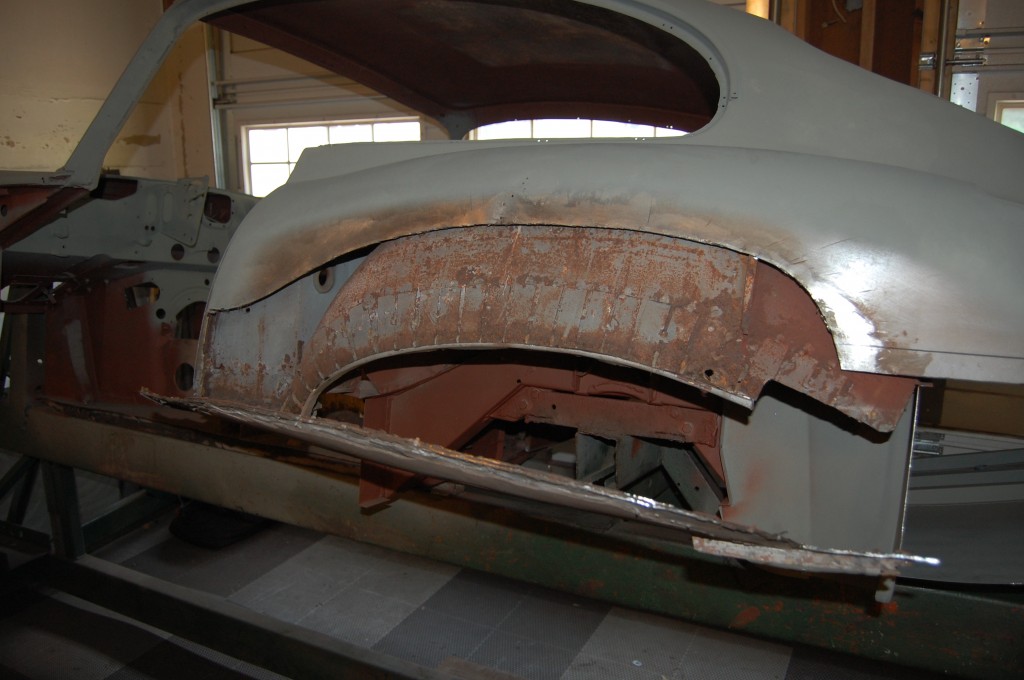
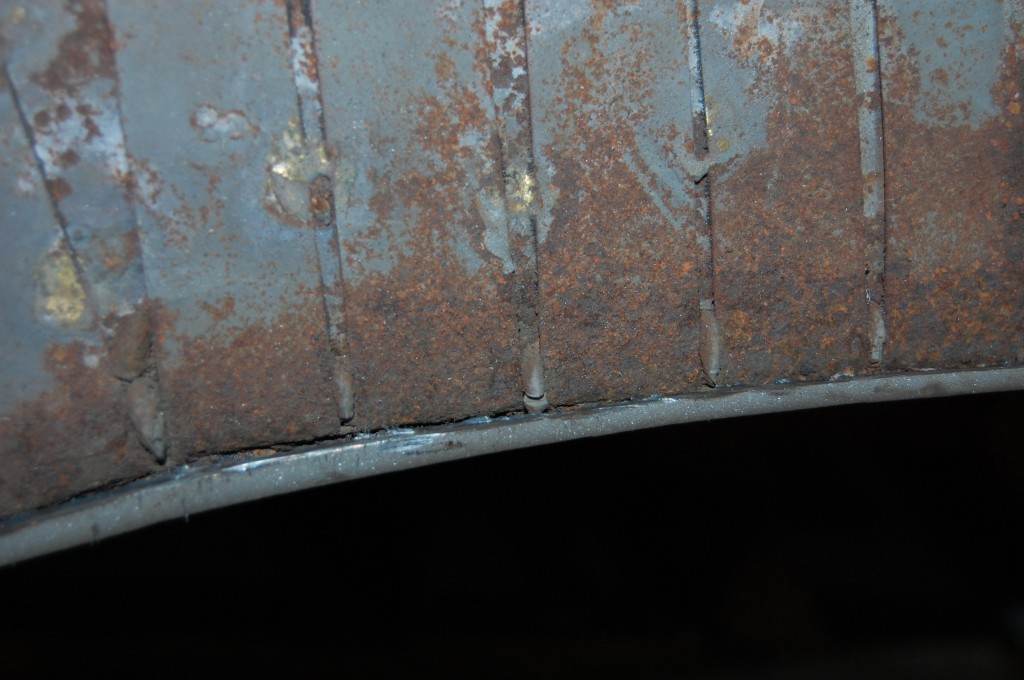
- OH MY GOD!!! I was certainly NOT prepared for this! I could not have been more freaked out if this turned out to be filled with snakes or something – this was HORRIFYING!
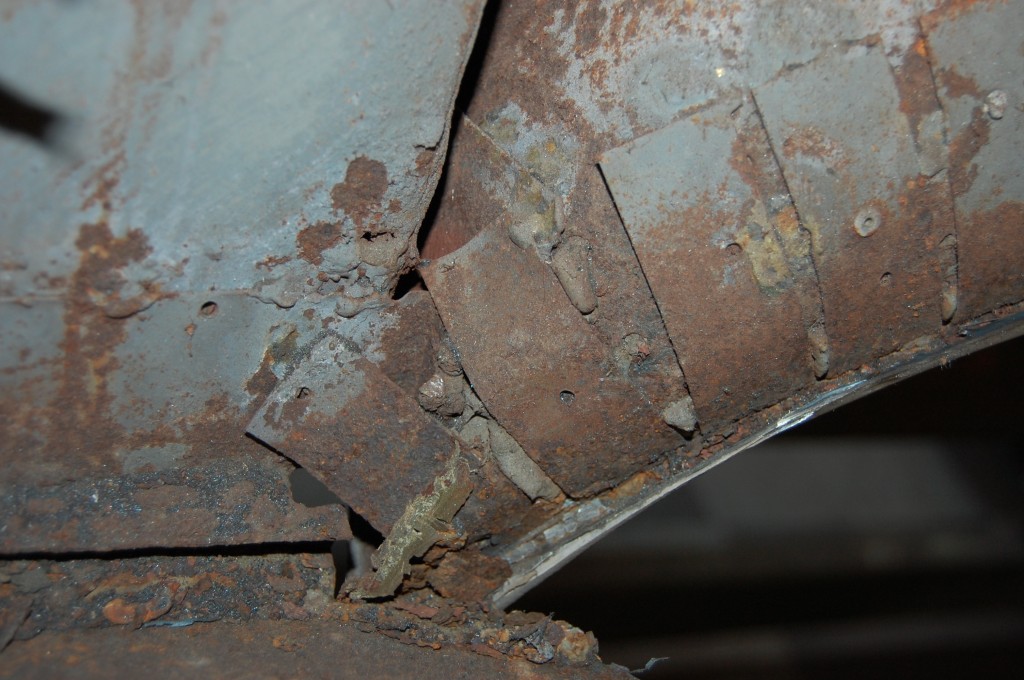
- Dozens of little pieces of steel were brazed to the inner wheel house and bent over to form the inner edge. It’s kind of ingenious, actually – in a really sick and twisted way!
- Here’s an idea – repair the car in a way that later on, when it’s finally done right, your previous repair destroys AS MANY panels as possible! AAAGGGHHHHHH!!!! Getting this all out of there took HOURS!
- Here’s another shot without the flash – sometimes that shows things better… Nope – still a nightmare…
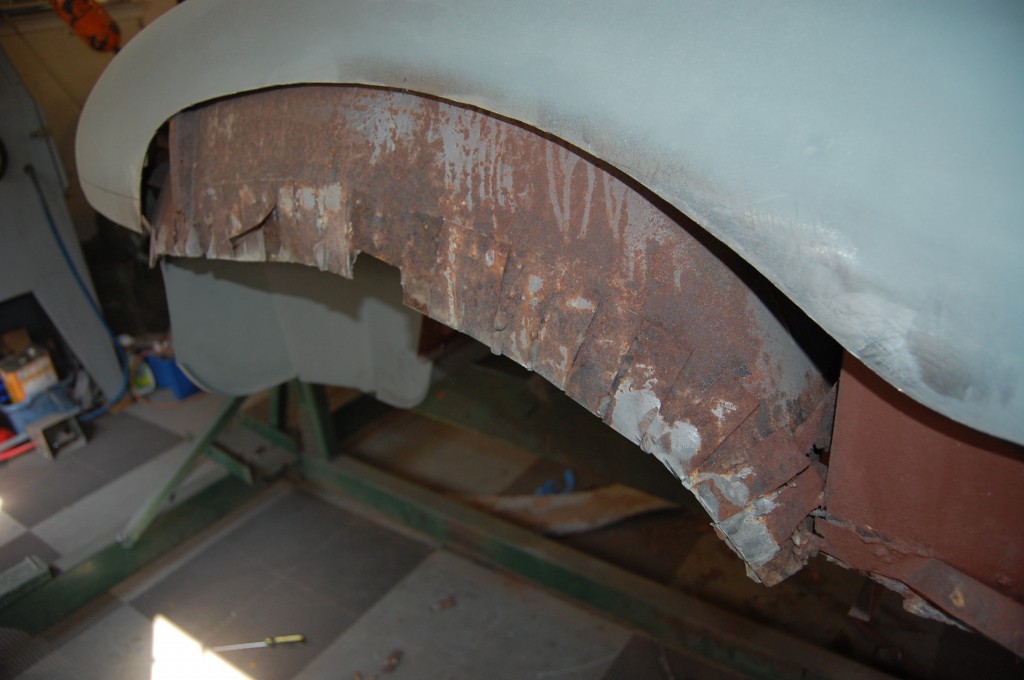
- Over to the RH side, and here we go again…
- So I’d already been having trouble getting the courage up to tackle this mess, and this little discovery did NOT help. SO after several hours of grinding, cutting, chiseling, sanding off the brazing, etc. – I finally walked away quite dirty – and disgusted – there were probably a few nice cuts and nicks in there too (that’s not that big of a deal, though – I cut myself almost EVERY day – even with gloves on most of the time – it’s unavoidable!) After this, a few more weeks passed making parts and working on bonnets – now you see why this car has taken so long!

