A couple of years ago, a customer from Washington DC brought up a tired and rust bonnet lower valance for repair and the installation of one of our new support members. We did the work, sent down photos of the repaired panel, and their response was, “Oh my God – I want the whole bonnet done!”
And they weren’t kidding either – as soon, we had the whole bonnet here – and what a bonnet it was – nearly perfect! It was a beautiful, original Series 1 bonnet, and aside from a couple minor dings here and there, PERFECT!
They were not in any big rush to get the bonnet back over the past couple of years, as they’re engine was being rebuilt, etc. And so I used their bonnet to make LOTS of patterns for new bonnet pieces – including as the “buck” for the forming of out headlamp conversion flanges!
Finally, we assembled the bonnet earlier this Summer, in preparation for re-mounting and aligning it to their shell. Of course, they’re shell needed a little attention, but surprisingly little, as aside from some rusty rear wheel arches (which I don’t think ANY coupe or 2+2 can escape from eventually…) – this shell is THE BEST Series 1 shell I have ever seen!
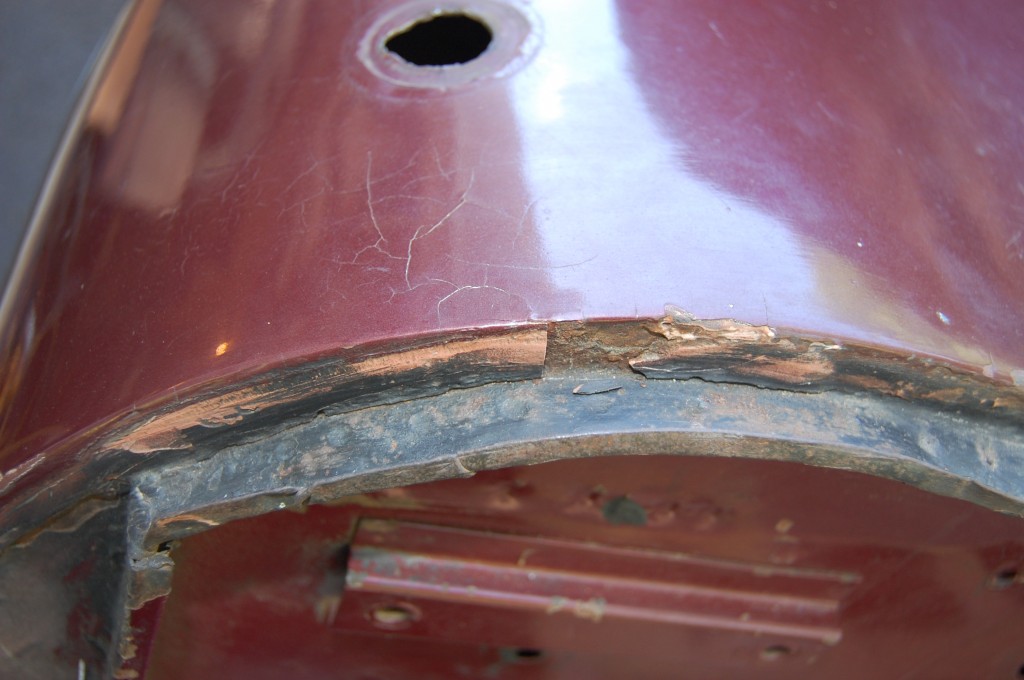
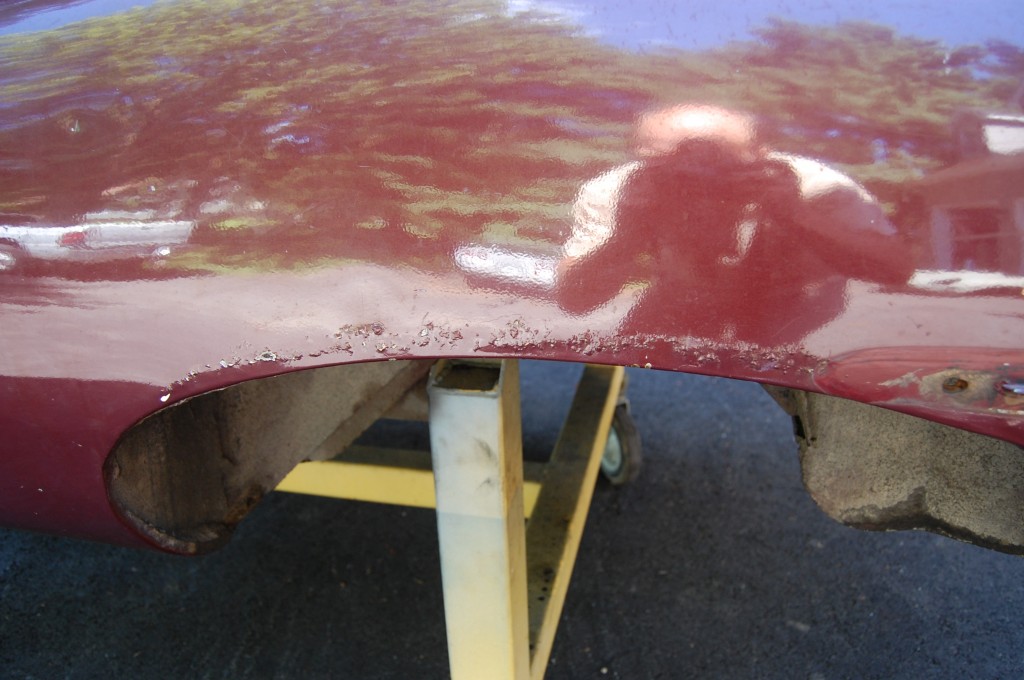
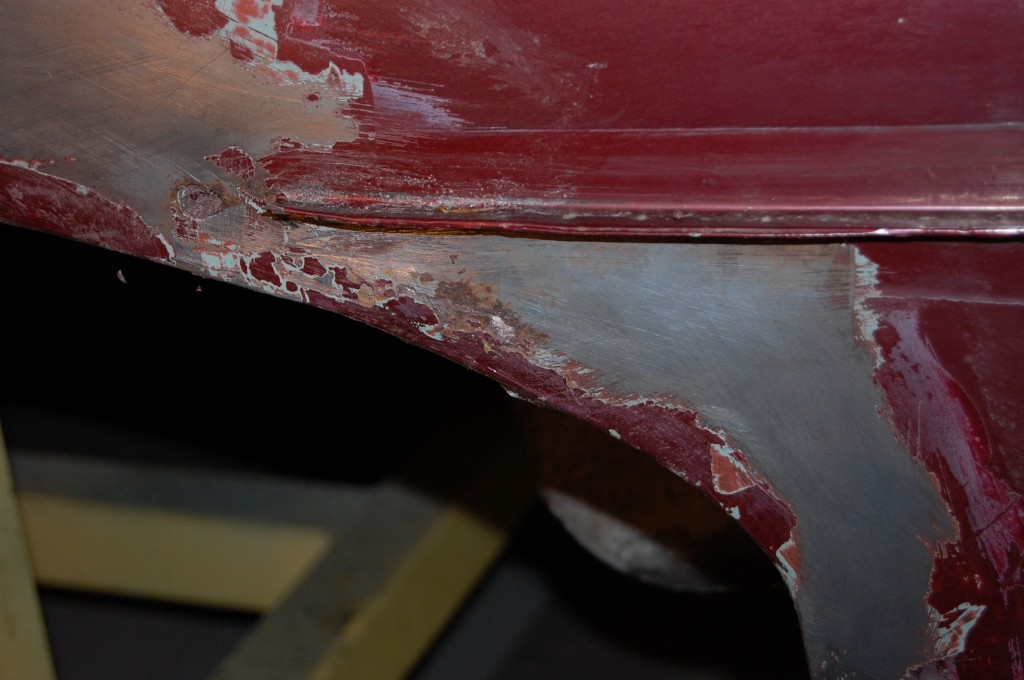
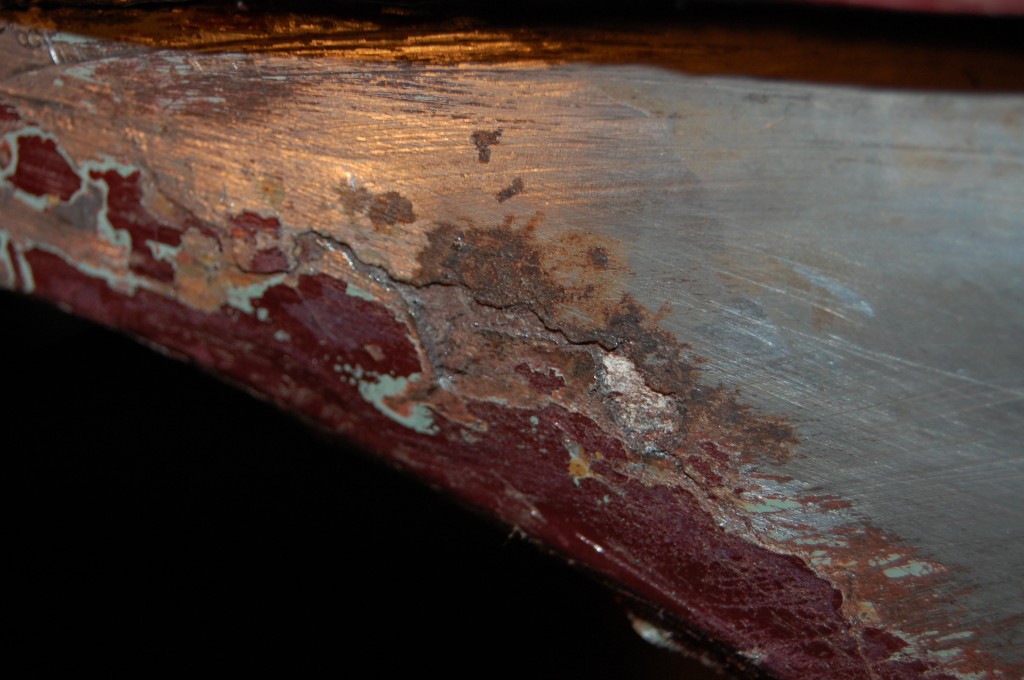
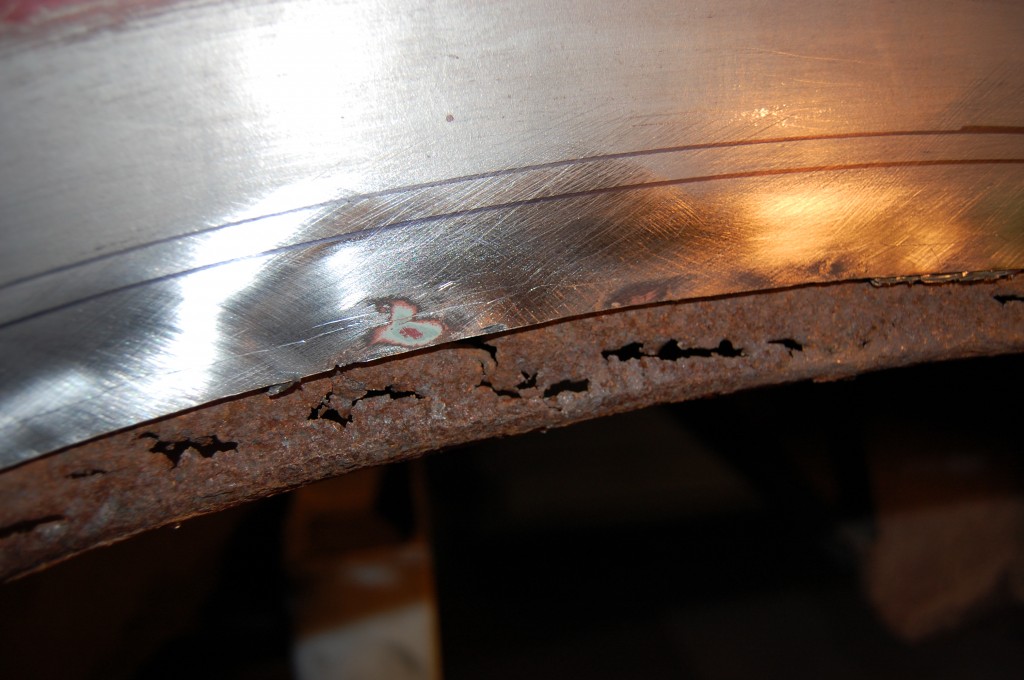
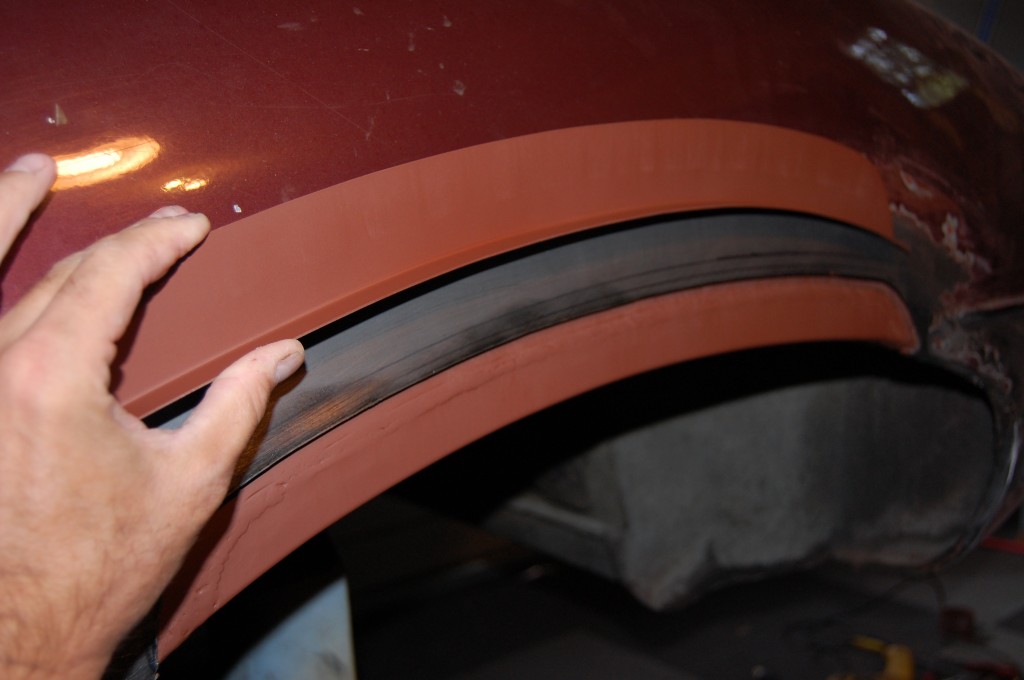
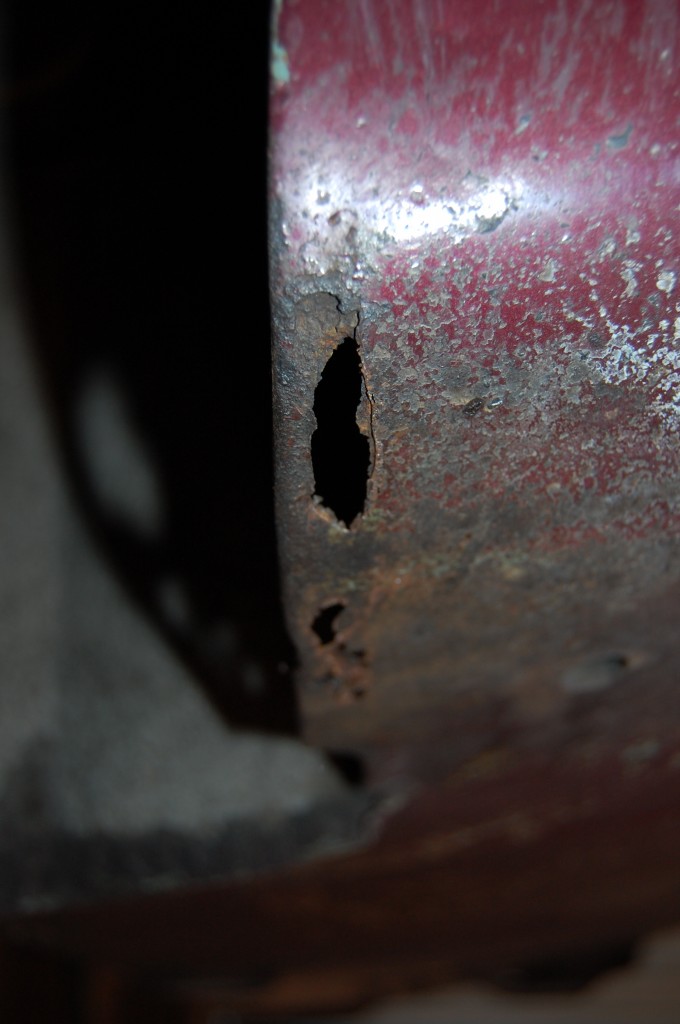
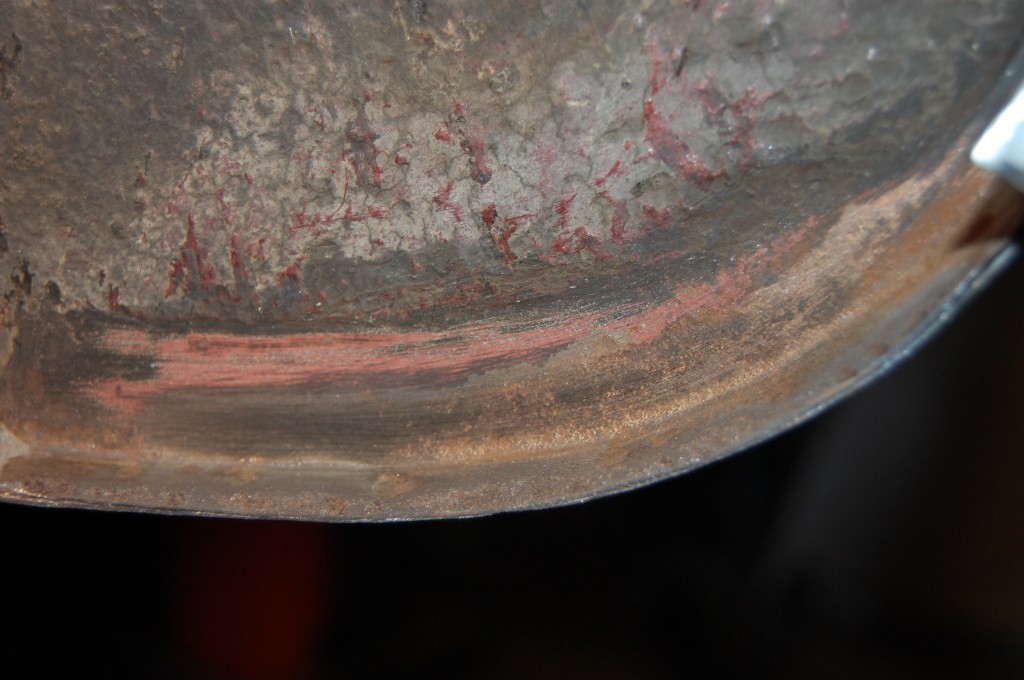
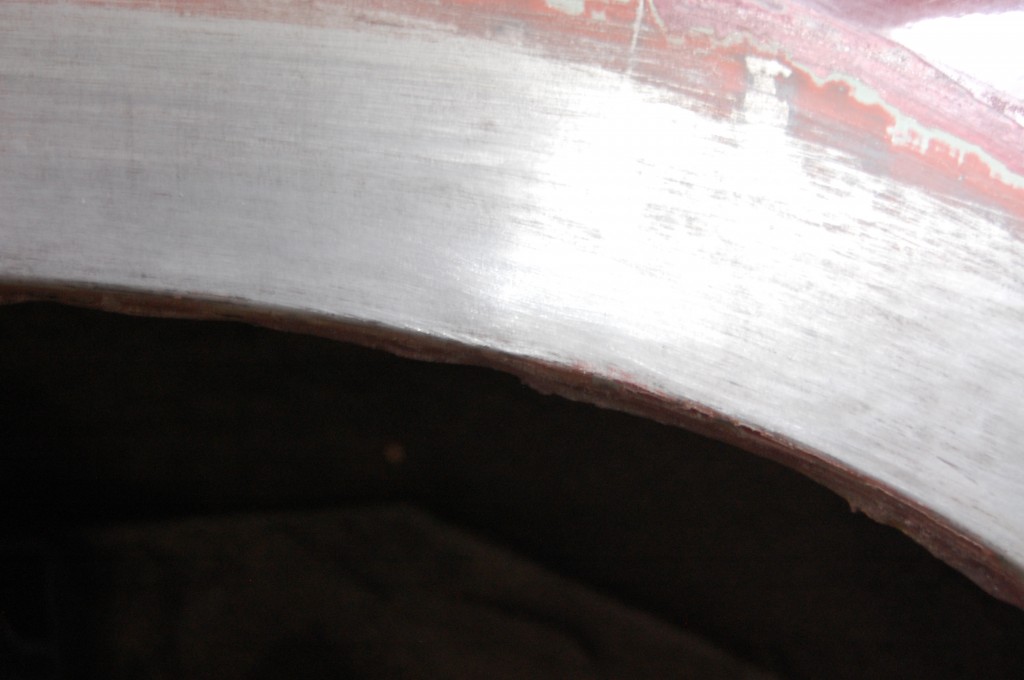
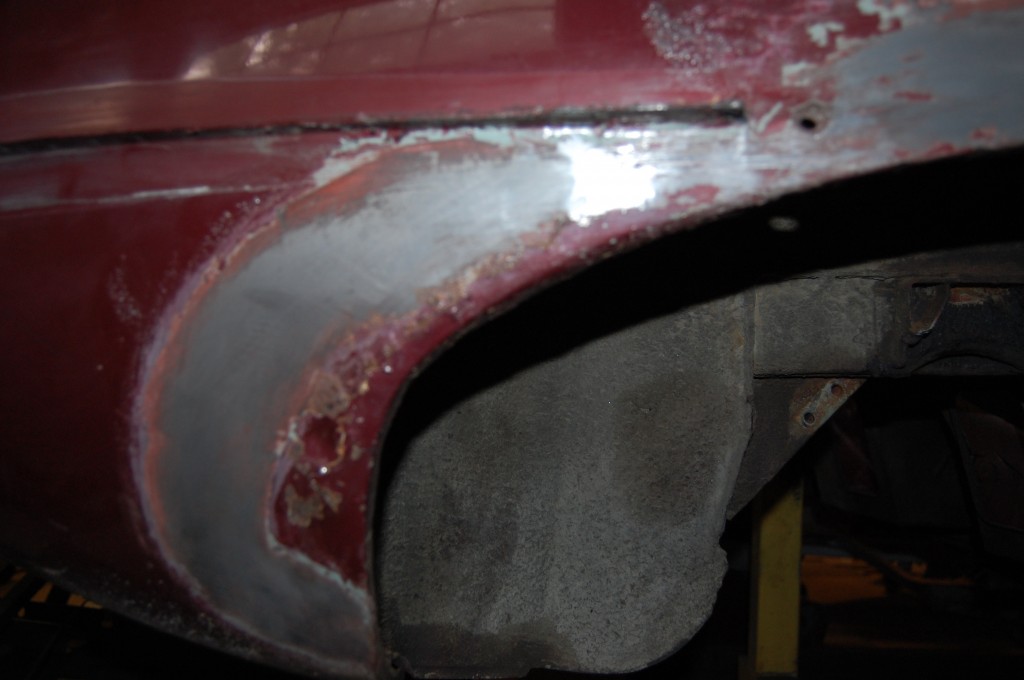
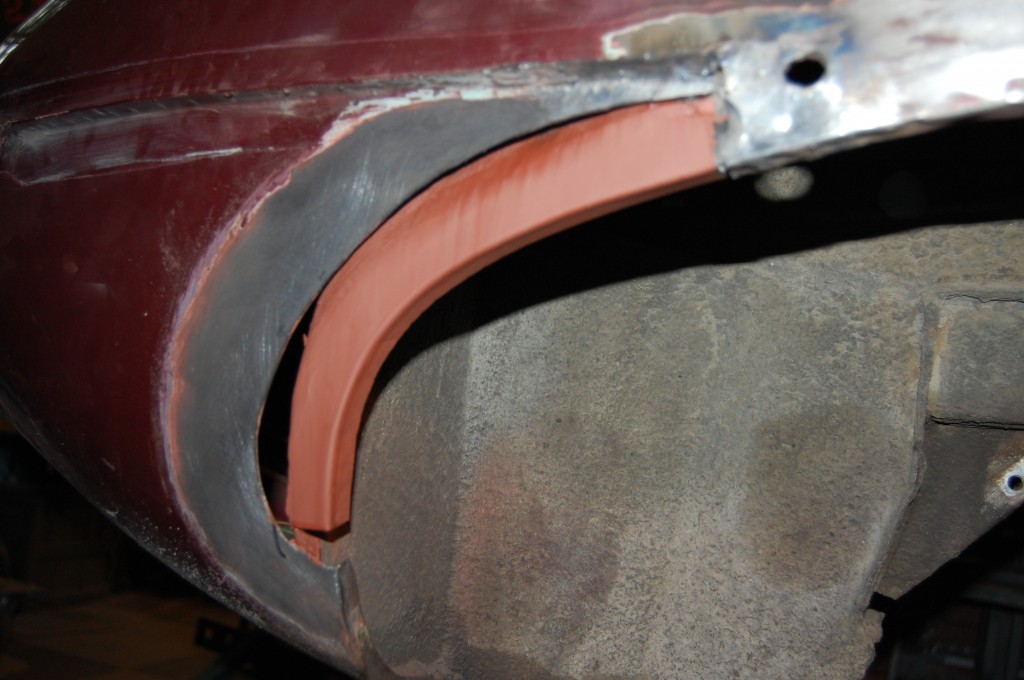
Take a look at these photos of the repairs to the rear wheel arches. I consider this to be THE HARDEST metalwork on an E-Type. The problem is that the coupes and 2+2’s have an inner rear wheel well, whereas the roadsters do not. This makes the wing rust out above the rear wheel, as water gets trapped in there between the two panels, and no paint of any kind ever works it way in there either… IN addition, this car had rust in the rear lower valance panels behind the rear wheel – but they all get that – even the roadsters. Same deal – about 1.25″ of metal-on-metal back there…
What makes the work so difficult is that after you weld your patches in, you can’t get behind it to smooth the panel back out after any shrinkage or distortion – and it is SO aggravating! If this was a front wing, I could weld on it all day, and then planish the welds and smooth it out like glass… But with the inner wheel arch eliminating that possibility, you just have to take great care in your patch forming and fitting, and then weld the pieces is as carefully as possible – minimizing the heat.
We make repair pieces for ALL of these areas – both the inner and outer pieces. In this blog, you will see us making custom pieces for this car, but these pieces could have been sections cut form one of our larger repair panels.
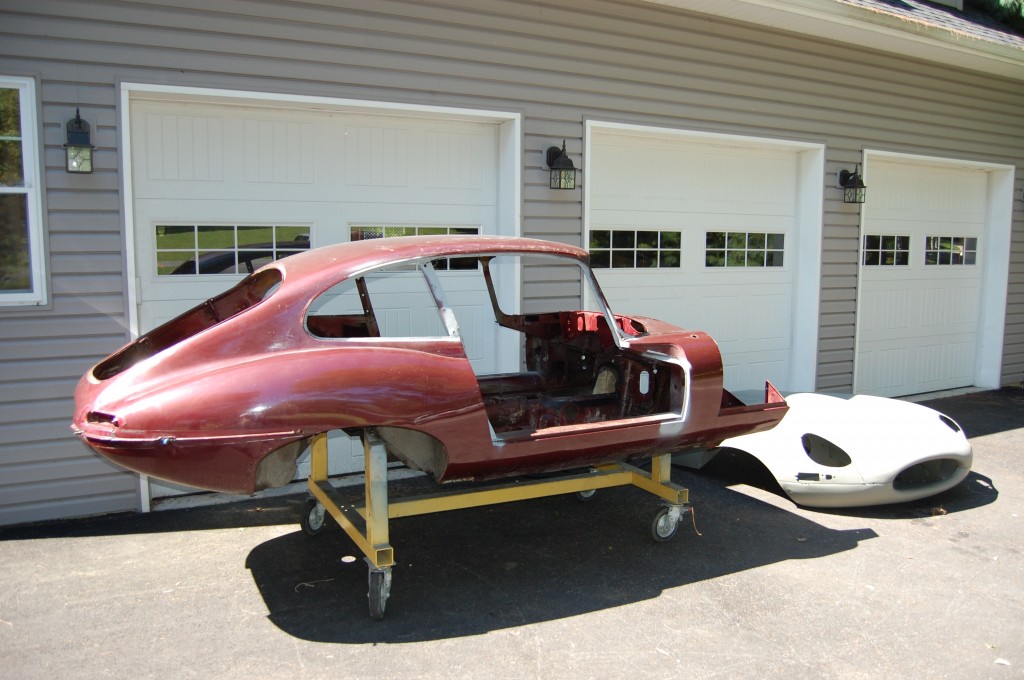
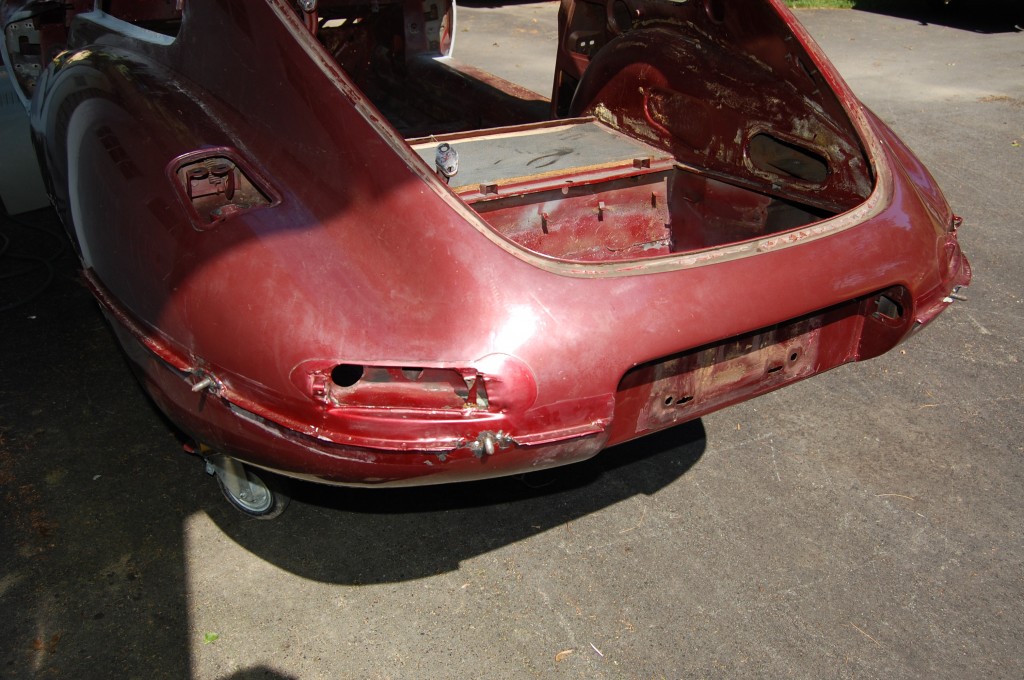
- Here she is – a VERY solid 1967 Jaguar E-Type 2+2. Her beautiful bonnet is sitting there in front of the shell – already restored here earlier this year. We will eliminate the rust issues in the rear wheel arches, mount a new set of E-Type Fabs frame rails, and then mount and adjust the bonnet.
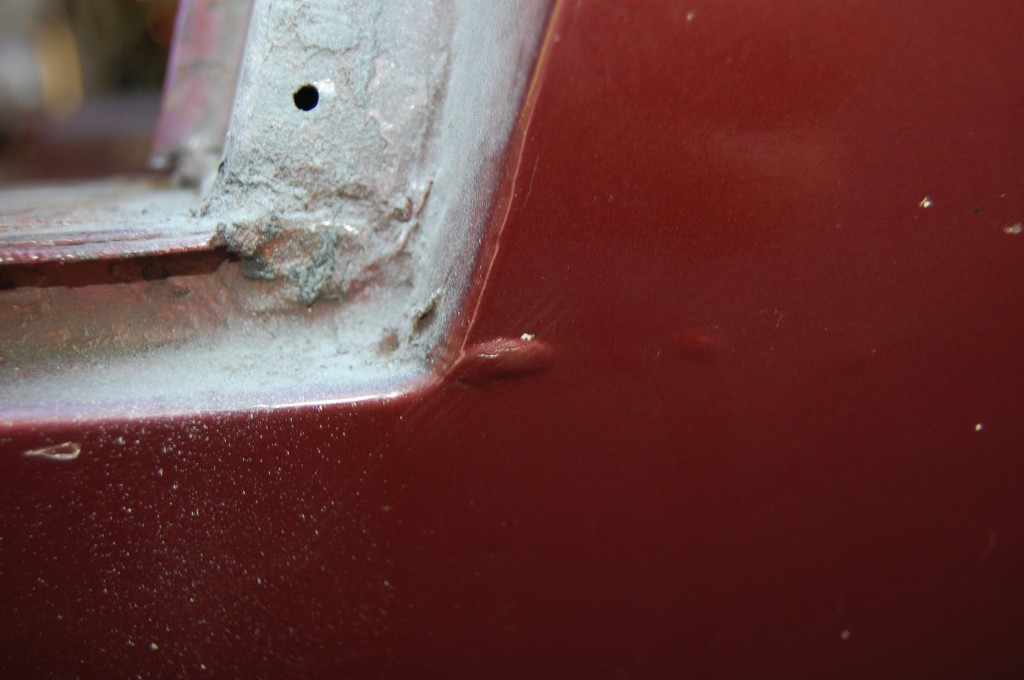
- We originally thought this car was essentially a virgin E-Type, but have since figured out what really happened here… The car is an original opalescent maroon car, with a second coat of paint. The bonnet was absolutely perfect (but rusty – and did not seem to be primed as well as the factory did it – so there was alot of rust and pitting – hmmmm…) And, the RH frame rail was all screwed up… I was convinced the bonnet was original, but I’m finally ready to admit that the owner was right on this one. He surmised that the car was hit hard in the front early in its life, and had the bonnet replaced with an original bonnet from Jaguar. That is proven by this area here. I can see filler in this valley, and there is only one way for this to get screwed up – it happens when the bonnet is shoved back HARD! Believe me, I know…
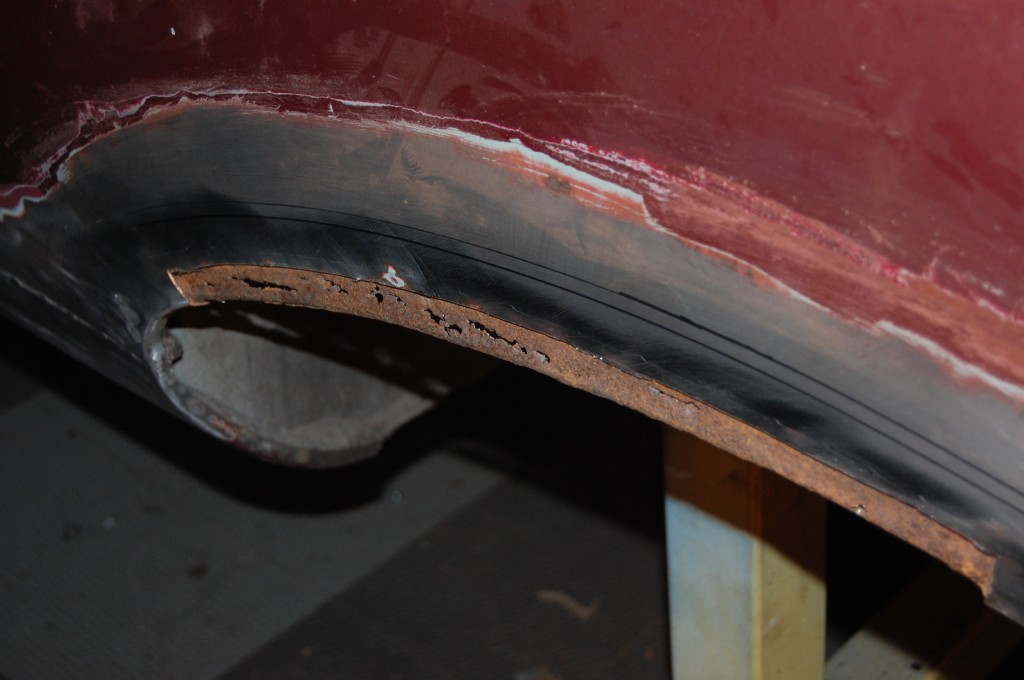
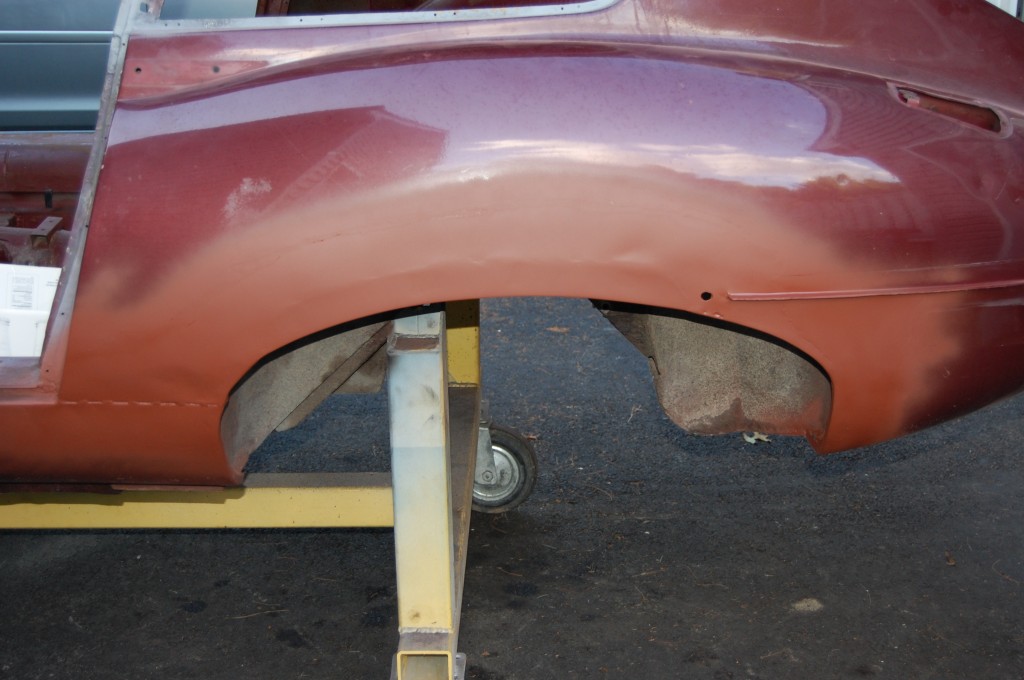
- This is the LH rear wheel arch.
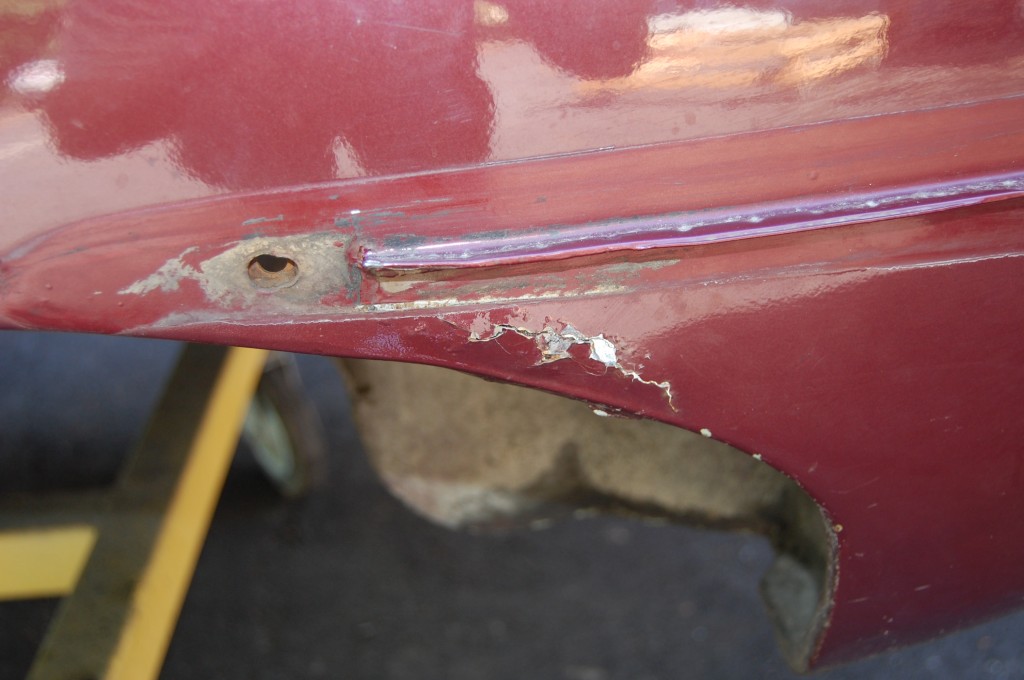
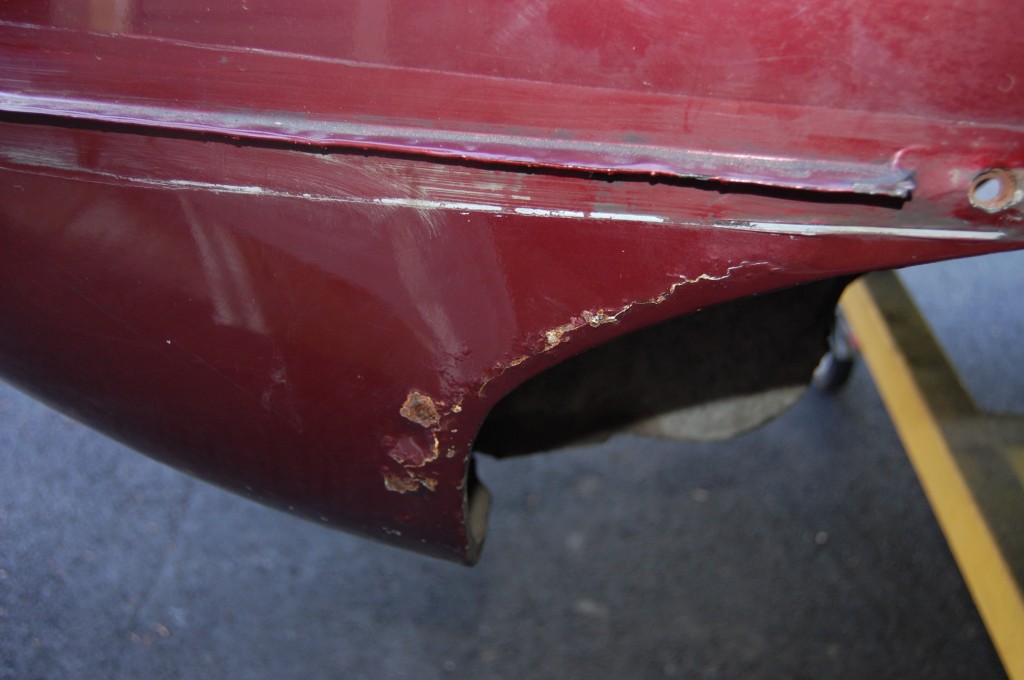
- Just behind the LH rear wheel.
- Same area on the RH side. All of these areas are “sandwiches” bwteen the inner and outer panels, and MAJOR E-Type rust traps…
- This bubbling is rust beginning to form under the factory leaded seam. We will have to melt the lead out of this one…
- No issues ANYWHERE else on this tub – none, zip, zilch, zero!
- First we strip things down with chemicals. The body shop that will be painting the car will be stripping the entire outer skin before paint, so we don’t need to be real fancy…
- More stripping – no sense in even bothering to strip the worst ears – our purpose here is to know where the good metal is.
- Another shot of this rust trap.
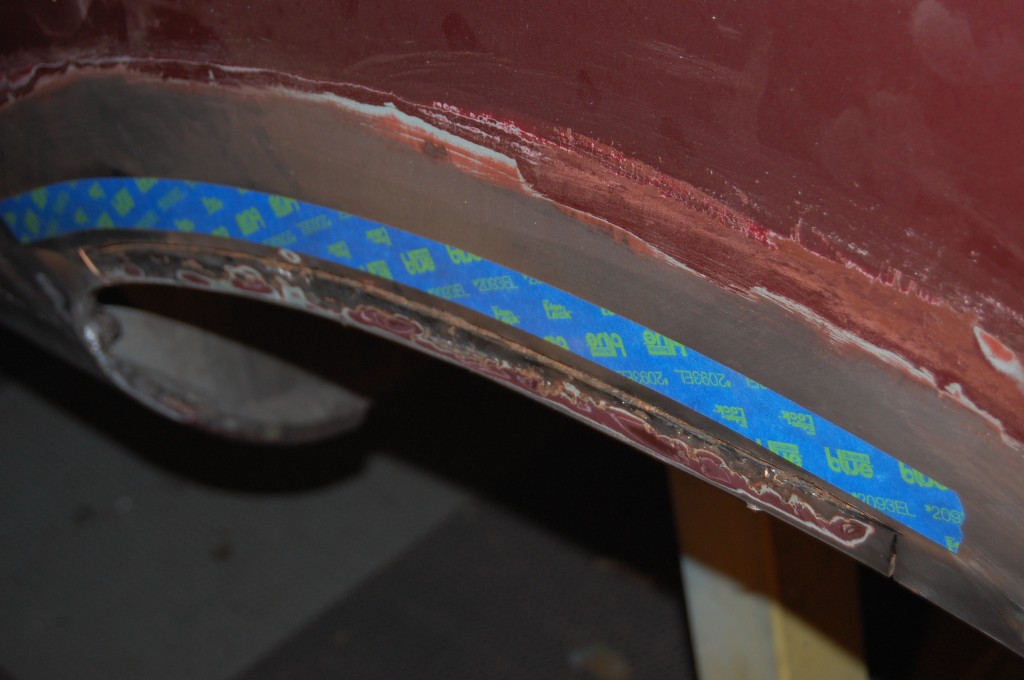
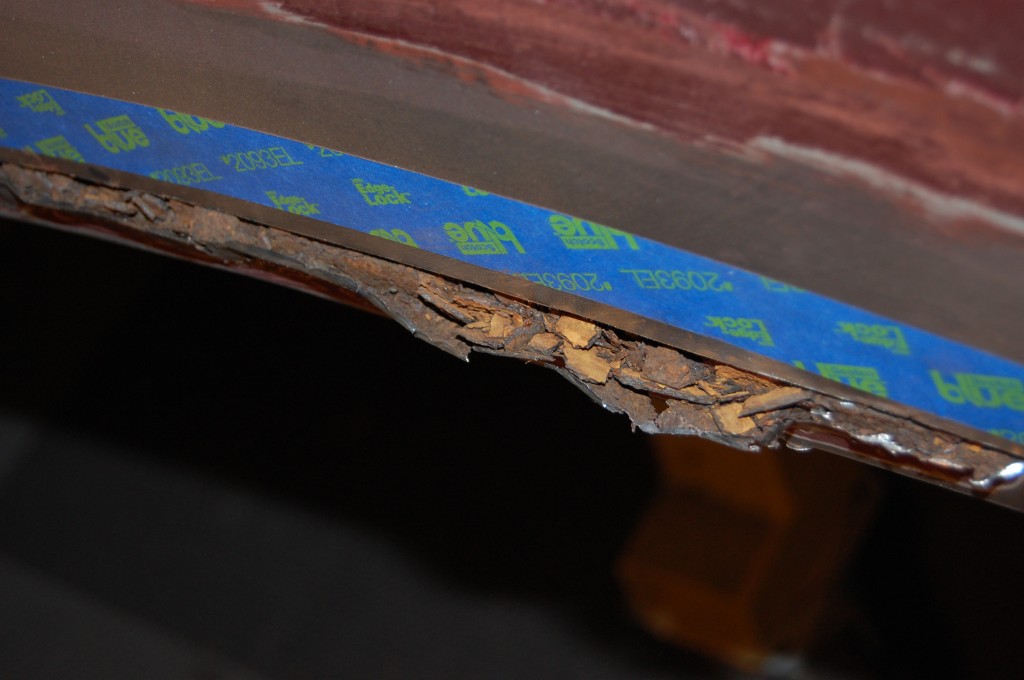
- We start marking and doing “exploratory cuts…” The tape was cerfully applied to give us the line of the arch for later.
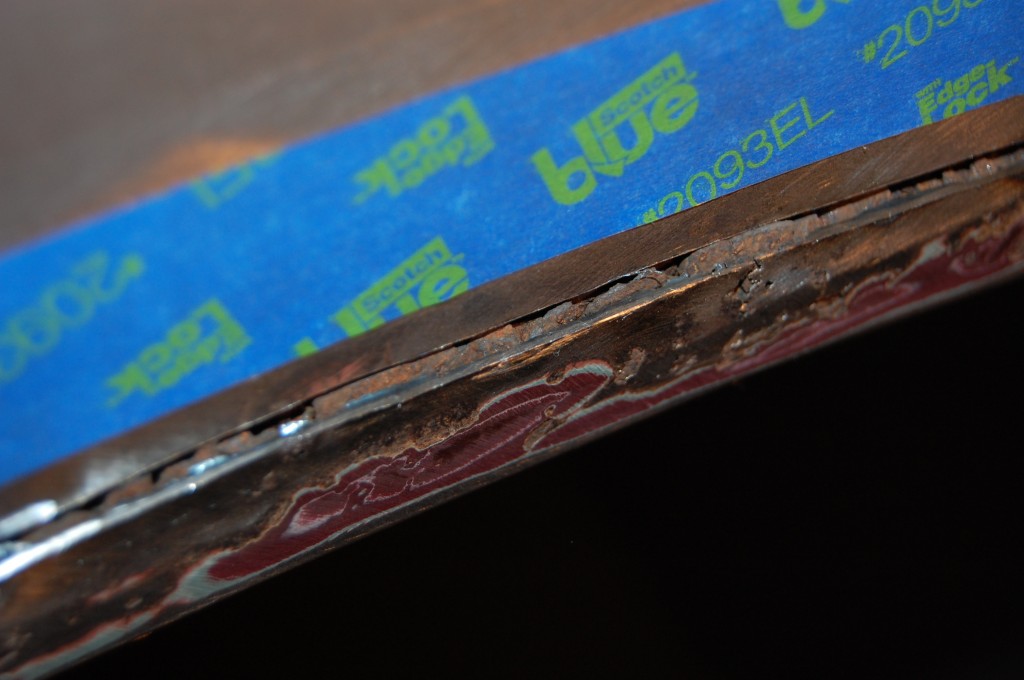
- See what’s in there?…
- It’s not pretty. With some luck, the inner fender is salvageable – it looks OK from inside the wheel well.
- Not a chance… The undercoating was acting as like a candy shell, but there was no good steel behind it, and a putty knife went right through here with no effort at all…
- So we poke around until we get a feel for what’s surface rust and what’s cancer…
- Then we make our final cuts on both the inner and outer panels, giving us room to work.
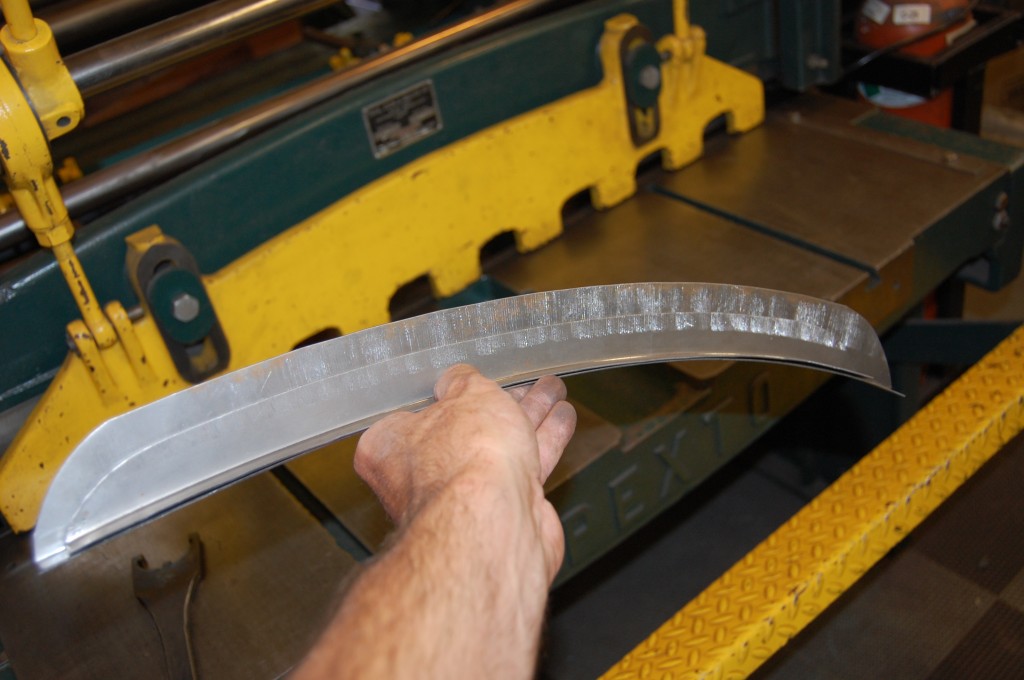
- Here are the patch pieces formed up with the shrinker-stretcher, and then smoothed out with the reciprocating hammer – also known around here as “the magic machine”…
- Here, the inner patch has been tacked into place.
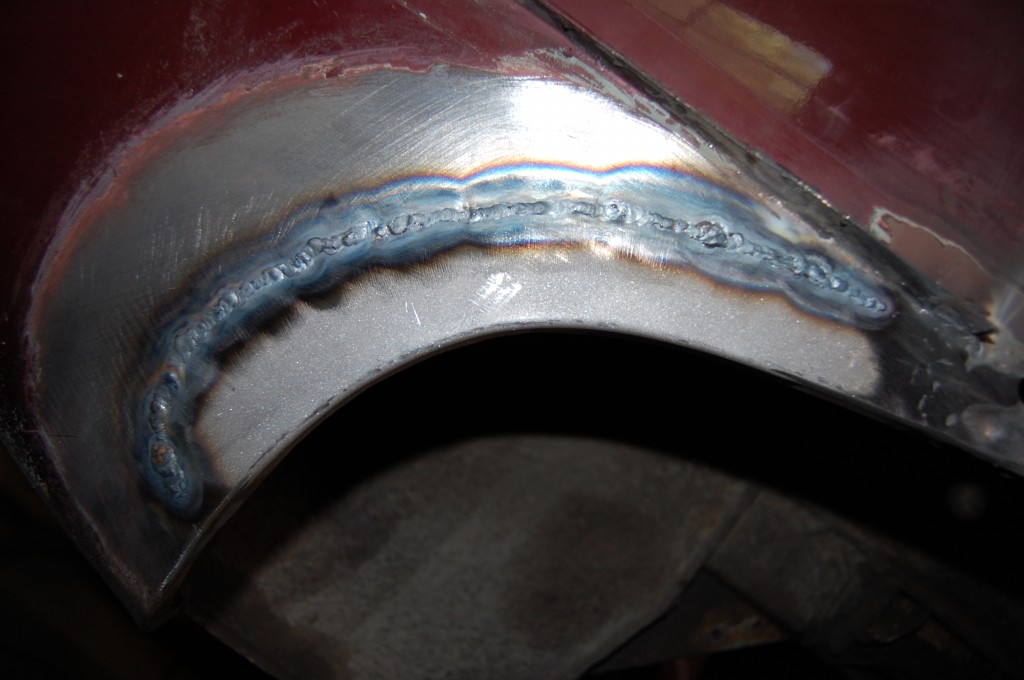
- Now we weld the entire seam with the TIG.
- Then dress down the weld and prime – heavily – with red oxide.
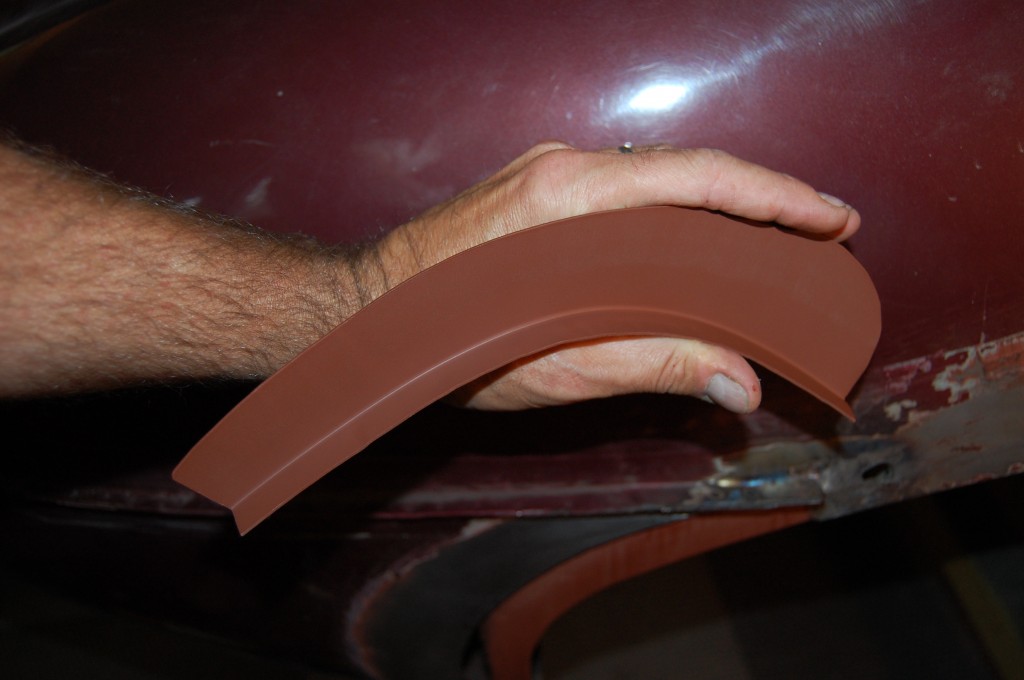
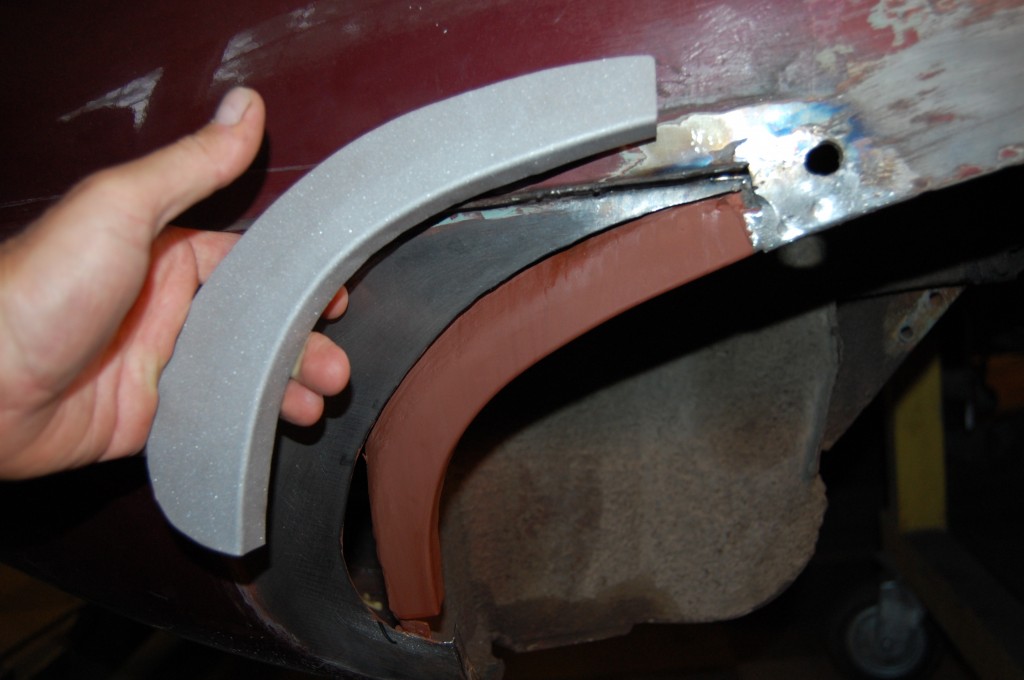
- We also heavily prime the back side of the outer patch as well. Take a good look at the size of this patch. We sell a patch panel that goes from the rear edge of the door, all the way back to the tip pf the bumper, and 3 inches high – DON’T USE ALL OF THAT! Trim the piece down to use JUST what you need to and no more! There has been a crummy patch available for this area about 5 inches high, and people have been putting the WHOLE THING in for years, when tehir rust is ALWAYS limited to the bottom 1.5″ of the wing – because that is how much overlaps with the inner wheel well. WHY are they screwing up all of that good original wing surface!?! I don’t know… The car in the rotisserie now has that giant patch on both sides, welded right over top of the original, rusted wing, then covered in 1/4″ of lead AND 1/4″ of Bondo! AND – it then rusted out again! AAAGGGHHHHHH!
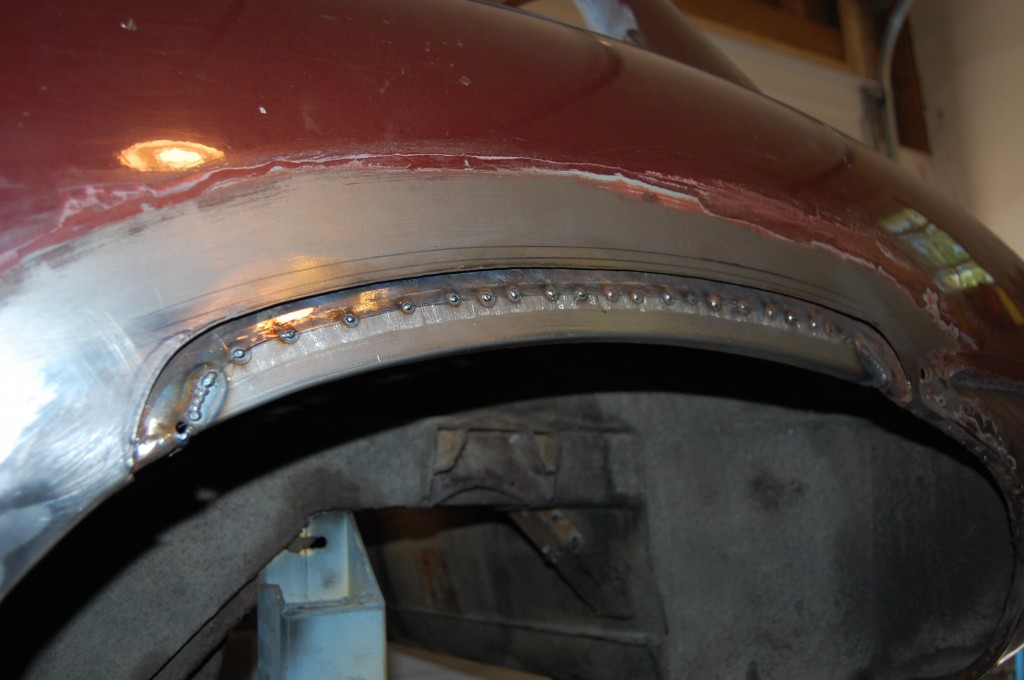
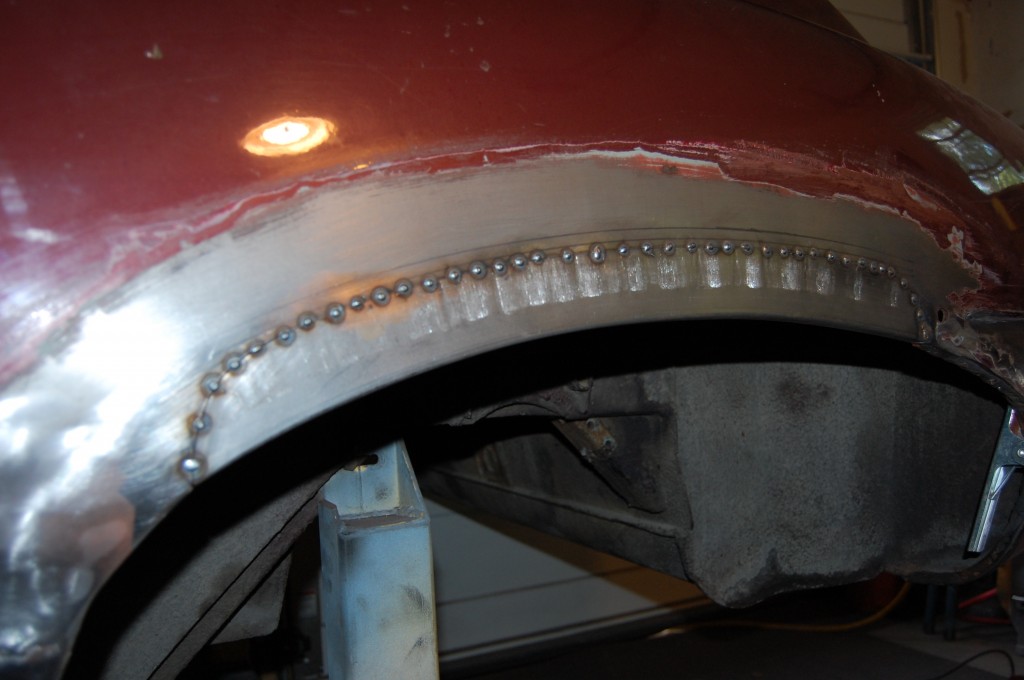
- Outer patch tacked into place. This is where it starts to get hairy… Up to this point, the wing is still perfect above the patch. I spent about 15 minutes tweaking the edges of the patch by hand so it just fit perfectly. Then the tacking that you see here went very well, but we did get just some SLIGHT distortion toward the rear. Next, we need to stitch up this seam with the TIG, and there WILL BE distortion, and there’s not a damn thing I can do about it – it’s very frustrating… All I can do is keep the heat to an absolute minimum and make the weld as minimal as I can.
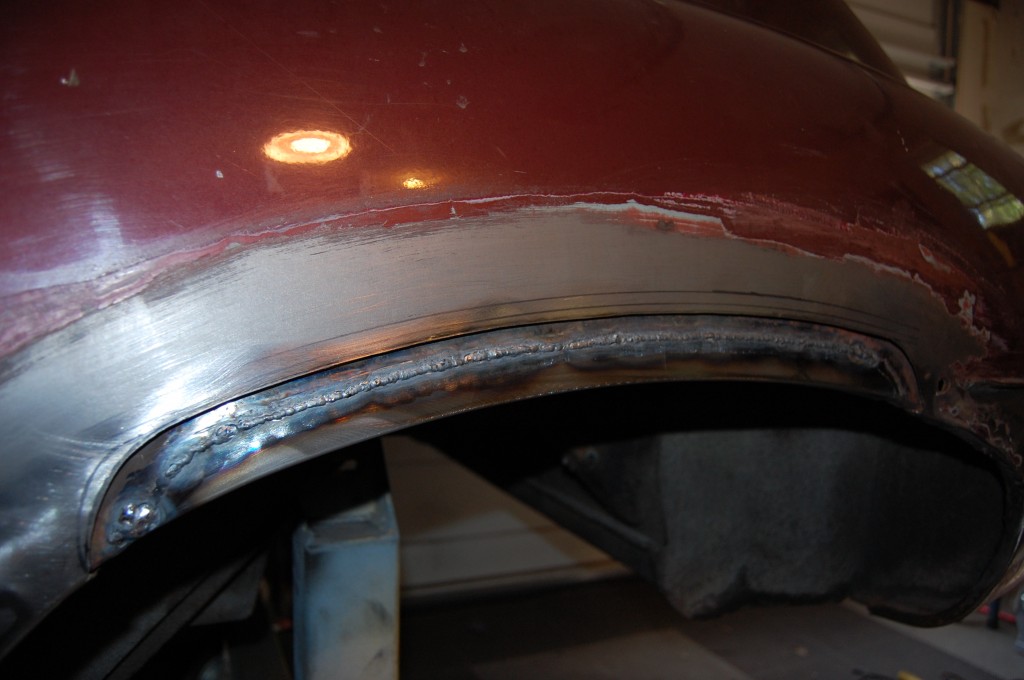
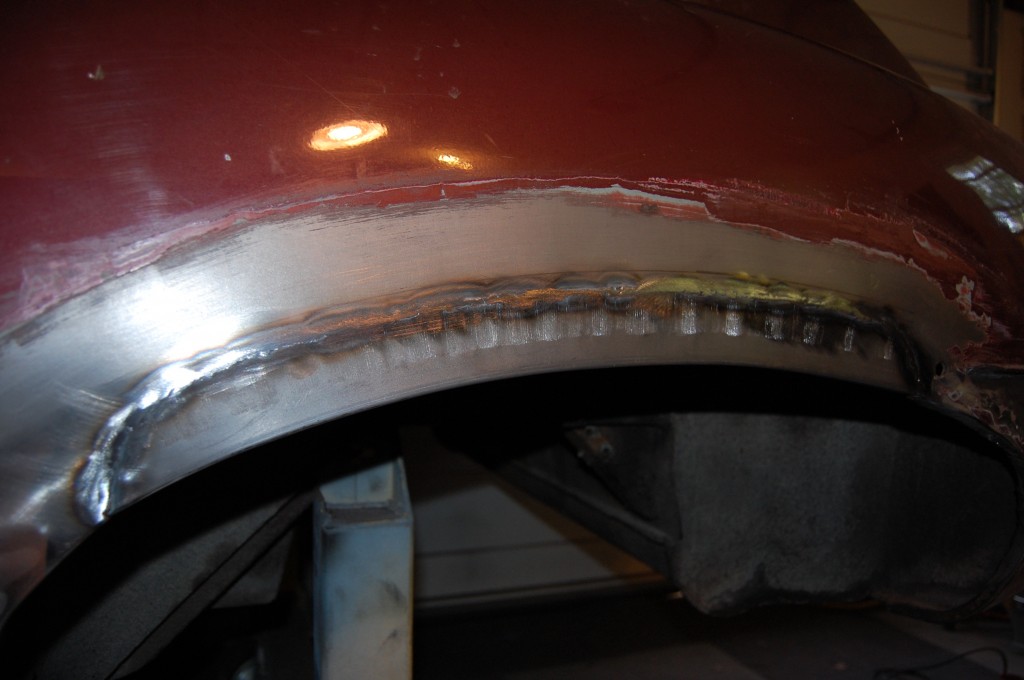
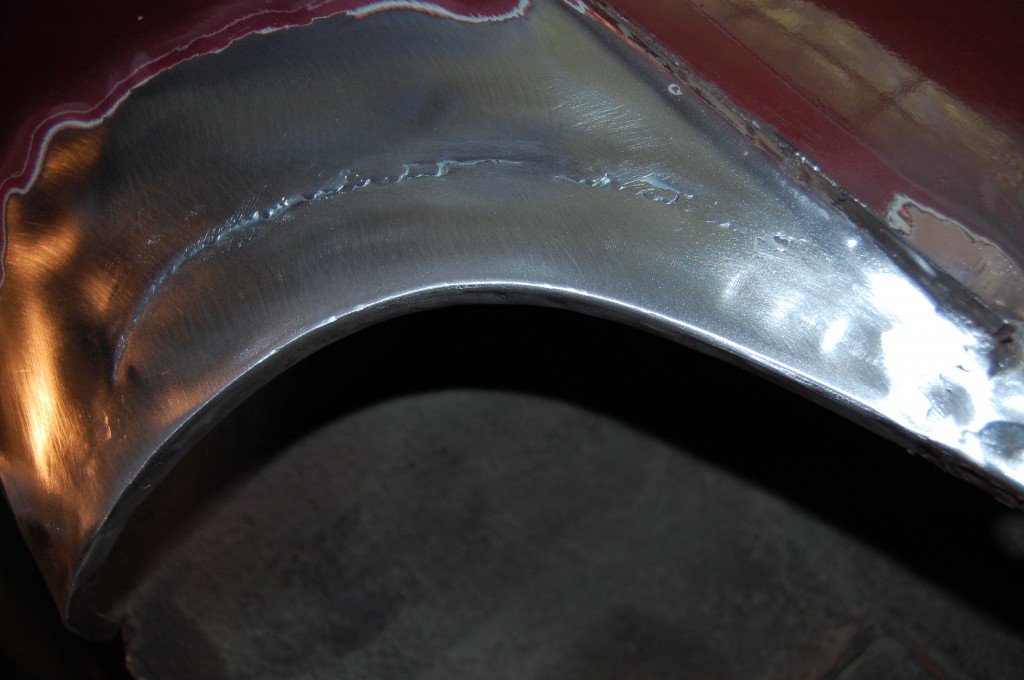
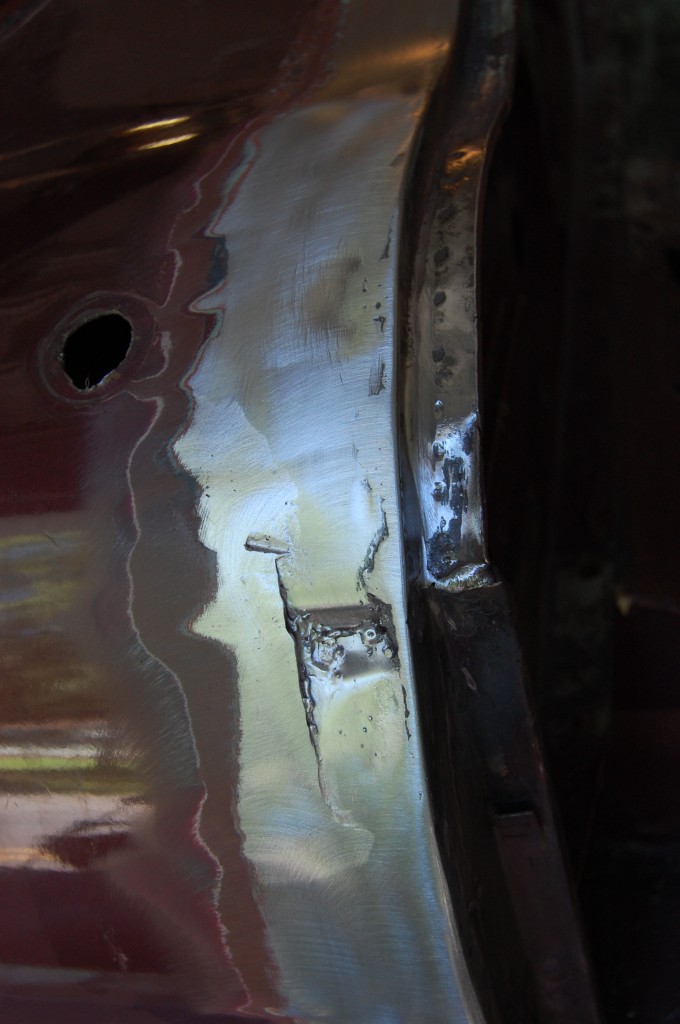
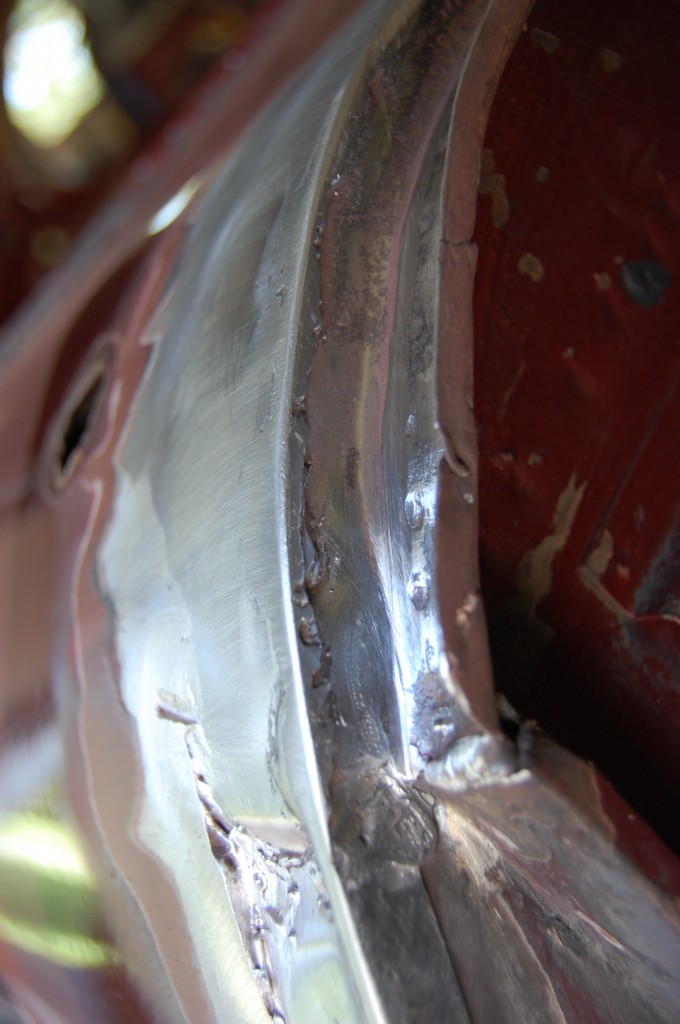
- Well, it distorted things some, but it’s really not too shabby. We will need filler to smooth it, but less than a 1/16″. I did not take a photo of the TIG weld – here I have already started to dress it down.
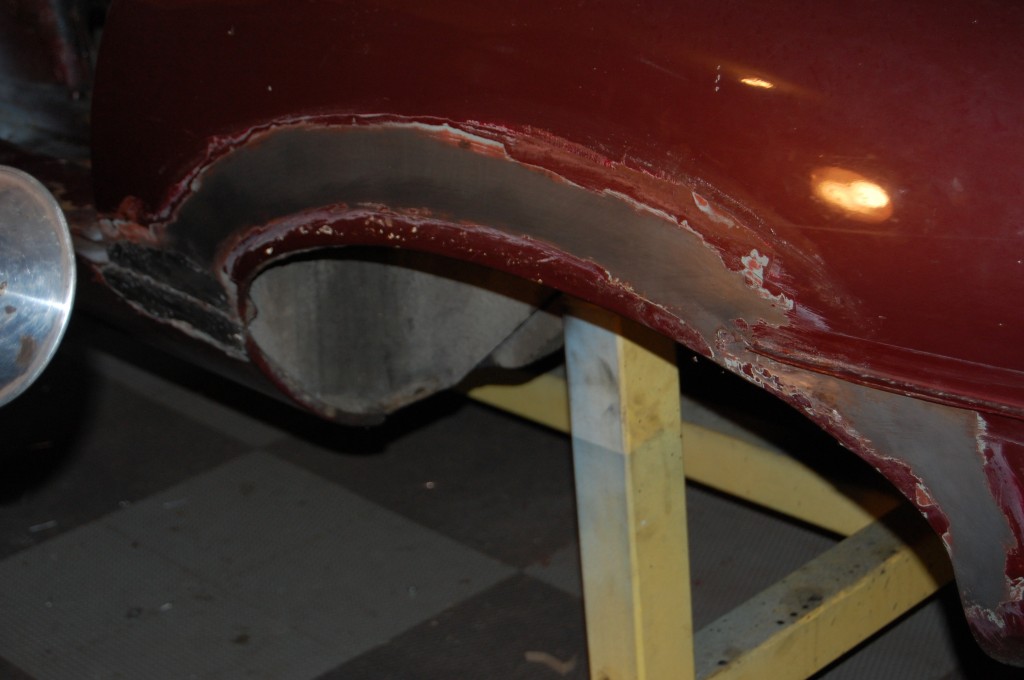
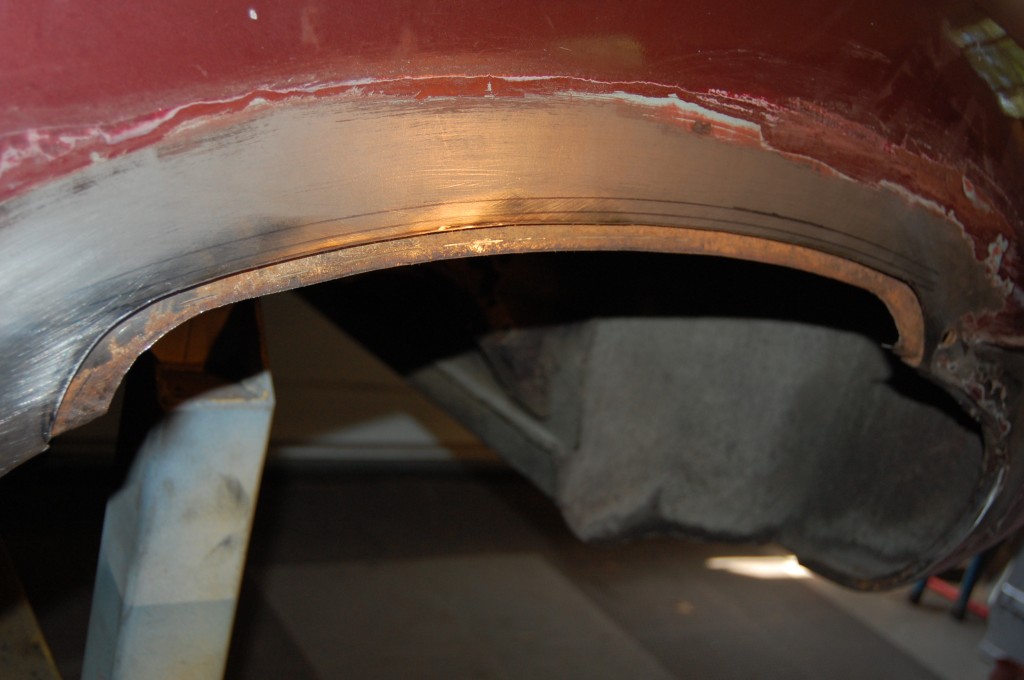
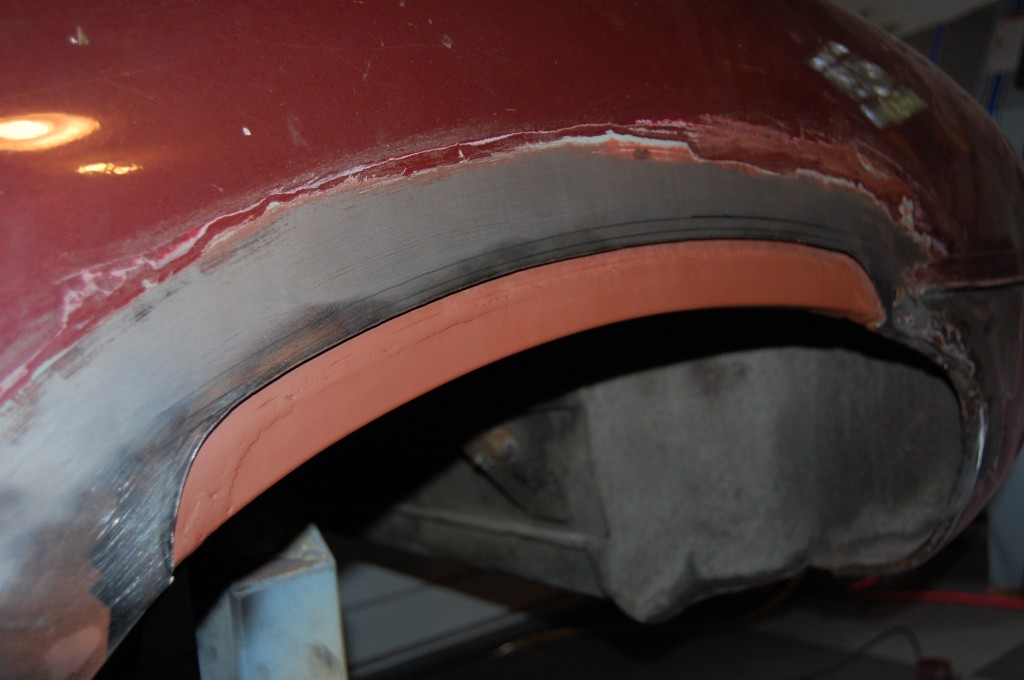
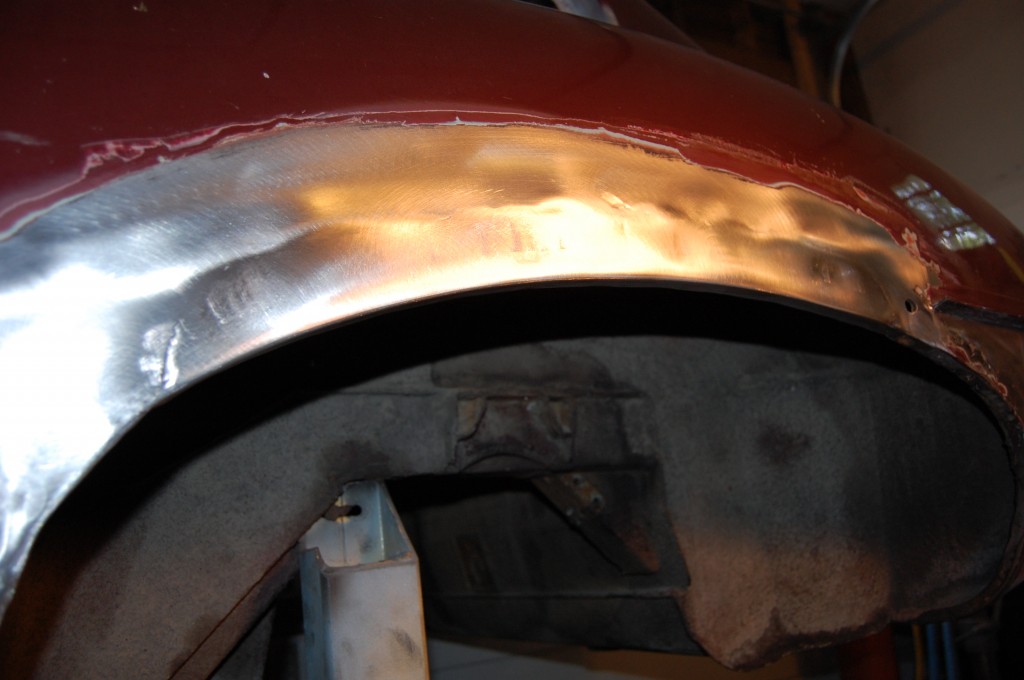
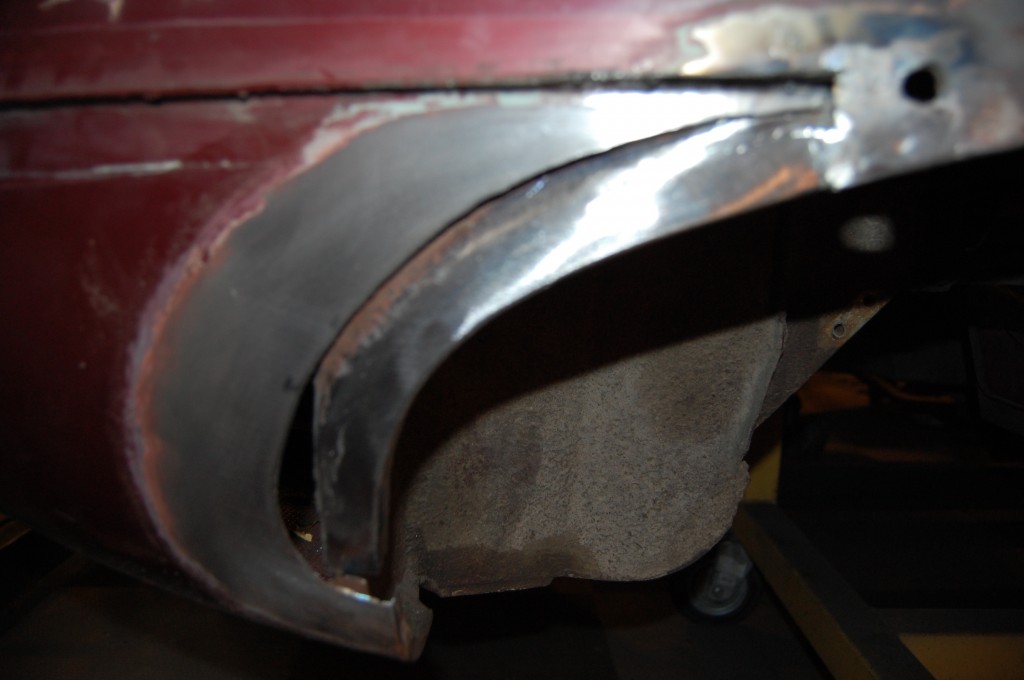
- Here is the finished product – rock solid, a perfect arch and a good lip, and the correct contour all around. the surface is a little wavt from the heat during the weld, but without being able to get behind the panel, the rest will have to be handled at the body shop on this one.
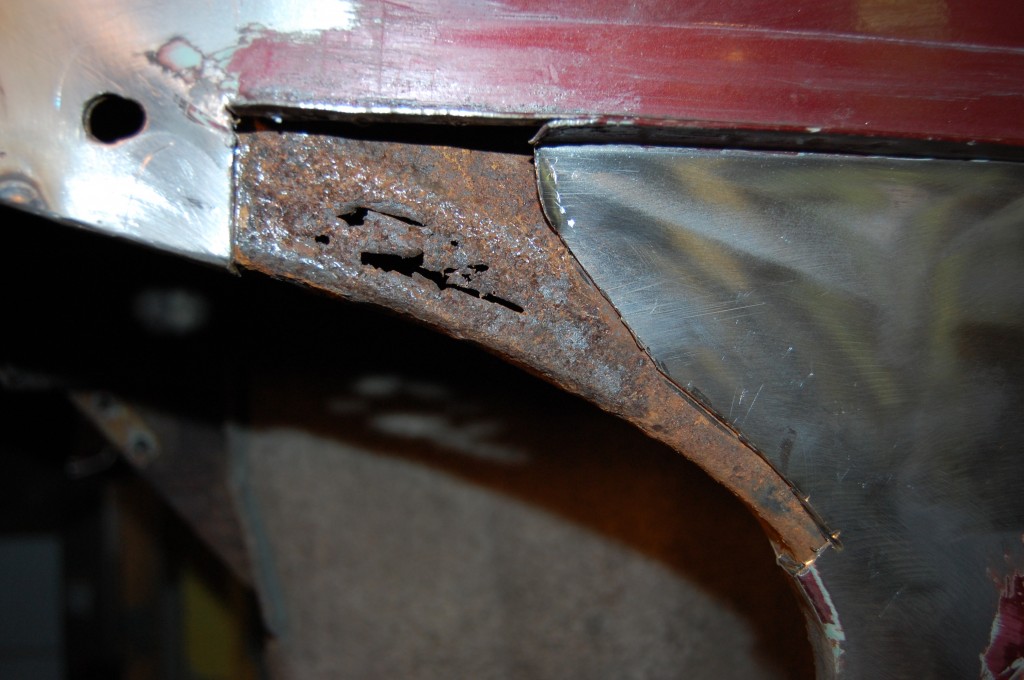
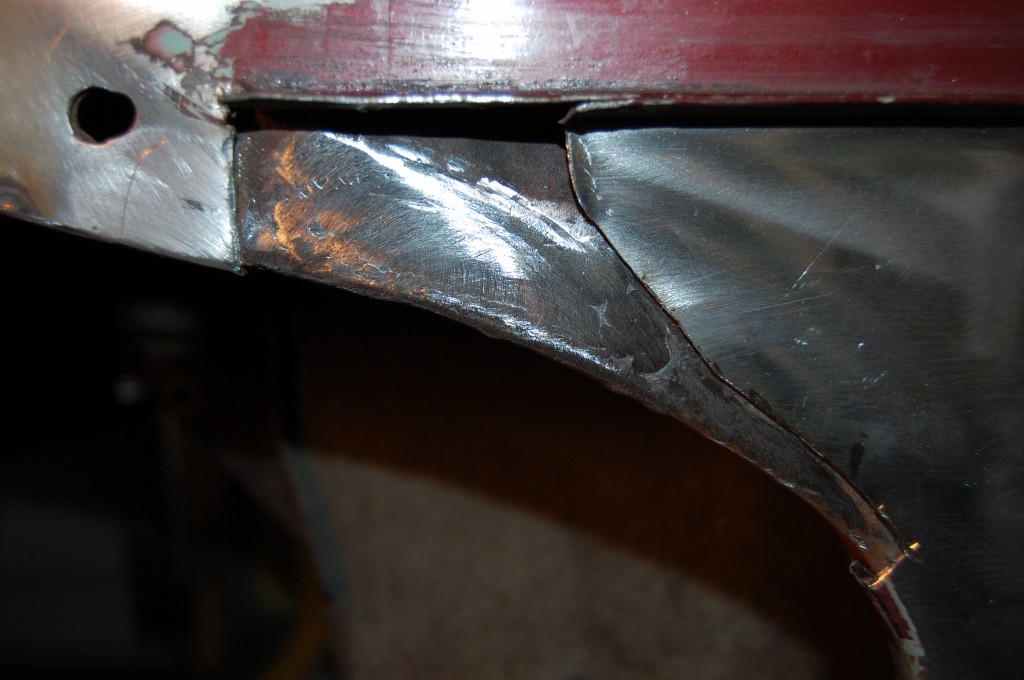
- Next, we move just to the rear of the previous work. Same issue here with the sandwich, and our inside panel is rusted where the panels are tight up against each other.
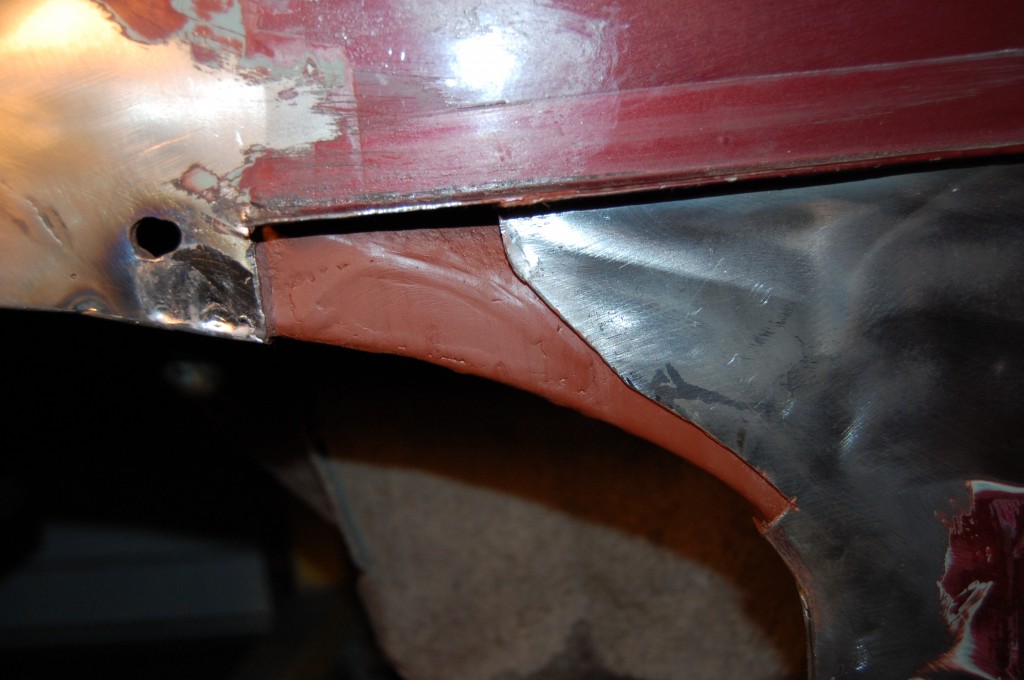
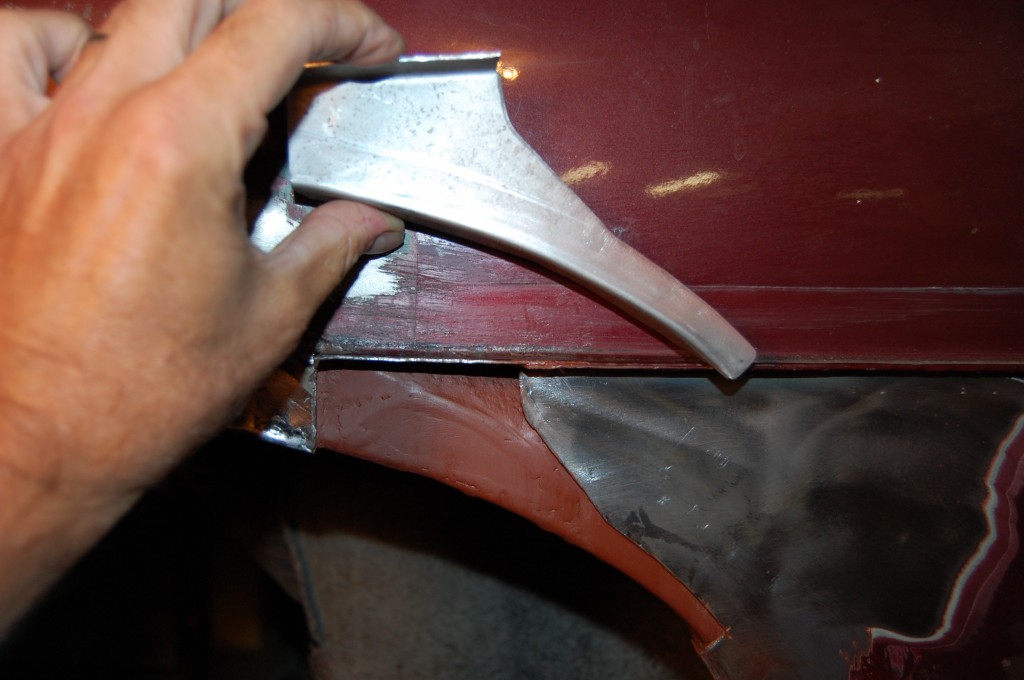
- We’ve poked around and determined that the actual rotted area of the inner piece is small, and so we just put a small piece in there. You can also see that we have kept the outer patch small as well. It is a funny shape, but it is just what we need here – no more and no less.
- Red oxide internally before we close things up.
- Most shops would probably replace the whole rear lower valance on both sides on this car. I’m telling you, that’s not the way to go on this one. The rear of the panel is leaded in with other panels near the license plate area, and there’s just no sense in opening all of that up if you don’t have to. I prefer to localize the repair if I can, leaving the factory panels, contours, and seams in placxe whenever I can.
- This area was in the bottom, just below the previous repair. Same thing – cut out the problems and localize the repair.
- Here we have just trimmed off that edge, and have hammered as much rust out of the seam as possible. You NEVER see this vertical internal panel this clean and unrusted!
- This is the outer wing over the RH wheel. This was perfect – no rust at all, and all virgin metal. BUT – I just KNEW it was in there starting, and thenthere was a lump here… I agonized over whether to open this up because it was so nice, and then I came up with an ingenius little plan..
- This is the aera behind the wheel on the RH side – more on that later…
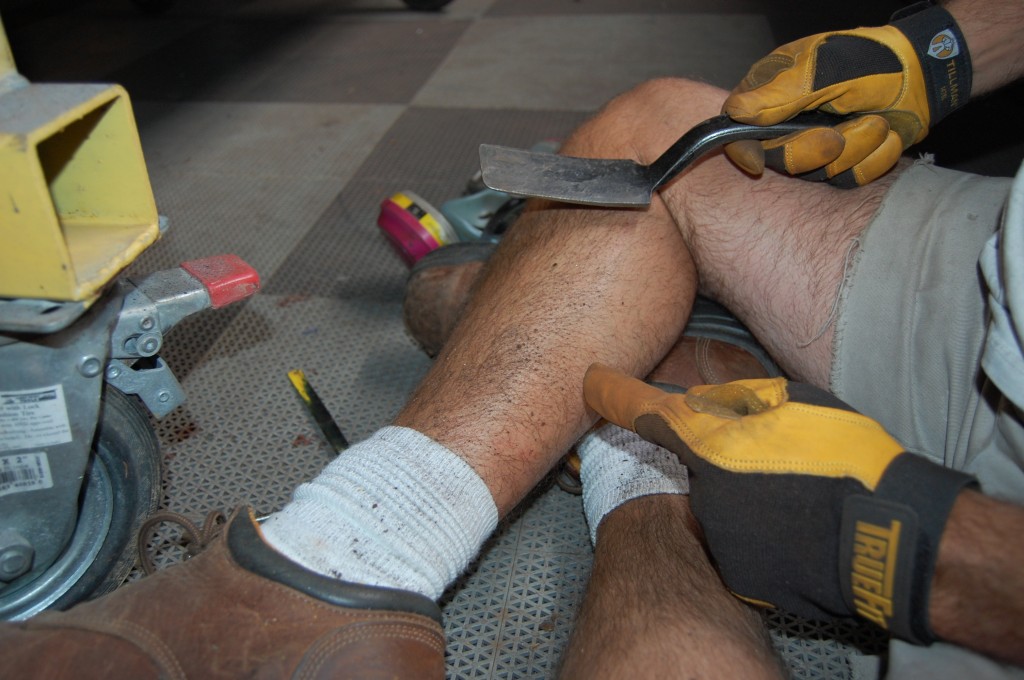
- What I did over the RH rear wheel was to take a slicing wheel, and just cut into the outer skin of the wing only, right along the edge where it folds in. Then I stuck a hacksaw blade up in there between the inner and outer fender, and as I suspected, rust flakes and crumbs started POURING out! Brent took this photo fot he rust piling up on my legs as it was coming out of there (we did these repairs out of the rotisserie so I had to sit on the floor for most of them…)
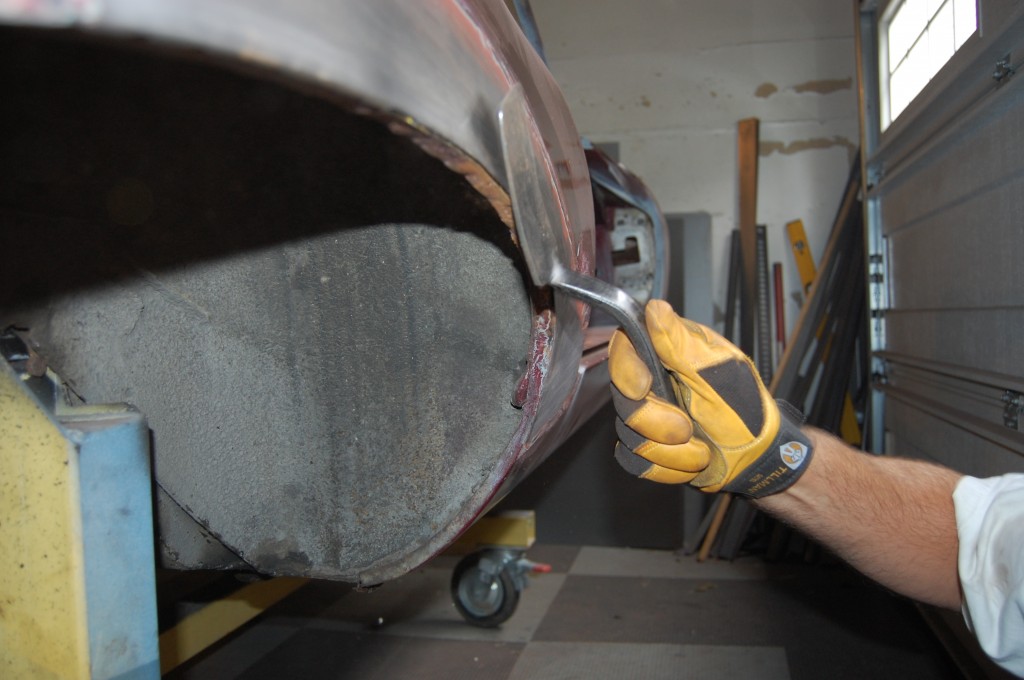
- After the hacsaw blade, I slapped the wing with a spoon gently enoiugh not to hurt it, but hard enough to break any rust flakes loose – and LOTS of stuff came out… You can see the cut in this photo right along that botom edge, and see the rust up in there. When I finally got out as much as I could, I pulled the nozzle and straw off a can of WD-40, stuck it on a can of red oxide, and spread the panels open with a spoon while sticking that straw up in there and going NUTS with red oxide!
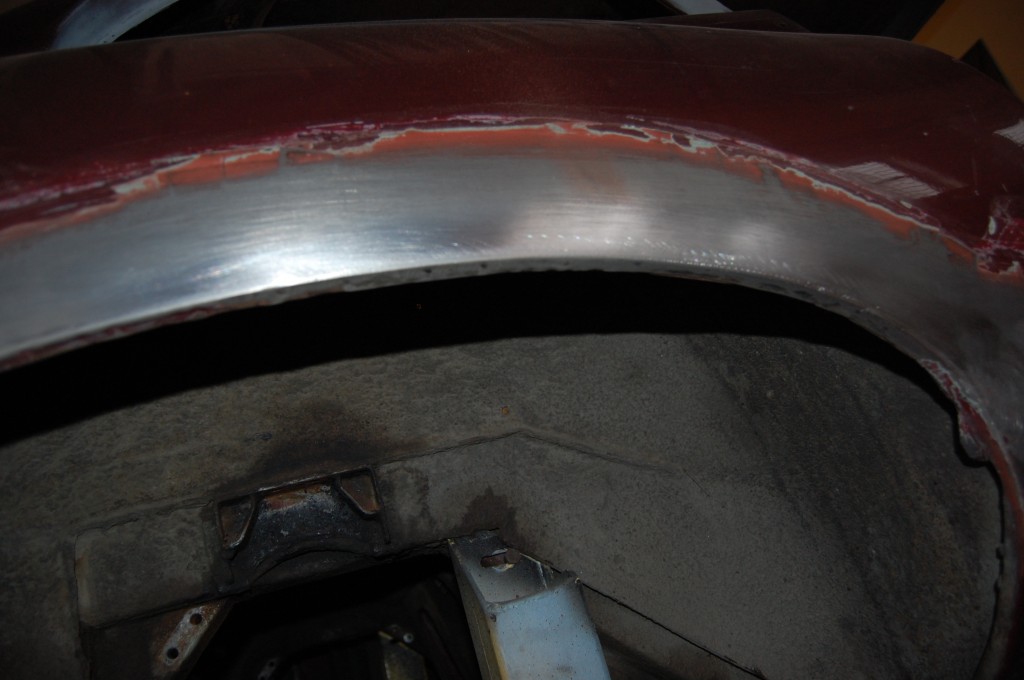
- After filling it with as much red oxide as I could, and letting it dry, I carefully welded the cut back up and contoured the edge with a flap wheel. This should last another 50 years, and you couldn’t tell it ever happened – AT ALL!
- Forgot to take pictures of the dissection behind the RH rear whell – in this shot, everything has been cut away and the inner piece has already been repaired.
- Don’t forget the red oxide! (it’s easy to get into a groove and forget – I have done it…)
- Here’s the patch for the outer skin – again, we have localized the repair with small, custome patches instead of ripping out whole panels.
- Another aera where we need to be as careful as possible with the welding.
- Pretty good but not quite as good as I had hoped – using the TIG in this area without the help of the rotisserie was a real challenge.
- Dressed down, this area is also not flat, but the limit of the distortion was to simply sink in the weld itsel – which is actually perfect – the filler will go in there and just feather out to our new, crisp edge.
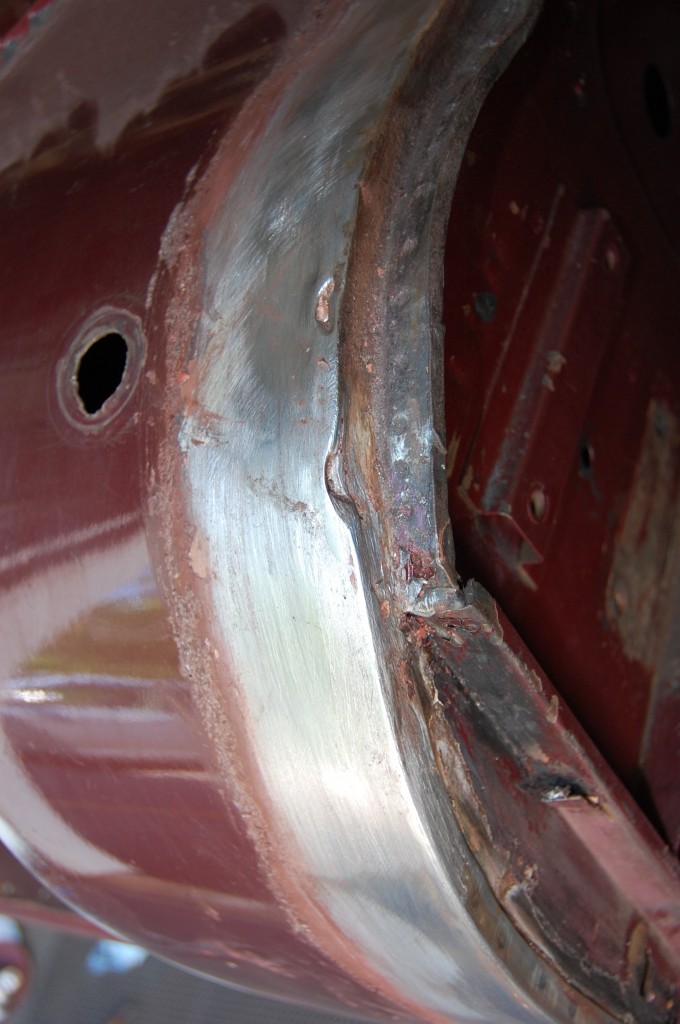
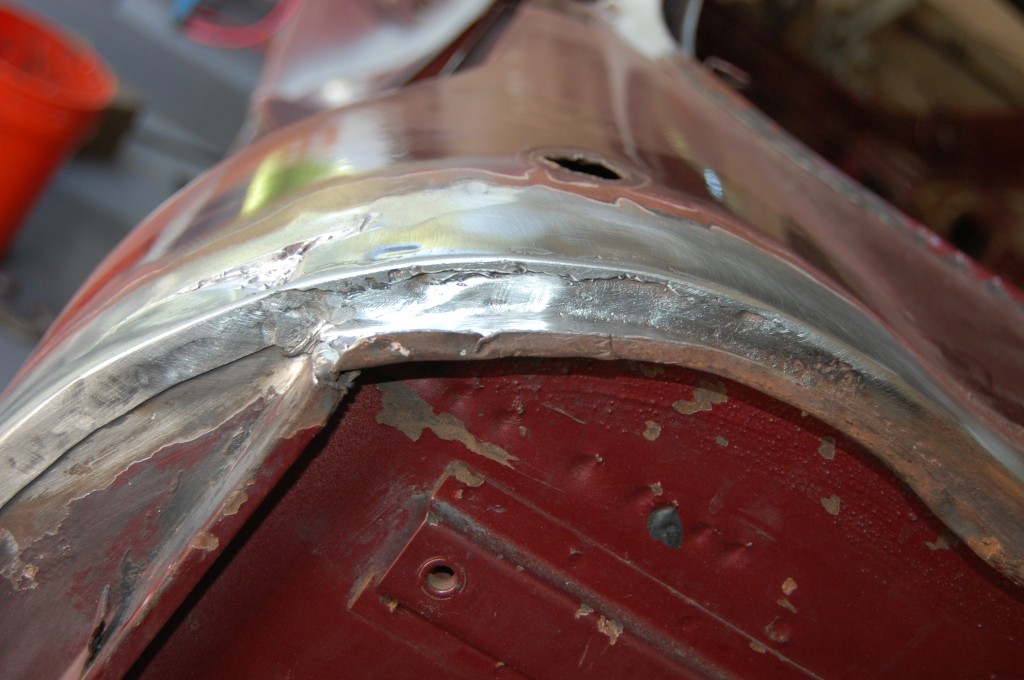
- Next it was time to see what was going on here. We stripped the whole leading edge of the cowl, becasue we want to make sure that we are fitting the bonnet to metal, and not a false edge made of filler – which is exactly what we had here…
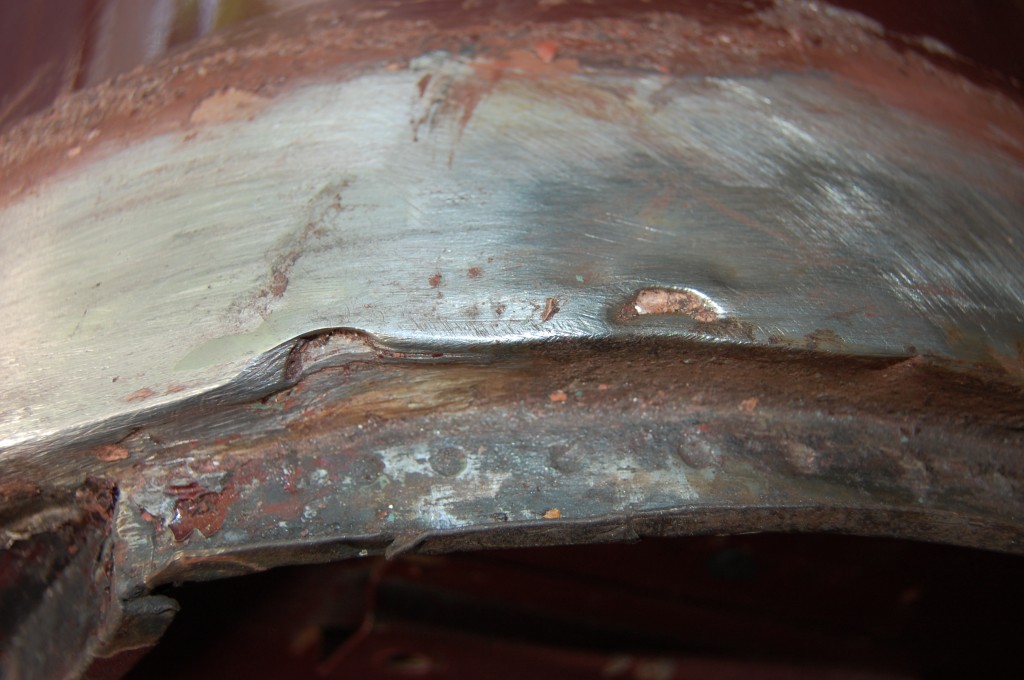
- These dents and damage are the result of the bonnet getting shoved back into the cowl. The previous repair included both lead and filler to build up the edge of the cowl, and the filler was already starting to chip out… We need to solve these problems with STEEL – packing filler into these holes is just asking for trouble down the line.
- Here is another shot after we have melted the lead out of the edge of the cowl. Unfortunately, we are right on top of a factory leaded seam, and some of that has come out as well. Look at how deep the factory seams are. What we need to do is straighten things out here and make sure that the edge itself is all steel.
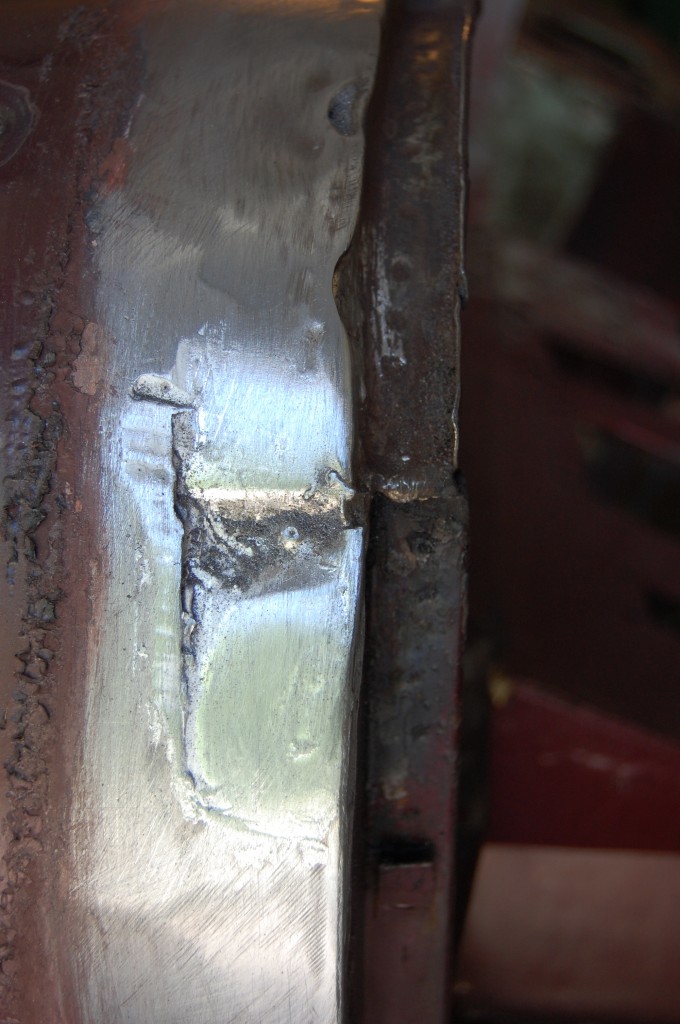
- Same area, reapaired. We have welded up the dents and holes along the edge, and put in several thick beads of weld, then carefully sculpted a new edge which is all thick steel. We don’t care about the crater in the factory leaded seam – it can be filled and smoothed with either lead of filler – but I recommend filler because this is REAL lead and not the modern lead-free stuff, and it is not going to mix well. As long as our edge is stell, having filler behind that will be fine.
- This shot shows cratering below our new edge on the face. That is also OK and can be filled with filler – as long as the edge is something that will not chip out easily.
- One final shot – a little filler on the top and sides will make this area MUCH better than it was when we started, and the filler won’t be prone to flaking out. Now the edge is where it should be, and we can fit the bonnet.
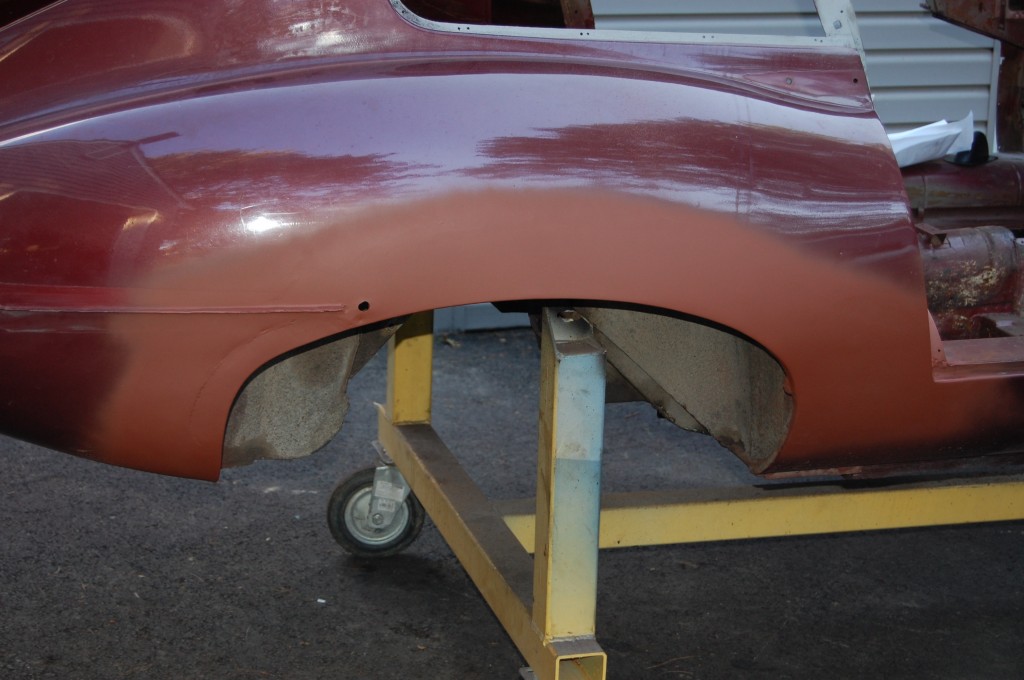
- The RH rear wheel arch has been “saved” with our ingenious little “slit and slap out the rust” idea, and the rear lower valance behind it has a good srong repair – inside and out.
- The LH side will need more filler work, but is also rock solid inside and out with good strong patch pieces of 19-gauge cold-rolled steel. I could have sprayed this with grey primer, and in the proper lighting, it would look absolutely perfect – you would not see the distortion in the wing near the repair. Remember that when you are looking at photos of other shops, panels for sale on eBay, etc. This is what this surface REALLY looks like. What’s interesting to note is the dished area just in front of the wheel arch betwen the wheel and the door – that is a FACTORY distortion when the wing was welded to the sill down there – this is what was under the factory leaded seam there! We had melted that all out to look for issues under the lead due to bubbling, but it was just surface rust and we cleaned it up. I’m always frustrated by these enclosed rear wing repairs on the coupes, but with a little filler, this will smooth right out – and is a ROCK SOLID repair that will last all of our lifetimes!

