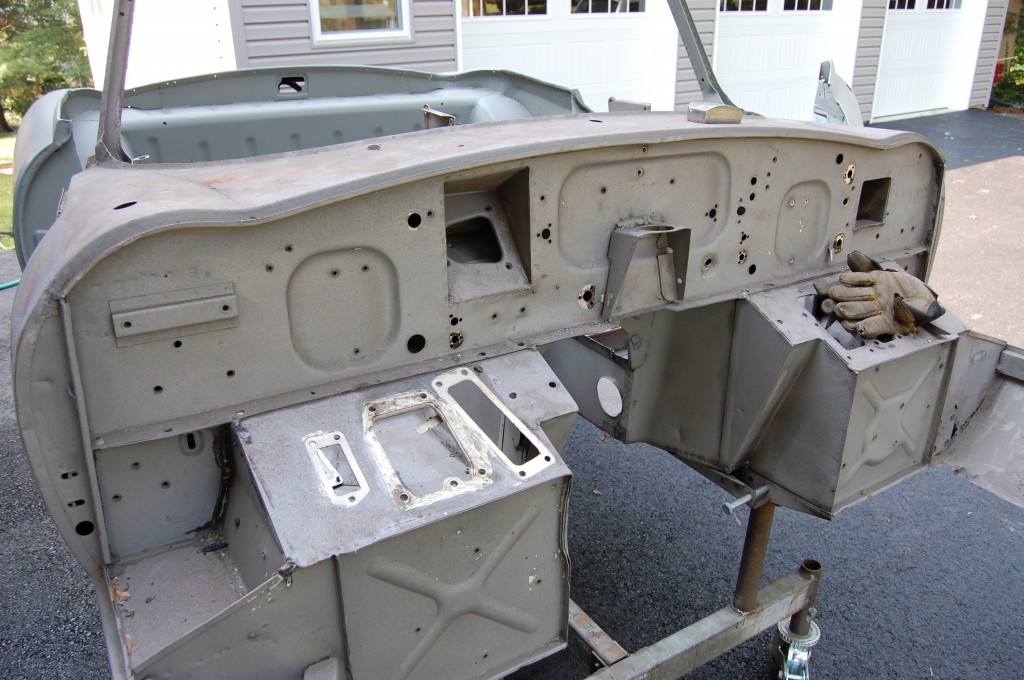
These are usually in one of two conditions – perfectly fine, or a complete mess – and it all depends on how heavy the previous owner’s foot was, it seems! Although I believe that this bracket starts to get alot more stress on it as the motor mounts soften up and it takes on more and more of the engine mounting task itself…
The bracket on this ’66 roadster looked fine at first and I had planned a light morning of scuffing down the firewall and hitting it with etch-primer. However, as I got right down in there and got a good look at it, I was singing a whole different tune…
Luckily, we fabricate these brackets here – I’m pretty sure we are the only people making it worldwide. SO I pulled one off the shelf and started the surgery… Have a look!
- What a lovely morning – I’ll just scuff this firewall down, straighten a few flanges, spray it, and it will be beautiful…
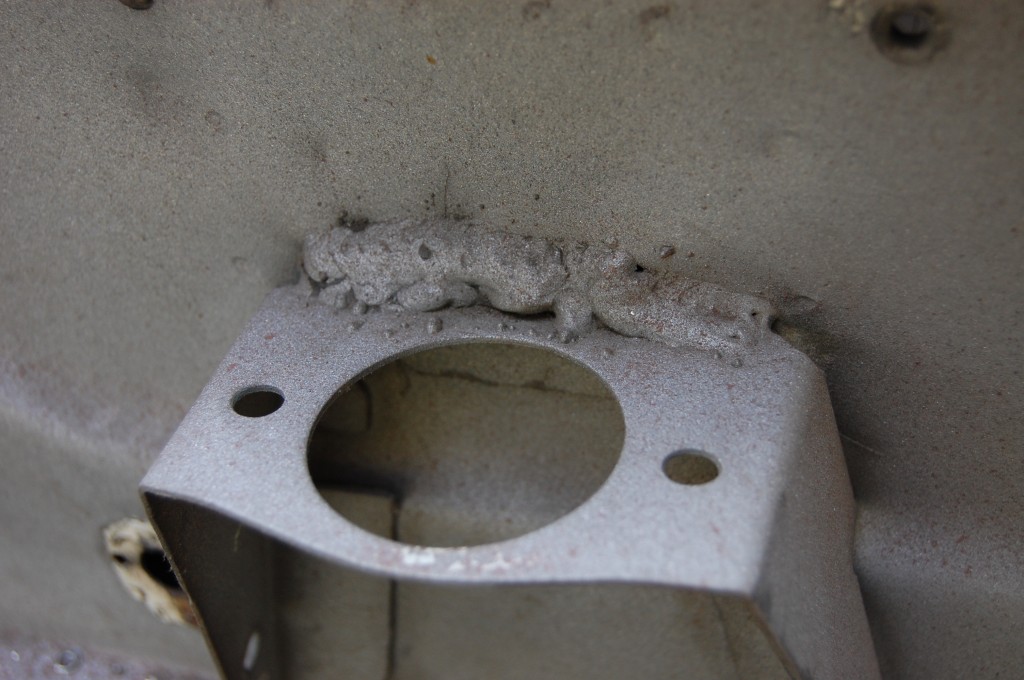
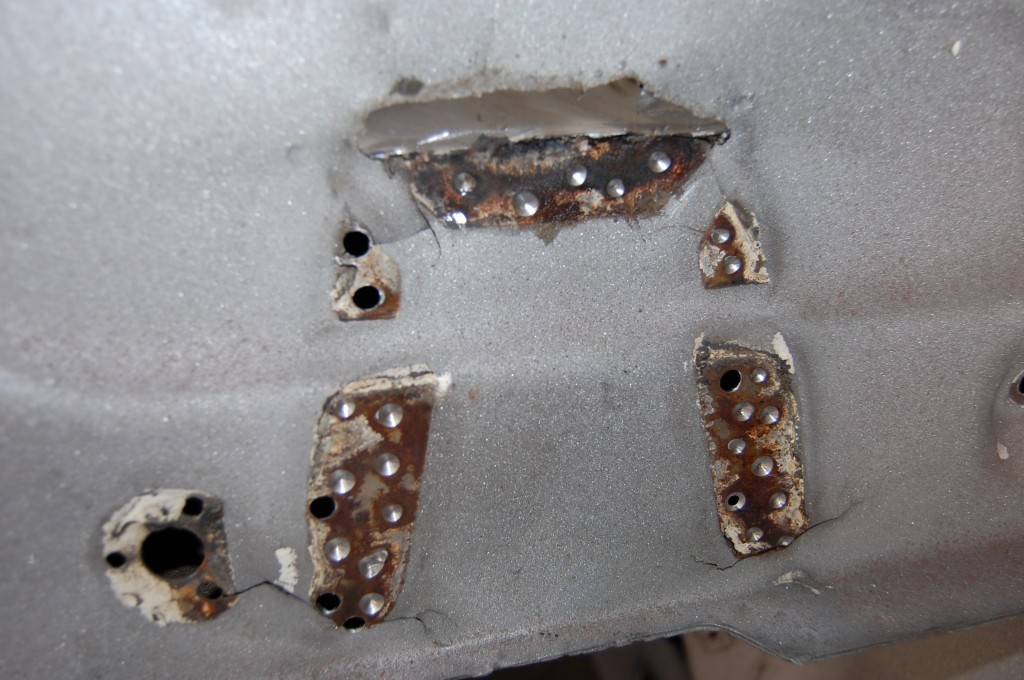
- I had even decided to leave this in place since this is going to be a nice driver and this will all be semi-hidden. And it sure is STRONG! Why did someone go this crazy on this? Hmmmmm….
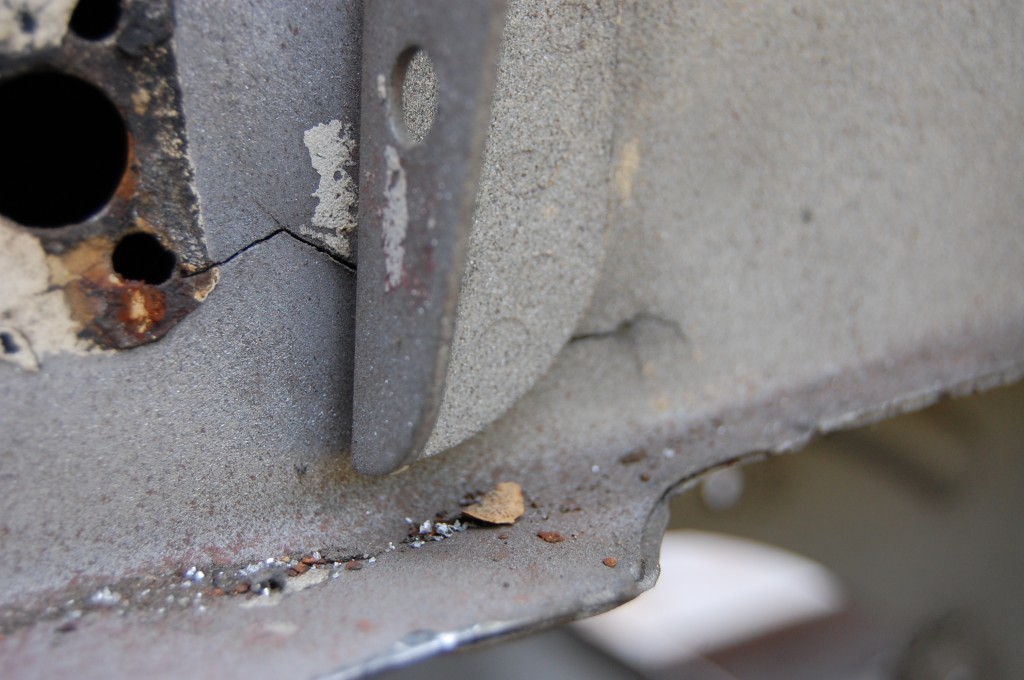
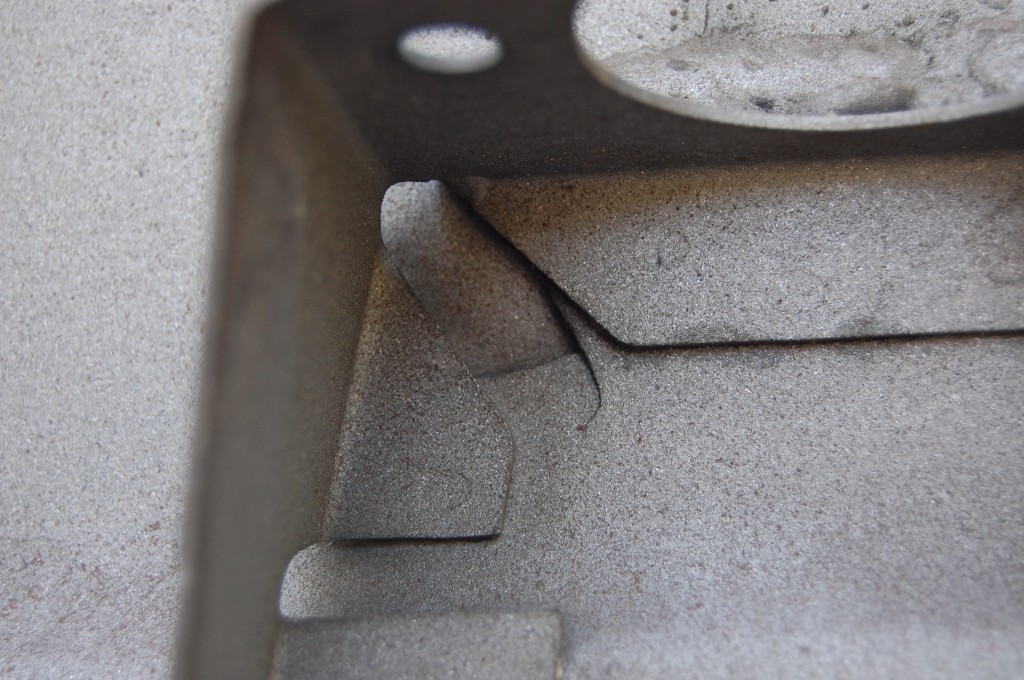
- Then I saw this – uh-oh – this is a problem…. Stress cracks from vibration, etc.
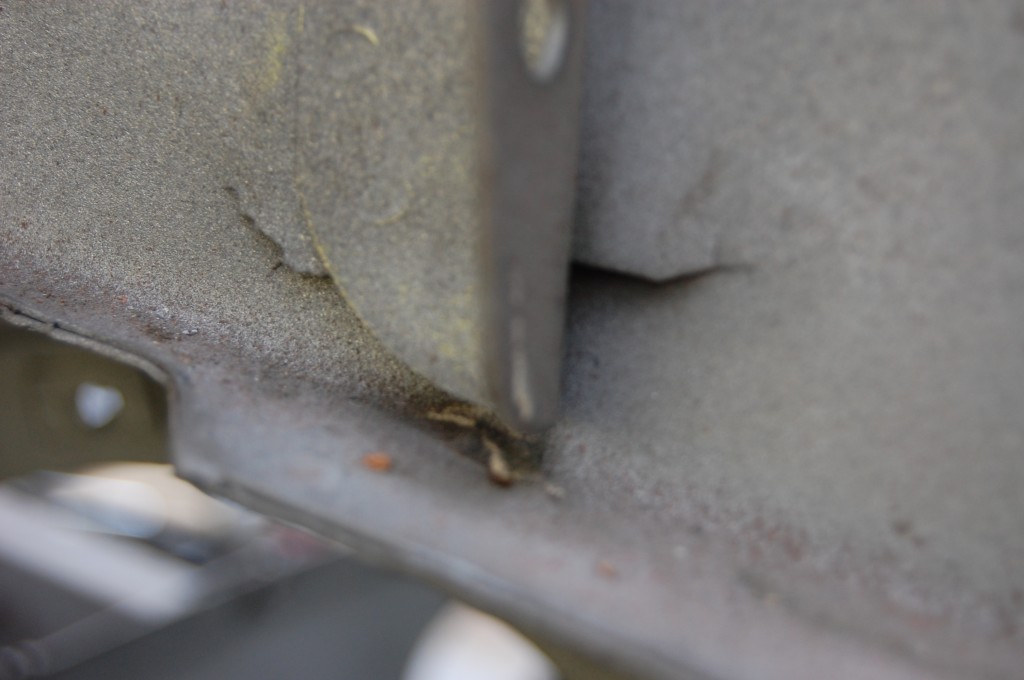
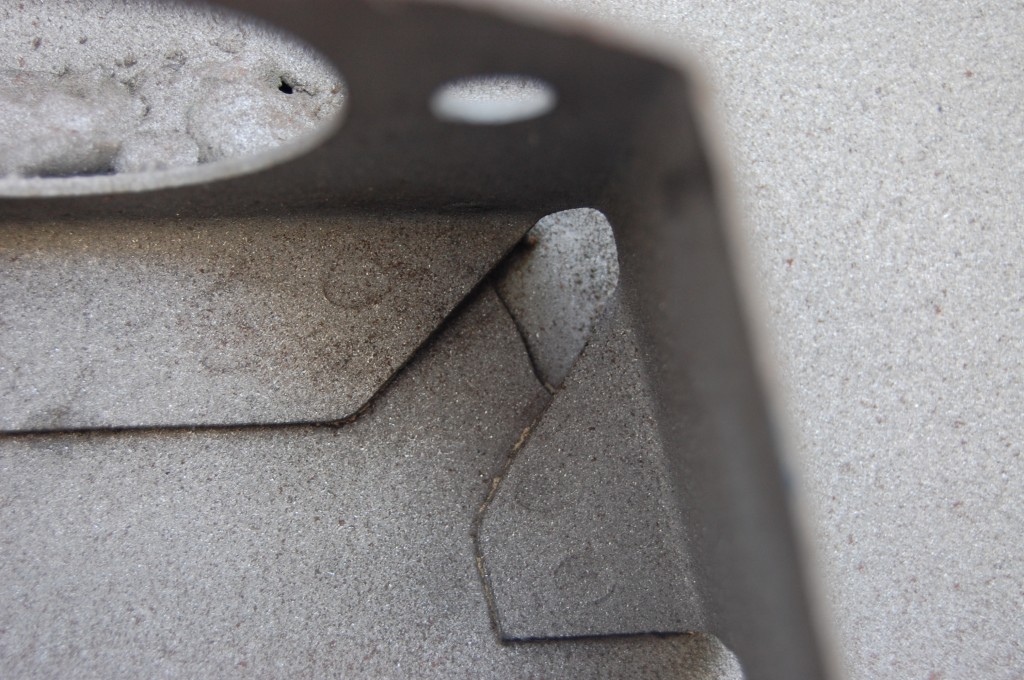
- And here’s the other side. By this point I knew this had to come out.
- More carnage in the upper corner – what a mess!
- And this corner rounds out the package!
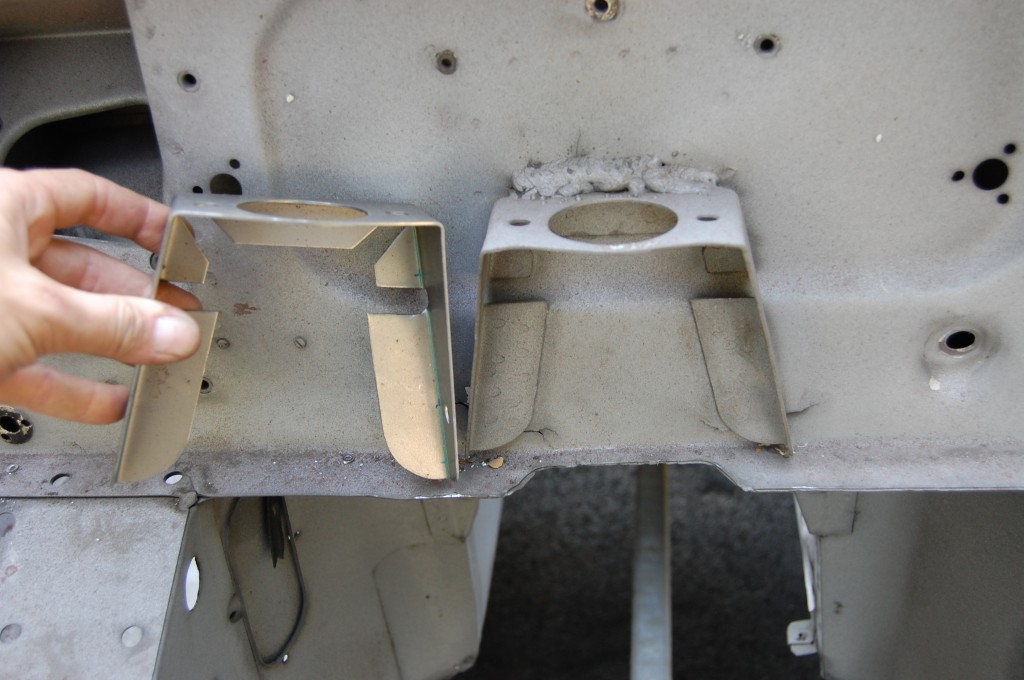
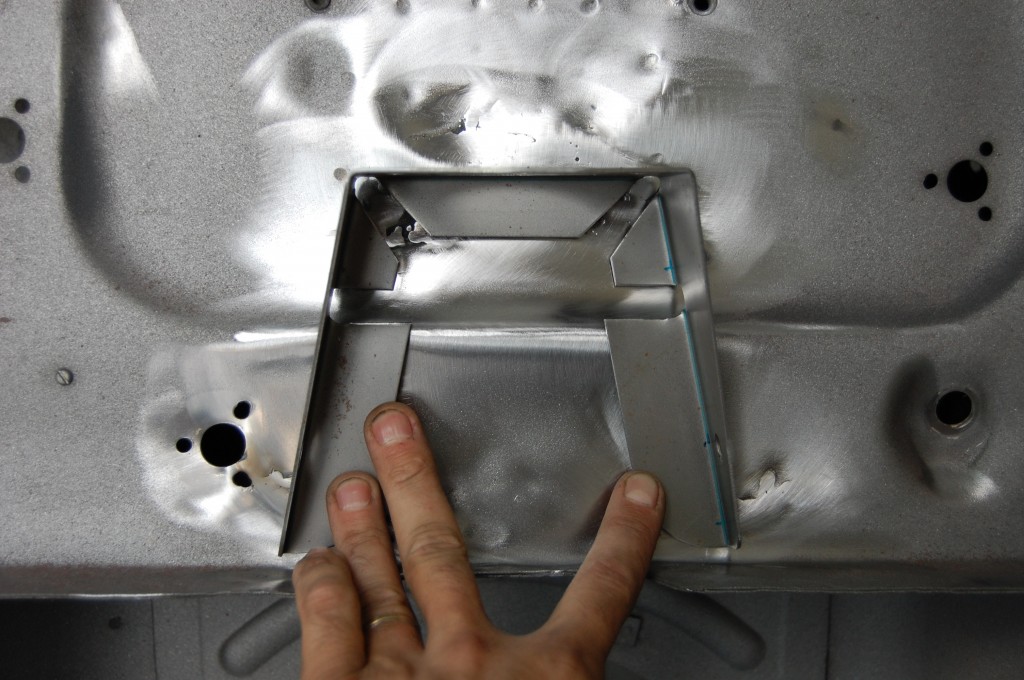
- We fabricate these brackets here and luckily some were on the shelf, so we pulled one off and held it up there – it is a dead match in every dimension – of course.
- These are not fun to remove – this one had 31 spot welds to be drilled out.
- She’s off finally – don’t even try to use a spot-weld drill here – the bracket is 16-gauge and you’ll be at it all day… A sharp 1/4″ drill is a better choice – and faster.
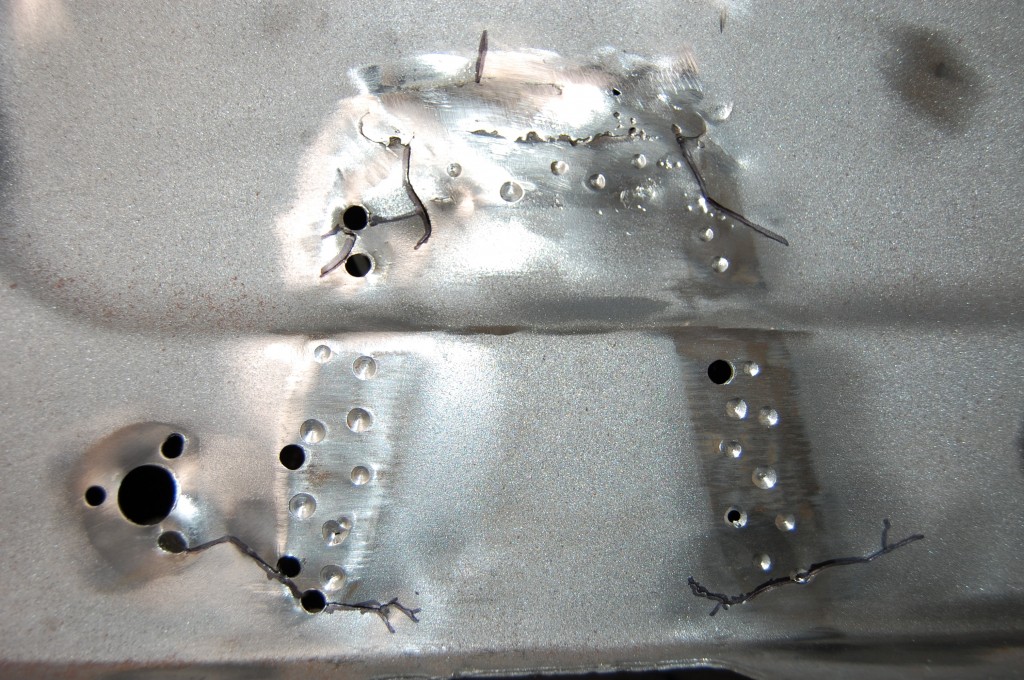
- Things are now cleaned up and we’ve aligned the cracks as best we can for welding. We accidentally went through the firewall on some spot-welds – it always happens… These will be welded up as well, even though they would be hidden under the new bracket anyway. Finally, note that we;ve traced the cracks with a marker so we can see where to go while welding.
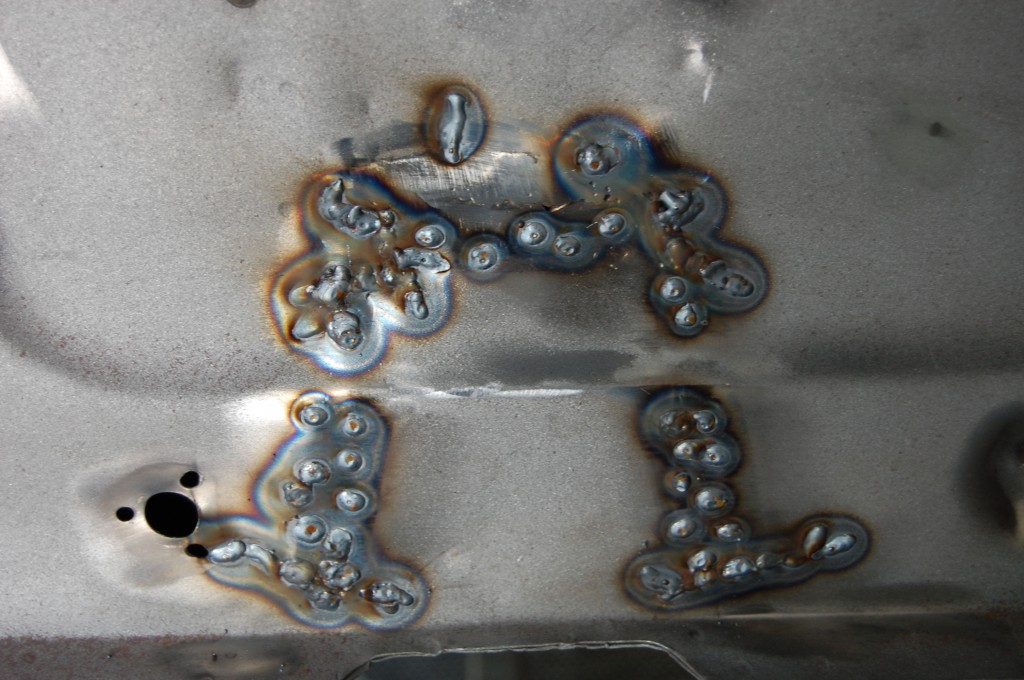
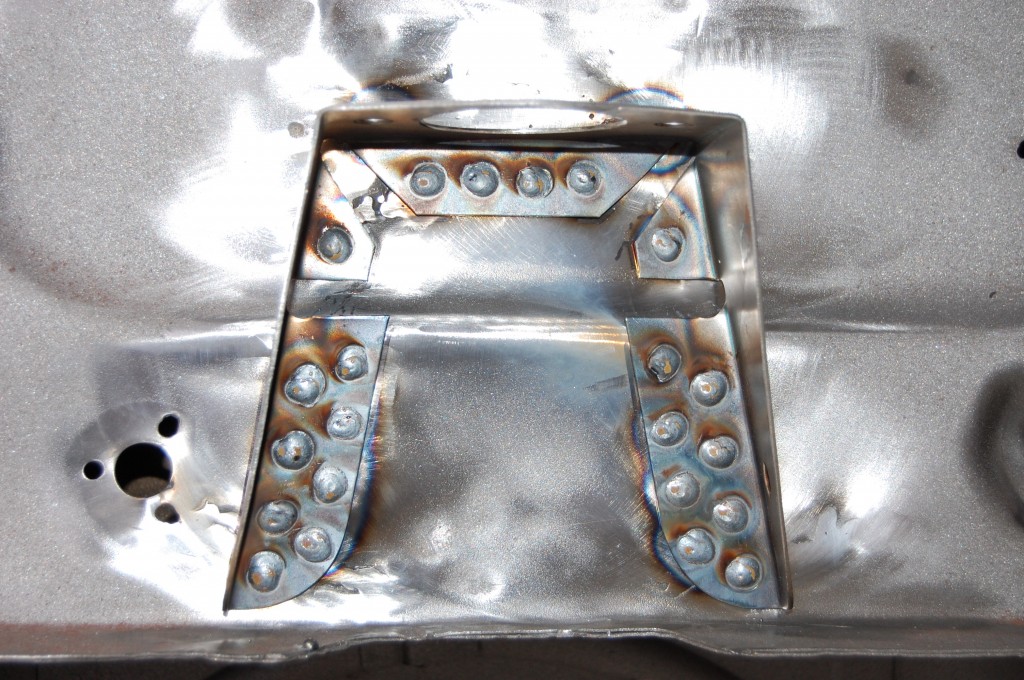
- The firewall is a good thick piece, so I went high on the welding amperage to make sure those cracks were fully penetrated. Then I dialed it back and filled the drill divits. We’ll be plug-welding the new bracket on – it’s the only way. This is spot-welded to the firewall panel off the car, then the bulkhead is assembled. Now, there’s a bracket welded in directly behind it and there is no chance of getting the tongs in there. So plug-welding is the only answer at this point. So – I welded up all the divits so that I can be sure to grab good thick metal for each plug.
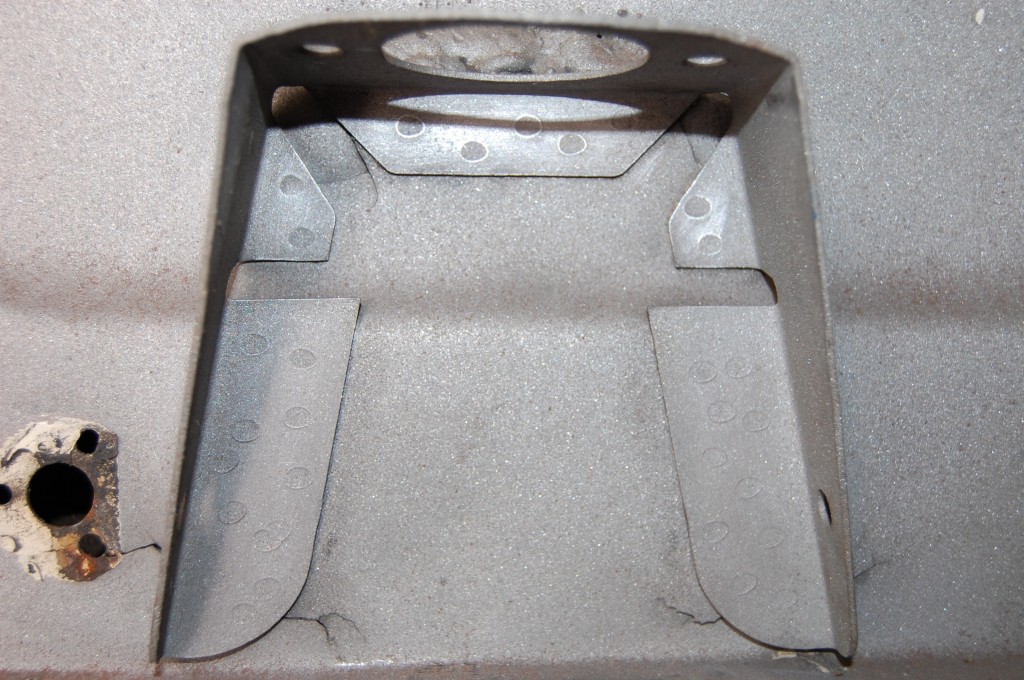
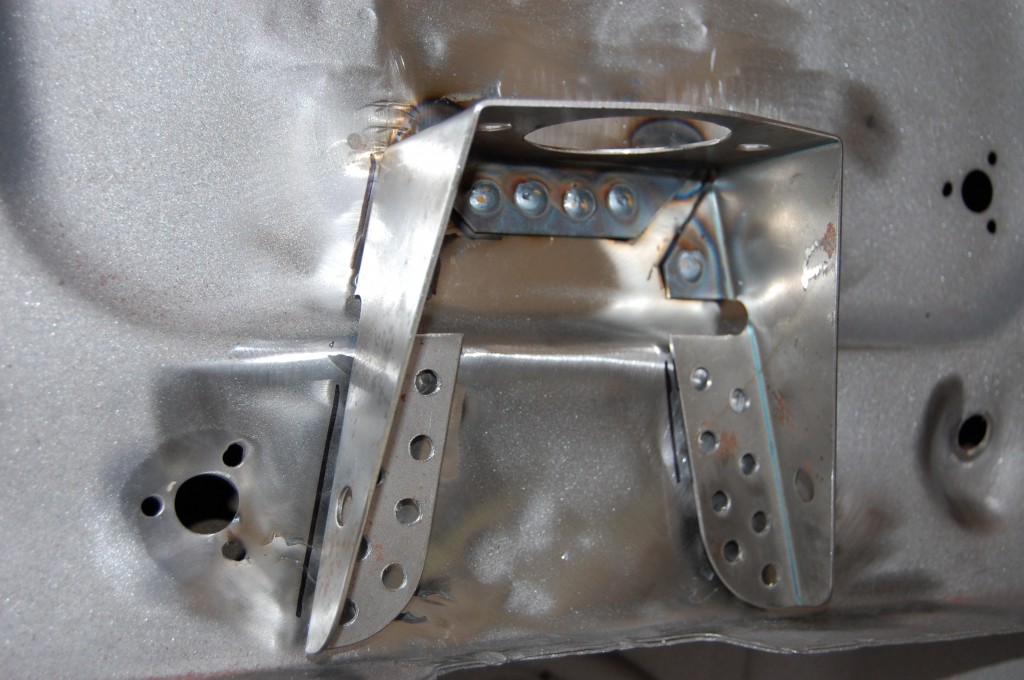
- Everything is now sanded back down and it’s time to fit the bracket. After this photo, I spent a gopod deal of time straightening the firewall for a good, tight fit.
- But there was just no way to get everything tight at once. So, I handled all of these upper sections while they were flush and let the bottom legs stick out 1/8″ or so for now.
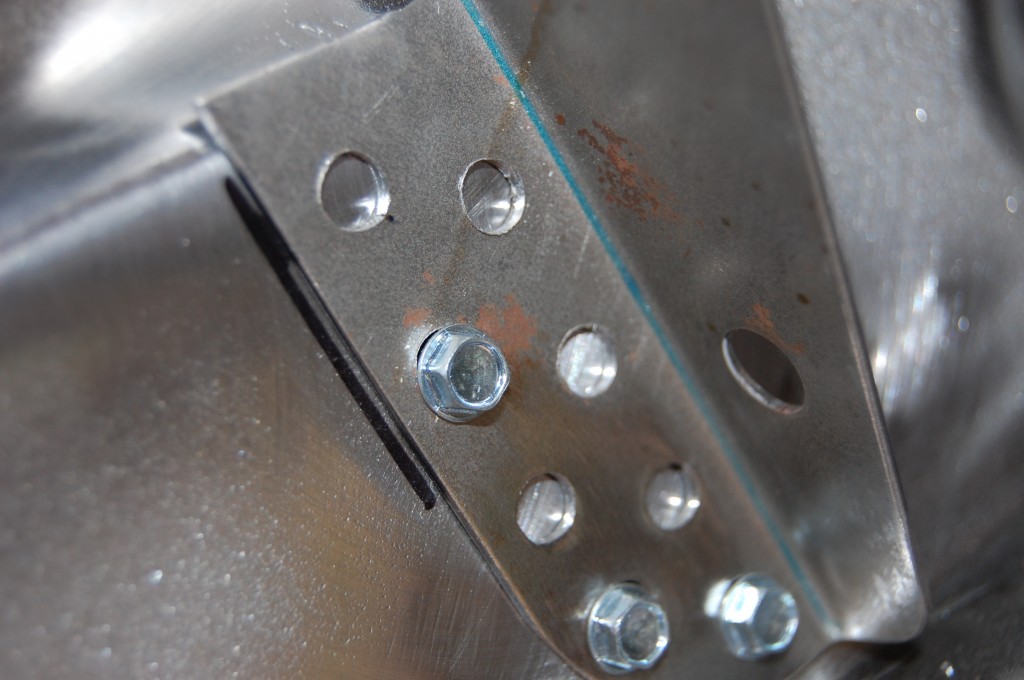
- Here’s another tip I’m giving away for free… These are small self-tapping sheetmetal screws that I’ve put in place temporarily to hold the lower section snug while welding the plugs. These plugs are a one-shot-deal – they need to be strong and also minimal in size since we cannot get in there and grind them smooth once done – so they need to be “pretty” – and as flush as possible, and all the same size would be nice too…
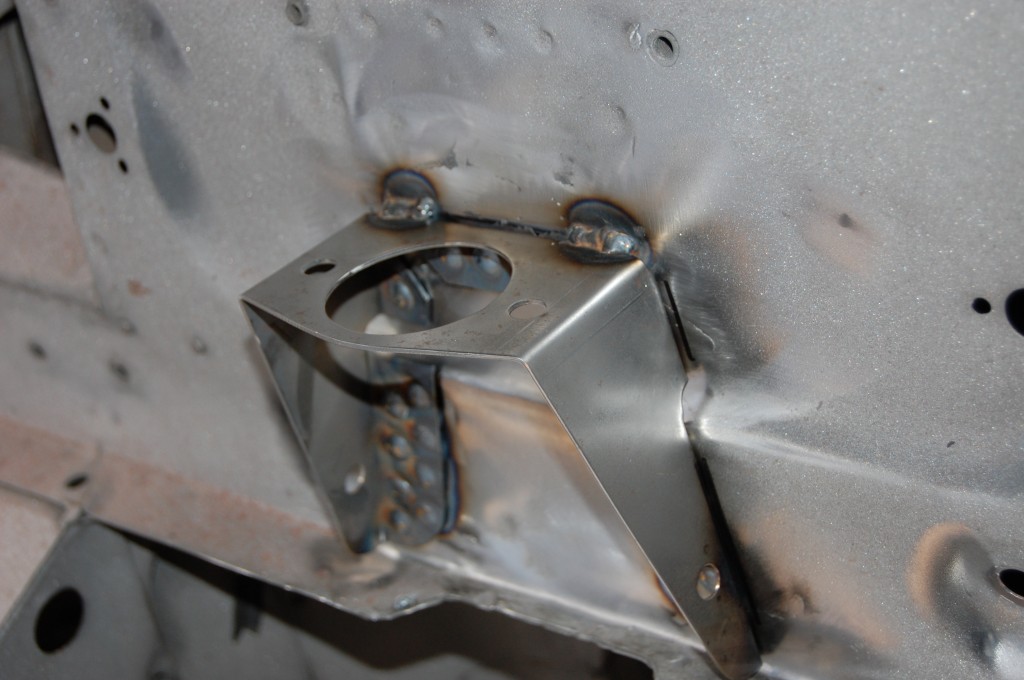
- Mission Accomplished! This turned out great and will look almost perfect once it is primed. A little cream filler on the face of the firewall would make it absolutely perfect if the owner and bodyshop want to go that far. And this is ROCK SOLID – this is NOT going to be a problem again!
- These little beads up top are actually correct – there are usually two small beads at each end run in with a gas welder at the factory. Another repair that came out even better than we’d hoped! If you need the stabilizer bracket, we have it ion our online store, and if you need your whole shell properly restored – pick up the phone and let’s talk!

