I think the lower valance (also sometimes referred to as the “underpanel”) is probably the most under-appreciated panel on an E-Type. But it’s also one of the most important panels on the car, as it contains the mounting points for the entire bonnet – it’s literally where the front half of the body is attached to the car.
Unfortunately, this panel is the most likely to get damaged – it’s right out front and low, and is often abused by parking blocks (I’ve done it myself and it happens fast and it’s just like a knife in the heart – you really just don’t even want to get out of the car…).
It’s also one of the first places to rust, and the caged mounting plates for the hinges are a water and moisture trap, and were not coated at all. Many tired E-Types have had their bonnets opened after a long storage period, only to have the hinge mounts literally rip completely out!
For these reasons, I’ve rebuilt alot of underpanels in the past, and lately there seem to be more than ever! This is probably due to the fact that they are often difficult to obtain, cost $1400, and I can rebuild yours (which already fits your bonnet – unlike a new one…) – for about half that price!
Take a look through these photos of a lower valance from a 1967 2+2 that we restored earlier this week – we rescued this panel just in time – any longer, and the pitting on the inside surface of the outer skin would have been too bad to salvage.
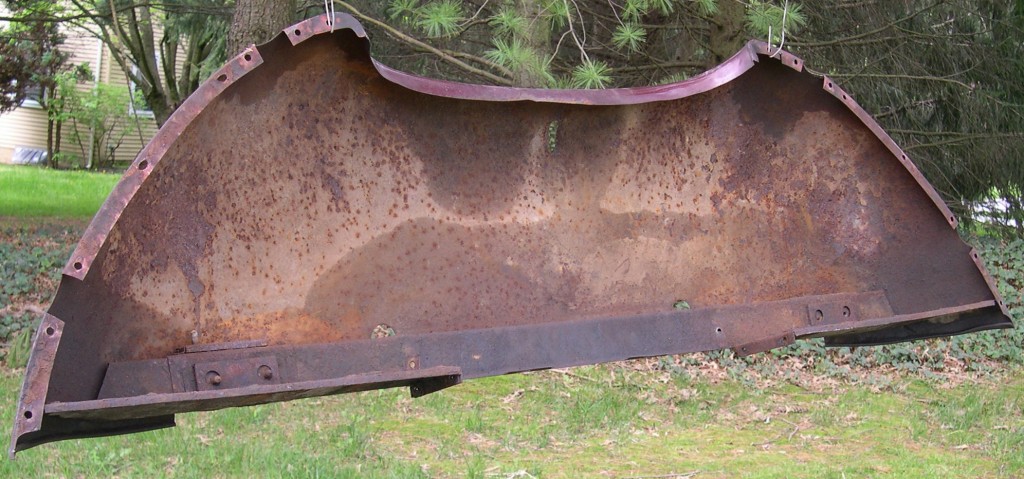
Here is the panel as received from the customer. Very typical battle scars - parking blocks, other various dents, heavy rust scale on the interior surface, and rotted hinge plates.
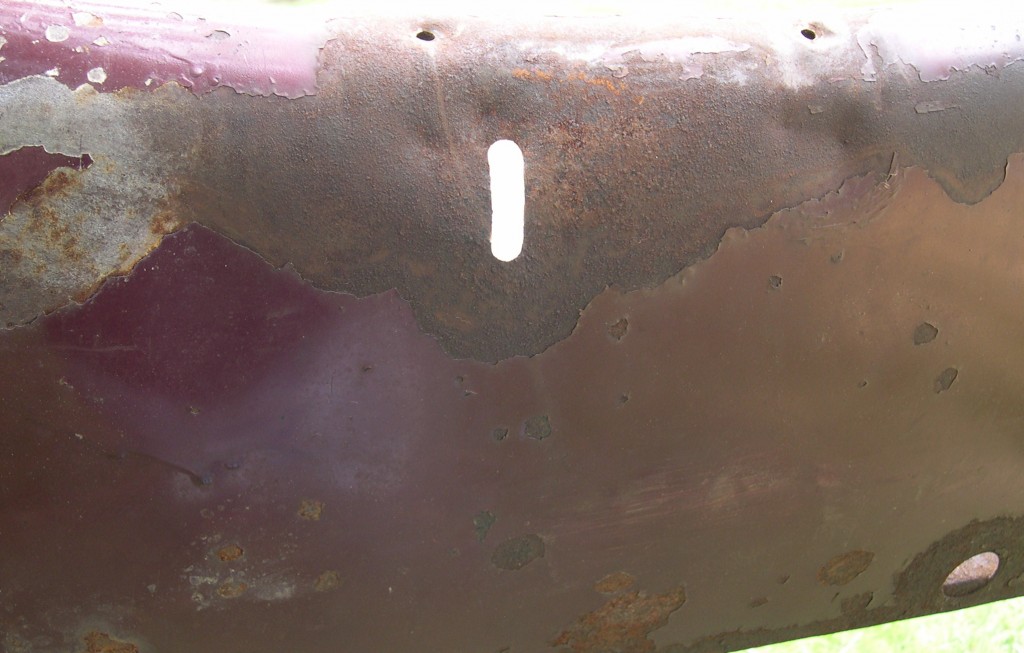
Here is the license rod hole, with various dents and pitted rust on the outer skin. We will also be reshaping the leading edge and removing the license bracket holes, but leaving the license rod hole - this is how they came from the factory - no bracket holes, but with the oblong rod hole.
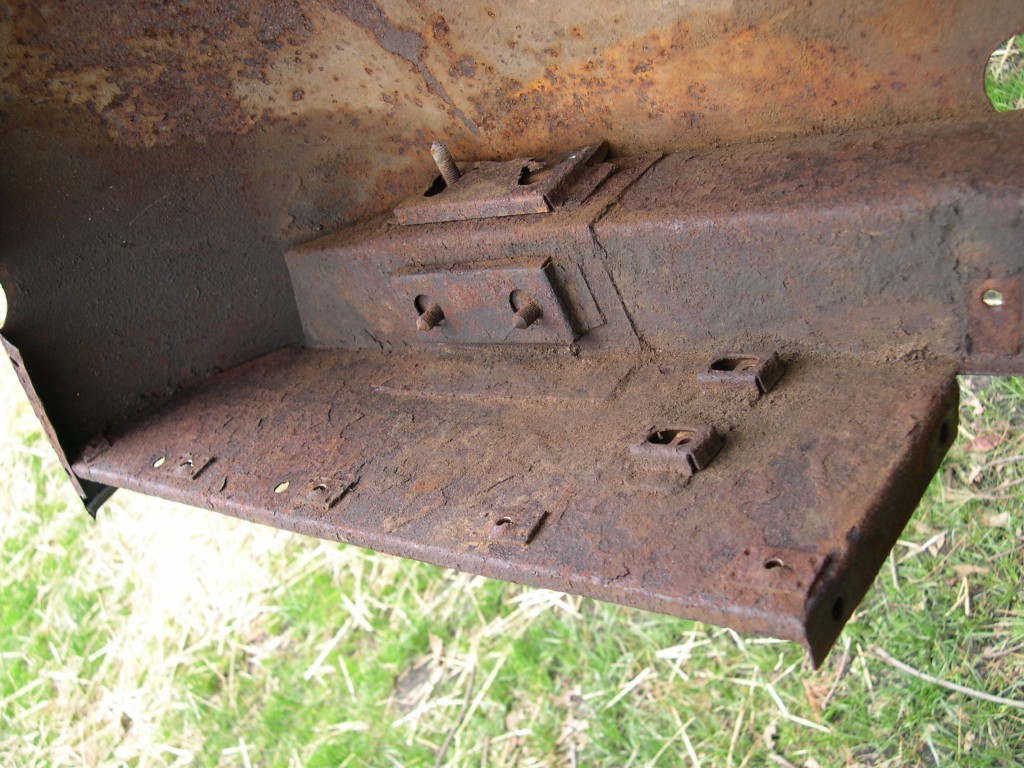
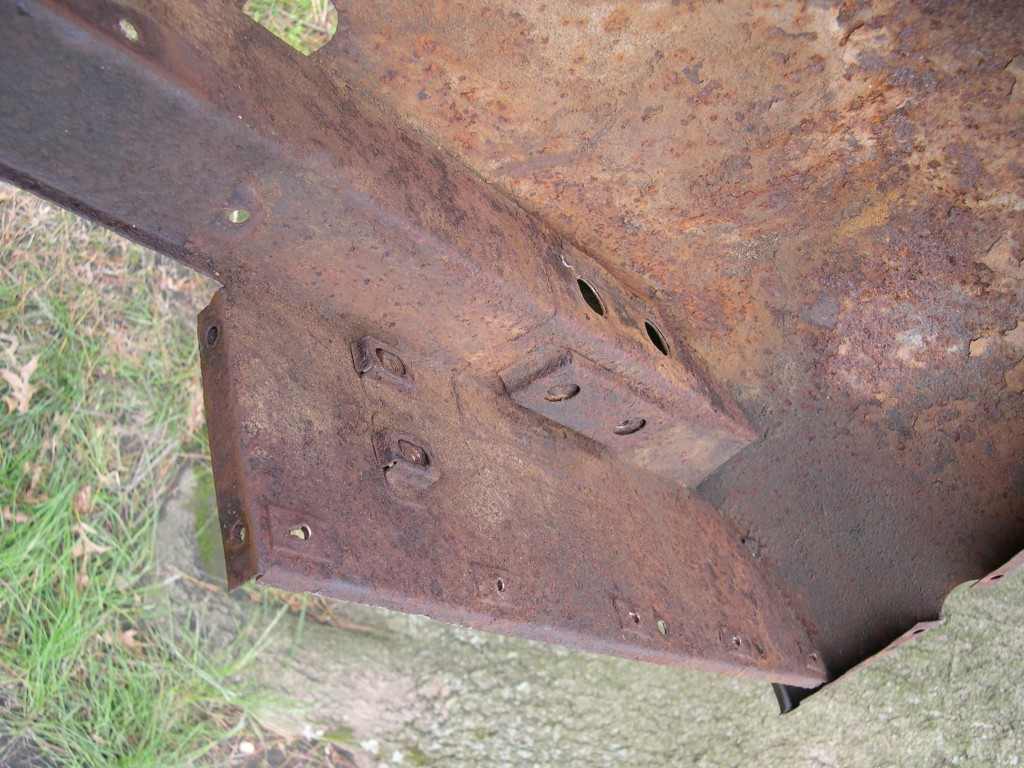
The LH hinge mounts - not a good story, and not metal that you want supporting your entire bonnet...
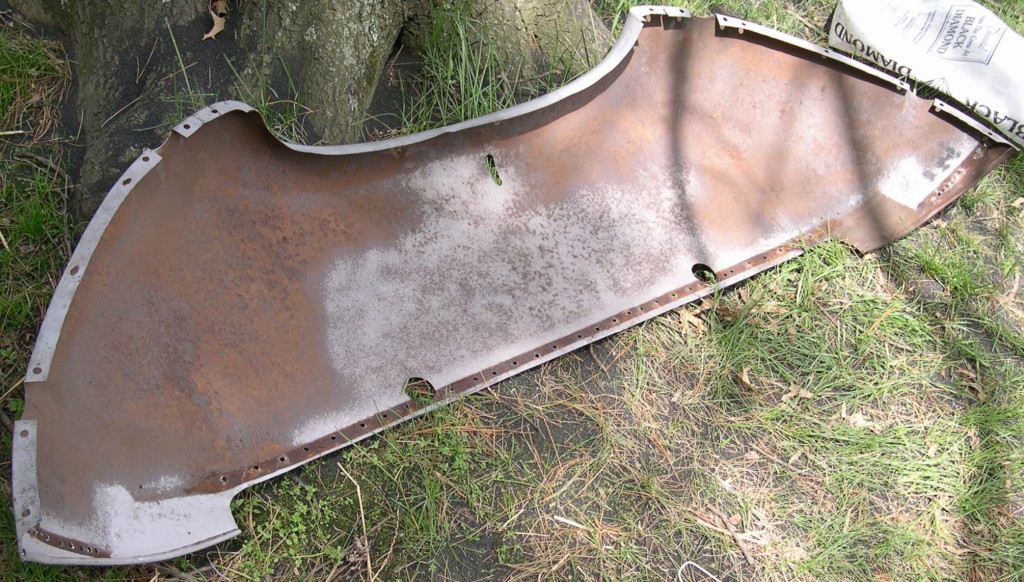
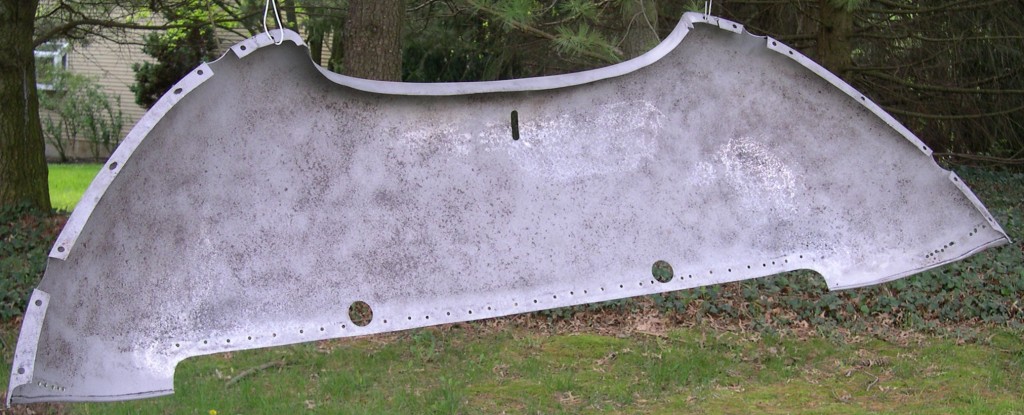
First order of business is to remove the support member, and sandblast the outer skin down to white metal. Rather than send this one out to the blaster, I did this one myself outside the shop. I knew there would need to be HEAVY rust removal - and that it would be tricky to do so without warping the skin, or blasting hundreds of pinholes into the skin.
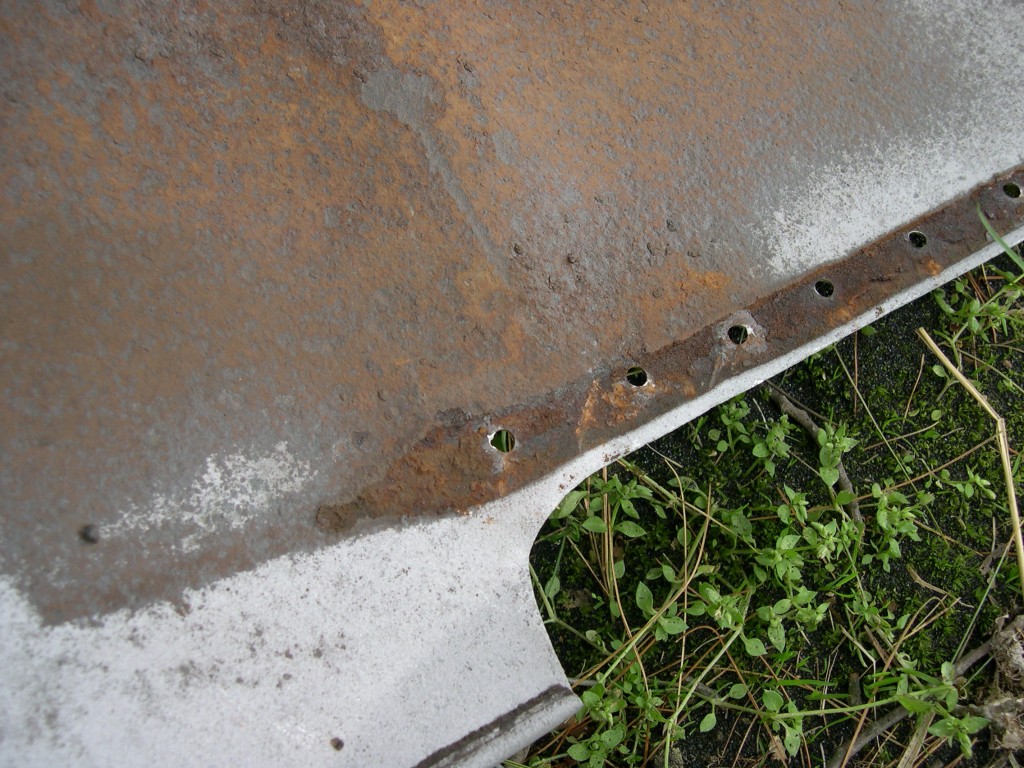
Remember this photo - THERE ARE NO "RUST-FREE" E-TYPES!!! This is what every single seam on the car looks like when you separate them. They assembled the cars from bare steel panels at the factory, without any coatings, THEN painted what you can see... Eventually, the seams rust to the point where they bulge, making the spot-welds more and more pronounced, and then the seam finally rusts out entirely. Here, we use "weld-thru" and other quality primers inside of every seam we assemble - eliminating this problem for good.
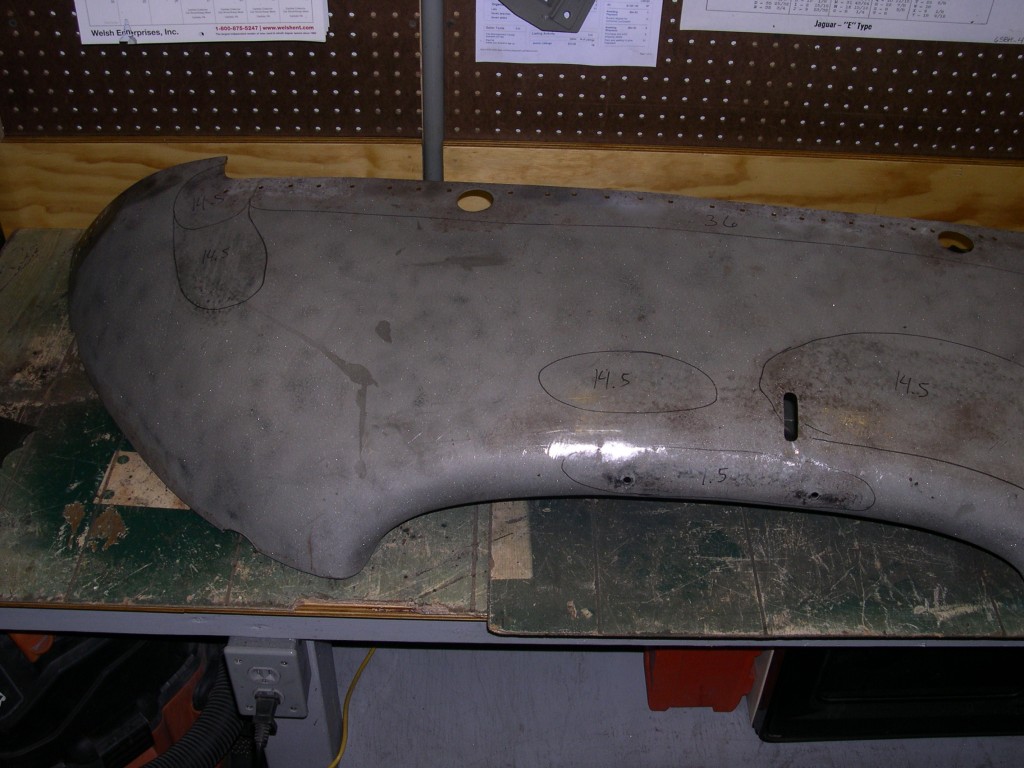
On the bench undergoing the reshaping. We identify the areas that have been damaged, and circle them for easy identification.
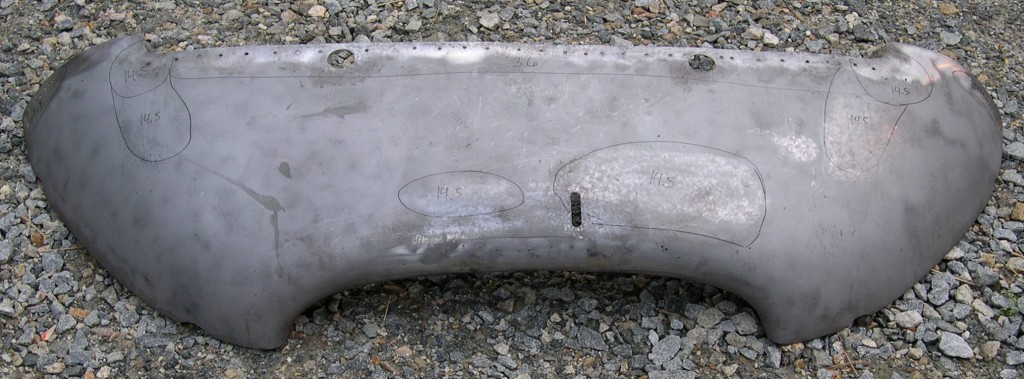
Next, we use a radius gauge to identify the exact radius of the damages areas, and reshape them with the planishing hammer, using the appropriate CNC-machined, hardened steel heads. This is a process requiring experience, skill, patience, self-control, and REAL tools. Don't try this at home with a $99 planishing hammer from Harbor Freight - it will turn this panel into scrap metal in about 60 seconds - stretching the metal beyond your wildest imagination... This panel came out very nicely because it was a virgin panel - it had never been beat on by well-meaning but inexperienced hands...
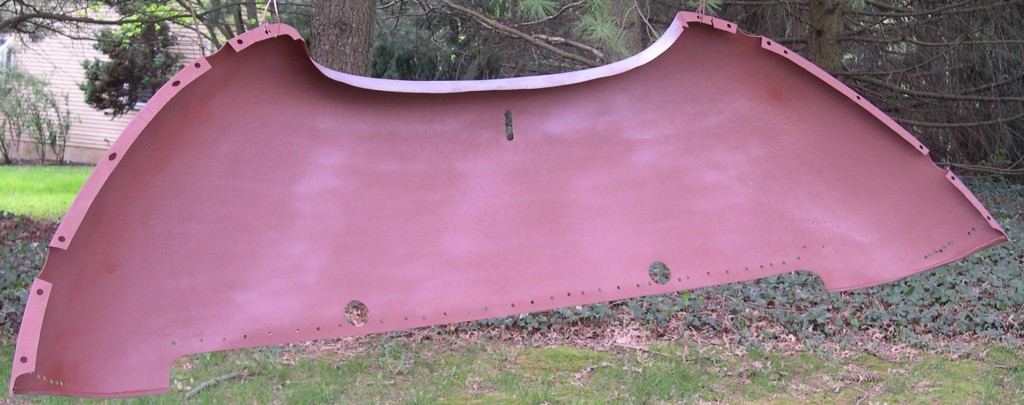
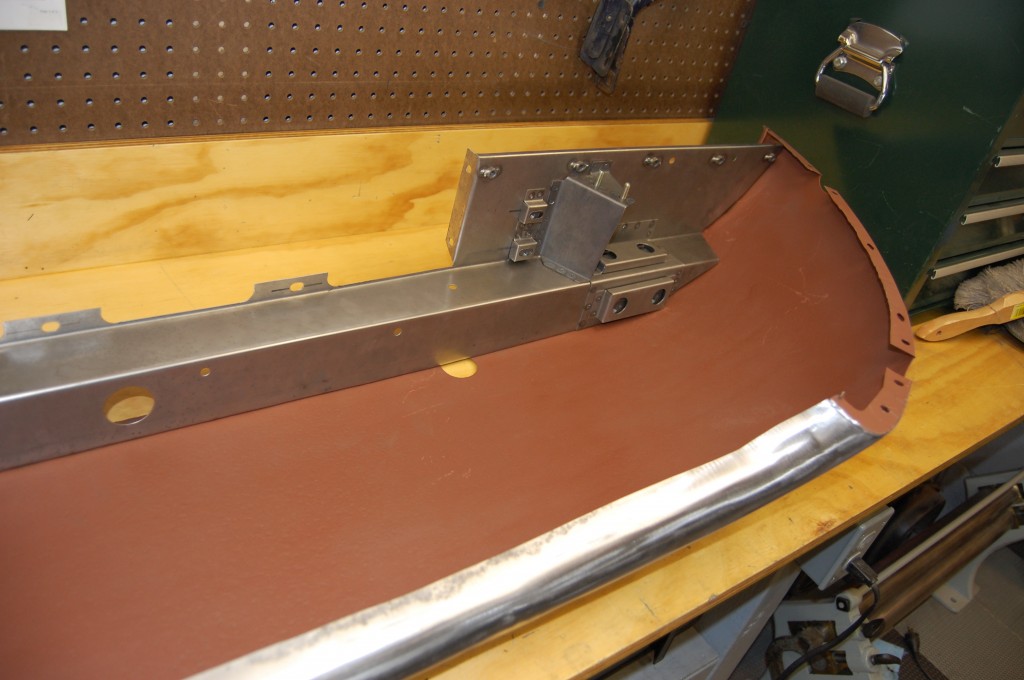
Next, it's back outside for a heavy coat of red-oxide primer on the inner surface. The heavy pitting calls for red-oxide, which bonds well with the still somewhat rusty metal. Notice that we also completely covered the seam for the support member. This will never rust again.
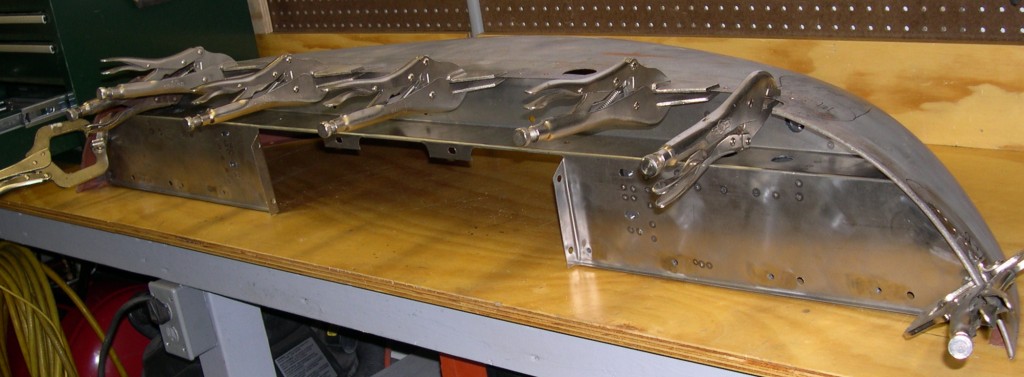
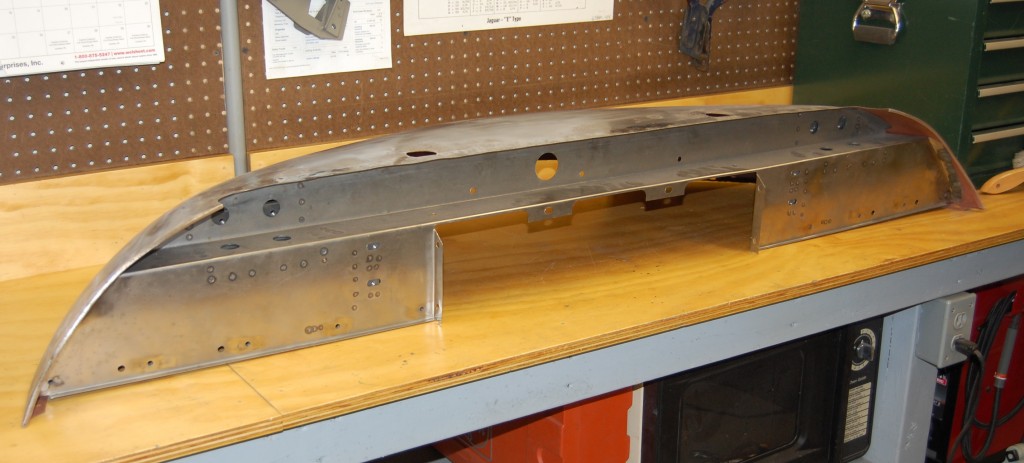
Back inside now for the fitting of the new support panel with caged hinge plates, etc. This is a new Monocoque Metalworks panel that we manufacture in-house - it is identical to the original in every way. You can see the details of this support piece and how we make it in another blog posting in the "Custom Panels" section of our blogs.
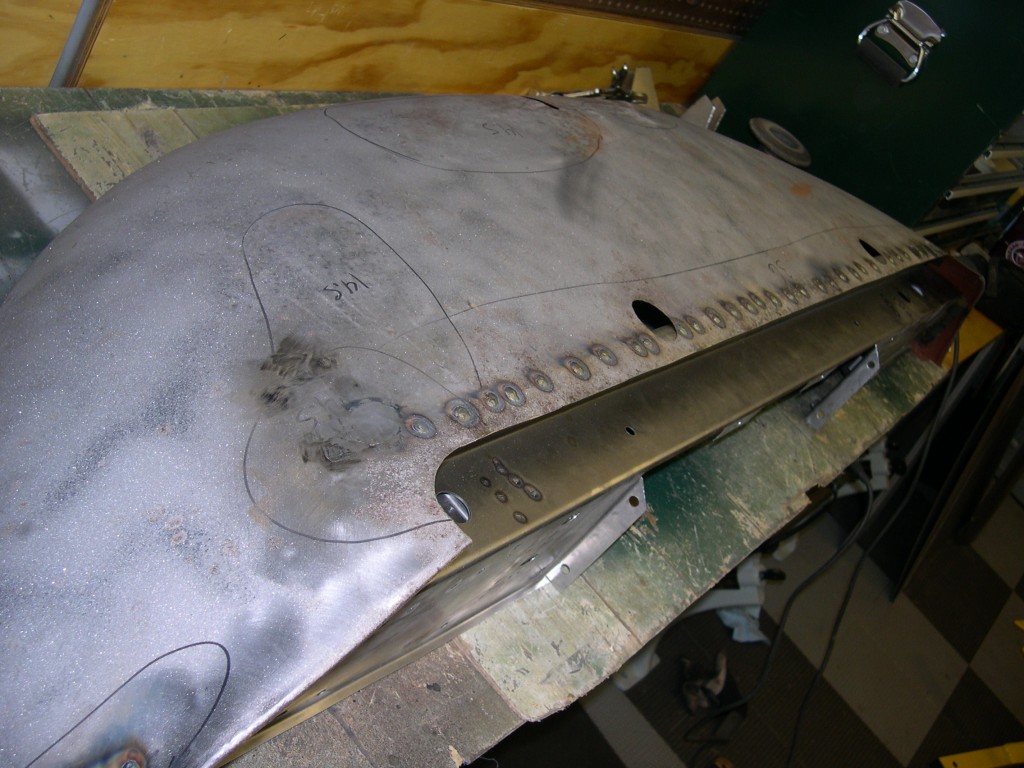
We've now attached the new support member via plug-welding - using the same holes created by drilling the spot-welds to remove the old support member. Note the area in the foreground where some small pinholes were filled and ground, and a quarter-sized patch was also needed. Also note the spots of rust on the outer skin - these are from sweat from the day before. Sweat is essentially salt-water, and starts to rust whatever bare metal it hits literally overnight - as seen here.
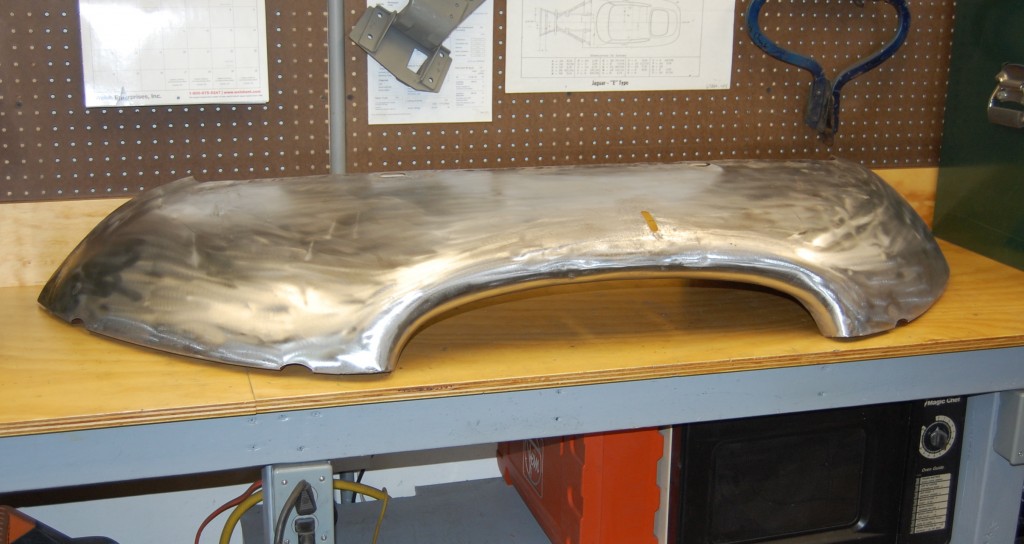
The matte finish of the sandblasted surface is very forgiving, and hides surface imperfections. So we scuff the outer skin to a polished finish to leave nowhere for dents and ripples to hide.

I am a FANATIC about the E-Type's mouth shape - it doesn't have to be absolutely identical to every other one and how it came out of the stamps at Abbey Panels, but it MUST be "right"... What is "right"? - you know it when you see it, and you sure know it when you don't see it - when it's wrong, it stands out from a mile away! This one is now correct, has had the license bracket holes filled, and will require absolute minimum filler - a heavy coat of slick sand blocked down should do the trick.
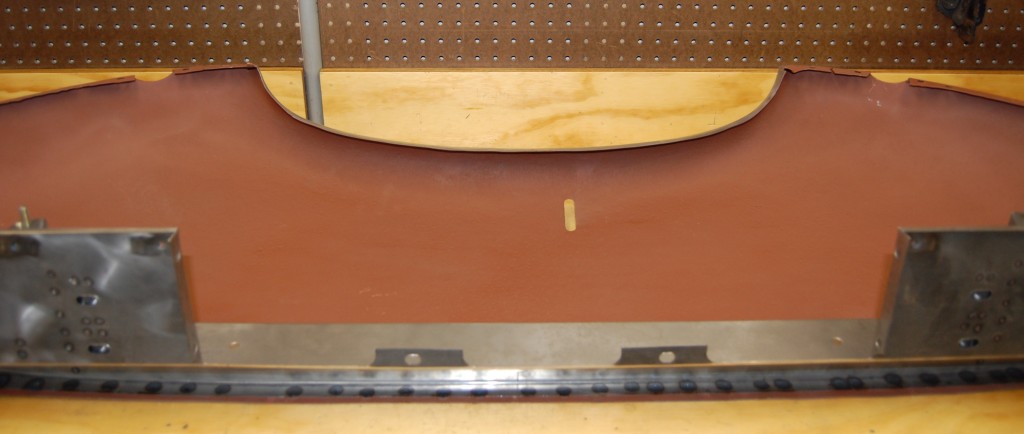
Further proof that the mouth is correct, and the license bracket holes are erased - properly - inside and out.
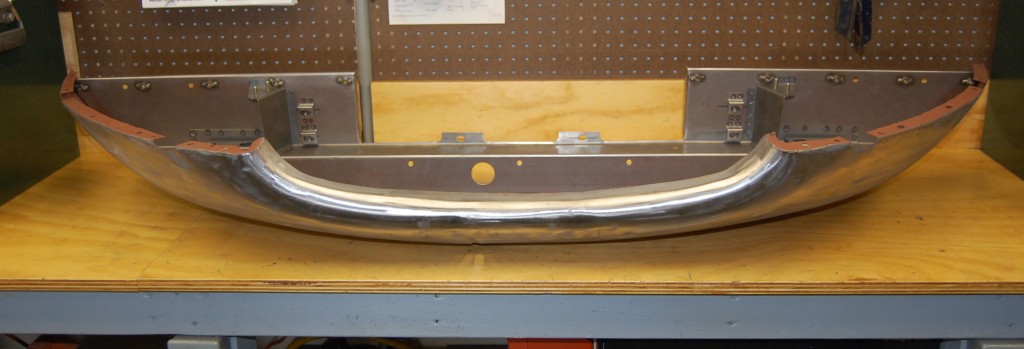
Another original E-Type panel made new again at Monocoque Metalworks. This panel will fit the customer's bonnet perfectly - because that's where it came from. I have seen new underpanels that are almost 1" wider or narrower than the bonnets they are being fitted to - that is a whole reshaping project in itself. Why not have your original restored by us instead? Even if there are large rotted areas in your outer skin, chances are we can still weld in a patch and save the panel. Give us a ring and we'll discuss your project today!

